Wrench Tip Wednesday: Chains & Sprockets
Chain and sprockets are a wear and tear item. If the chain is not properly cleaned and lubed it can cause premature wear on the chain and sprockets.
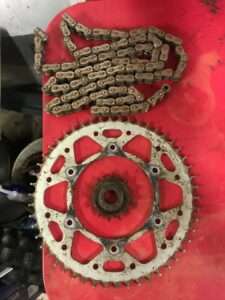
When washing the bike, put it up on a stand so you can spin the wheel and get every part of the chain cleaned. Immediately after washing, lube the chain up. I prefer good, sticky lube and not the kind that splatter everywhere! BelRay Blue Tac chain lube is my go to. After you have a clean bike, inspect the condition of the chain and sprockets. Sprocket condition can be checked visually by looking at the sprocket teeth. The teeth take on a hook shape when worn, and in severe cases, shorten and round off when maintenance has been neglected. The condition of the chain can be checked by putting the bike on a stand. Rotate the rear wheel and visually inspect the chain’s condition. As you rotate, feel the chain for tight spots or links that are stuck together. Attempt to pull the chain away from the rearmost part of the rear sprocket. If the chain can be pulled off the rear sprocket by a half sprocket tooth or more, it is time for a replacement. If the chain moves significantly side to side when pushed and pulled on the sprocket, wear has occurred.
So, you are to the point of needing a new chain and sprockets. Most of the time, it is a good idea to go ahead and replace both sprockets and chain at the same time. If not, the items replaced can wear prematurely. Usually, the front sprocket wears out a lot quicker. First off, remove the master link from the chain. Then, remove the chain from the dirt bike. Now, go ahead and remove the countershaft sprocket (front sprocket). Before installing the new countershaft sprocket, clean up the countershaft area. The front sprocket has a retaining clip and it is important to make sure it seats all the way into the groove. Time to move to the rear sprocket, before removing the wheel, go ahead and loosen up the sprocket bolts. This just makes it easier to remove. When that’s finished, remove the wheel from the dirt bike. Then remove the sprocket bolts and nuts and pull the old sprocket from the hub. Spray contact cleaner on the hub to clean the area up before installing the new sprocket. Apply Loctite to the threads of the sprocket bolts. Snug the bolts down with a ratchet and an open-ended wrench in a star-shaped pattern. This will ensure that the sprocket gets tighten down evenly. Then use a torque wrench to finish tightening them, refer to your bike manufactures service manual for torque specs. While the chain is off, inspect the chain slider and rollers. If they are wore out or damaged, go ahead and replace. Put the rear wheel back on the bike. Typically, you will have a chain that is a little longer than the one on your bike. So, measure it out and cut what needs to be cut off. Typically, a grinder is an easy tool to use to do this. Otherwise, a chain breaker tool is needed for the job. For us, it’s usually 4-5 links. Align the chain up with the rear sprocket and thread it up through and around the front sprocket. Then slide it through the chain guide and back up around the rear sprocket. For an o-ring style chain, make sure the o-rings are put on each pin before installing the master link. After the master link is installed, it is time to adjust the slack in the chain. Do a visual check, most people can tell just by looking at the chain if it’s too loose or too tight. A good rule of thumb is the three-finger method. Put three fingers on top of each other. You should get three fingers in between the chain and swingarm. If not, it’s obviously too tight or if there is still a lot of slack with your fingers in there, it’s too loose. So, adjust it. Loosen the rear axle. Tighten the chain tensioner bolt to loosen chain. Loosen the chain tensioner bolt to tighten the chain. Make sure the chain blockers are aligned properly. Tighten the rear axle up. Check the chain again.
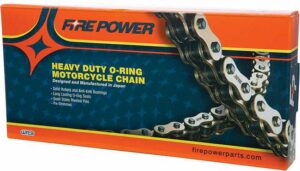
I run Firepower Gold O-ring chains on all of my bikes paired with a 50T Supersprox rear sprocket and PBI front sprocket. For Beta & Sherco gearing recommendations, go to our tech tip section on the website.
Cover Photo Credit: Shan Moore