Wrench Tip Wednesday: Installing an Air Filter
Looks like we are finally getting in the drier and hotter part of the year which means it can and will get dusty. With that being said, I find it important to hit on proper insulation of an air filter. Did you know an air filter is one of the most important components on a dirt bike? The purpose of it is to capture dirt to prevent it from getting in the carb and sucked into the engine. So, it is kind of a SUPER BIG DEAL! A leaky air filter can cause premature wear, such as, top end components (piston and rings) wearing out sooner than they should.
Before you even oil the filter up, make sure the air box is clean and has no plants growing inside. Having dirt in the air box can increase the chances of getting dirt inside the air box boot and then into the carb. If it is clean, you will not have to worry about this. One of the best things a person can purchase is the Twin Air Airbox Plug! This allows you to spray and scrub on the inside of the airbox without the fear of getting water or dirt in places you do not want to.
Glove up and let’s install an air filter properly. The air filter must be clean. If you install a dirty clogged filter, it can reduce performance and make the bike sluggish. Not to mention the potential risk of dirt falling off the filter into the filter boot then into the carb. Take your clean filter and apply foam filter oil to it. Lots of good ones out there – PJ1, Motul, Bel Ray, etc. Most oils can be purchased in two different ways aerosol or pourable. It is personal preference but we prefer to use aerosol spray because it allows control of the amount of oil applied to the filter. It is important to insure coverage of the entire filter, sometimes kneading the oil in is necessary. The oil helps catch the dirt so having too much is always better than not enough. If you choose to use aerosol, take the time to ensure the proper amount of oil is applied.
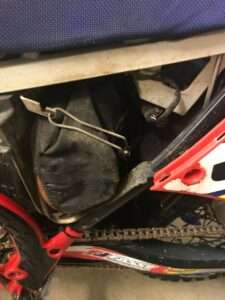
Now that the air filter is all oiled up install your filter cage. Once the cage is in place, the most vital step that is often forgot; apply an ULTRA THICK BEAD OF GREASE around the rim. If this step is skipped you will guarantee yourself a leaky filter and premature engine failure. We recommend a good water resistant one that has stability under high temperatures such as Lucas Red “N” Tacky Grease or Bel Ray Waterproof Grease.
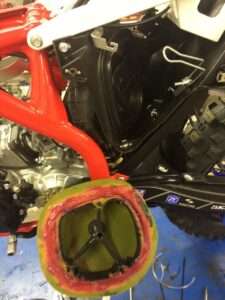
Now it is time to install the air filter. Make sure it lines up with the filter box, to insure its 100% sealed. Now you are ready to ride!
Pro Tip: Outerwears Pre-Filter is universal and can slip over the air filter. If you know it is going to be awful dusty, put it over your air filter. It will save the air filter and keep it clean. This is very handy for events that are two days.
We stock all products discussed and can be purchased on our online store!!

Remember, a dusty face means a dirty filter!