Building a Race Bike According to Bonecutter’s
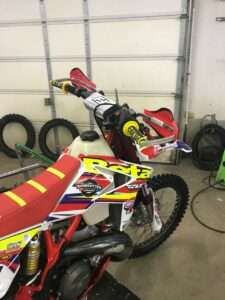
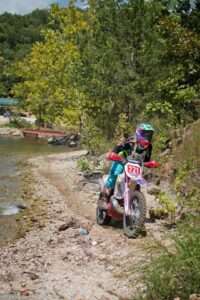
Okay, so you have taken the plunge and purchased a brand new dirt bike. Fantastic!! Now, is this new bike that you have just rolled off the show room floor “race ready”? Sure you can go straight out and race it, but you are fore warned there is serious risk of doing real damage to your new investment. I recently started riding a 2018 Beta 250 Race Edition. As you continue to read I will share all the things we have done to get my bike race ready and set up with all my personal preferences.
Strip the bike down. Remove all the plastics, tank, and exhaust. This will allow you to get a good view of all the important stuff you are about to work on.
GREASE. From the factory, bearings have a small amount of grease, but with what we ride you need a lot. We started with the linkage. Remove the linkage from the swing arm and grease the heck out of the bearings. This step will prolong the life of the linkage bearings by keeping the water and dirt from grinding away at them.

Don’t get Loctite crazy. Some places it is best to use anti-seize. Chain adjusters and brake pins are a perfect place for anti-seize, keeping you from striping them the next time you are removing them. The bolts that hold your plastics on is another recommended place for anti-seize especially on the ones in the tank area.
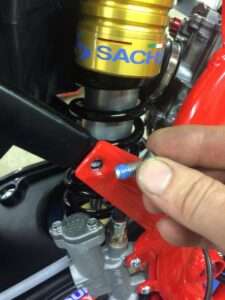
Loose lines can end a race in a hurry! The rear brake line coming from the brake caliper runs a good possibility of being knocked loose. The best way to help prevent this from happening is to have it tightened to the inside of the brake caliper and then tie it down with wire. A loose front brake line could end up in your spokes and then we all know what happens after that. Solution – always check your fork guard clamps for tightness and proper position.
A cooler bike is always better. No, not referring to looks, Beta’s already have that going for them without extra help! This reference is to modifications to the cooling area. Consider installing oversized radiators as they allow the coolant more opportunity to keep your bike at a cooler temperature. Many bikes come equipped with a thermostat in the radiator lines. Totally unnecessary for our kind of racing, remove it. On my bike a Boano silicone hose kit was installed, deleting the thermostat. The header sits really close to the Water pump hose, we add an extra piece of hose around the outside of it for extra protection. Another optional item is the oversized water pump kit. It also helps the bike stay cooler so of course we installed it. Engine Ice is our choice for coolant.
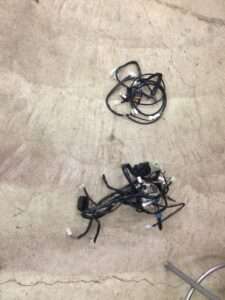
Up for a little dual sporting? Beta is your bike, as all are dual sportable, for this reason the Beta is equipped with a ton of extra wiring. If your plan is to hare scramble it is best to remove the OEM wiring. This can be accomplished by installing Beta’s race wiring harness. The picture shows the difference in size between the two, CRAZY! Think how much weight you just lost. My new harness was rerouted along the frame and removed the throttle cable from this route. Purpose is to free throttle cable so no kinking or binding occurs. In addition the CDI was moved behind the right side cover by the battery facing downward. This will provide more protection for the CDI and helps with water that may come in contact with it from causing issues.
Jetting – to do or not to do. Check the jetting and needle in the carburetor, we base all of ours off JD Jetting’s chart. Beta’s stock jetting is actually perfect for Missouri, but on mine we did change the needle to blue. Also, the throttle position sensor was removed and a TPS plug was installed. Take a look at your carb vents. Do you see they vent out at the bottom of the bike where all the dirt and dust is billowing about? Solution – carb vent kit, this will relocate the vents to under the seat.
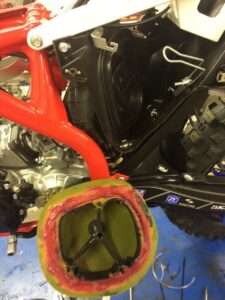
Proper air filter installation is super important! Literally apply filter oil to the filter. Always use a THICK bead of grease around the rim. Doing both are a MUST every time an air filter is installed as dirt in the carburetor is NO good. Make sure your filter is seated snug against the filter box so there is not any leaks.
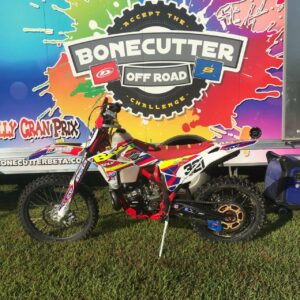
Blue Loctite time! Super important on your new Beta, if nothing else is Loctited, at least take the time to Loctite the frame to subframe bolt and the seat bolt. We do recommend to Loctite all aftermarket protective items that you have purchased to add to your new bike. The line up on my new 2018 Beta 250 Race Edition is as follows: TM Designworks rear disc guard, BRP chain guide (thicker than OEM), IMS oversized tank – no pitting (OEM tank will not make last for a 2 hour race), TM Designworks skid plate (sides are high enough to protect water pump), Obie linkage guard, Bullet Proof Designs radiator guards, and Enduro Engineering full handguards make great tree deflectors.
Feel the need for more power? Exhaust system might be on your list to change. It is suggested to zip tie around the seal that lies between the silencer and header. This will help prevent oil seepage. You may also want to consider installing a pipe guard to lessen the number of dents your pipe is sure to get. P3 makes a very durable guard.
Do you prefer soft or stiff? Suspension, in my opinion, is the game breaker to the way your bike rides. Beta’s suspension varies between models. Beta RR models have open chamber forks, more suited for trailer riders to C class riders. Beta Race Edition models are equipped with closed cartridge forks that will work well for AA/A riders. Either suspension can be sprung for the riders’ weight, and let me emphasize your actual weight NOT what you wish you weighed. Both bikes can be adapted depending on your needs, but do not expect the wrong bike or setup to work without modifications. Not everyone needs revalving done but it can make a huge difference in the overall handling.
Making the bike really your own. I have been riding Beta’s for 3 ½ years and have a good idea of what I do and do not like. I prefer riding with a Rekluse clutch because it saves me more times than not. I am a huge fan of Fasst Company’s Flexx Bars with ODI Emig lock-on grips is my bar setup, I find it really hard to ride without both items. Wide pegs to make standing more stable (sitting on your butt is not a good thing), Fasst Company is once again where I turn to for their Impact Moto Pegs. I replace the stock levers with ARC folding levers slimmer feel and softer pull.
Tire set up – Most bikes come stock with thin tubes. Get rid of those things ASAP, they will not hold up to all of Missouri’s rocks. Replace those thin things with some Ultra Heavy Duty tubes or if you want to totally prevent flats install Bib Mousses. For me Bib’s are the only way to go. I also change out the stock tires and always run a Bridgestone M59 on the front. For the rear tire I chose between a Dunlop MX33 or a Shinko Cheater depending on the terrain I will be riding.
Wrapping it up! In the end brand is up to you, but seriously consider all the guards discussed. Woods racing can be brutal on a bike. With your build complete it is time to break in your new machine and get it dialed in just for you. Just remember key secret to a successful race setup is knowing when to start riding and stop tuning
Check out the entire slideshow of pictures on our Facebook page – Bonecutter Beta & Sherco https://www.facebook.com/bonecutterbetasherco/
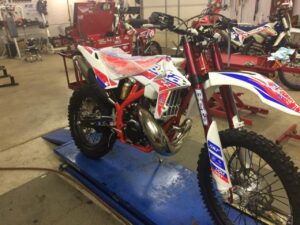
BEFORE
\
After