GNCC Race Bike Build
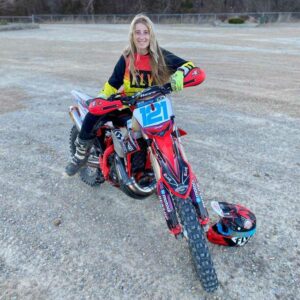
Do bikes come ready to race off the showroom floor? My answer is no. This is not limited to Beta or Sherco, it goes for all different brands of dirt bikes; no bike comes off the floor completely ready to ride. With that being said, a key secret to successful bike setup is knowing when to start riding and stop tuning.
The featured bike in this blog is a Beta 250 Race Edition.
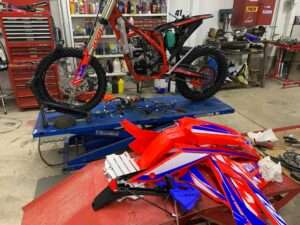
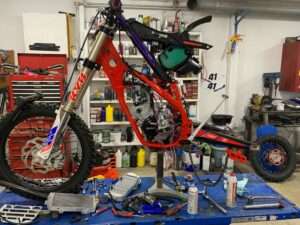
The first step to a race bike build, is to stripe it to the frame. Literally. Everything comes off, tank, plastics, exhaust, speedo, horn, etc.. On my bikes, we install the race wire harness. It removes all the extra wires used for the lights and cleans up the harness. Basically, everything unnecessary comes off. All the wires and CDI were rerouted to the right side of the bike for extra protection and less likely to receive excessive water damage. Make sure the CDI is pointed downward.
Next order of business was removing the linkage and swingarm to grease ‘em up. Most manufactures do not use a lot of grease on their bearings in the factory. By addressing this when the bike is new, the life of the bearings is prolonged. A massive benefit of buying a new bike from us is we do this in a Pre-Delivery Inspection as a bonus to our customers at no extra charge.
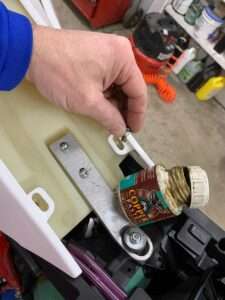
There are times when Loctite is necessary and times when anti seize/grease is necessary. Red grease was applied to the chain adjusters and brake pins, helping to ensure upon removal, down the road, they would not strip. On the engine mount bolts, red grease was applied to the bolt and Loctite on the nuts. Another crucial place for anti seize is on the bolts holding the plastics on, especially the tank ones. Strip out the tank and that’s no good.
A couple “pro tips”:
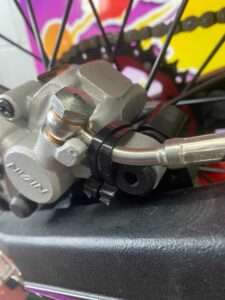
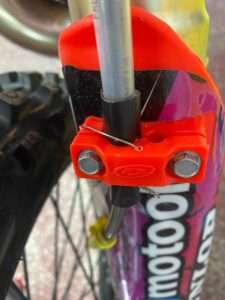
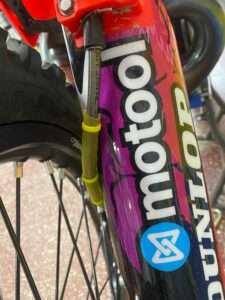
On the rear brake caliper, the brake line can be knocked loose, to help this issue, it is tightened to the inside and then wire tied. The front brake line is also prone to loosen up and get into the spokes which can destroy the brake line. It is very important to watch this and keep the fork guard clamp tight and position it accordingly. To help ensure it stays put, we wire tied the clamp. Extra rubber hose was attached to the brake line for extra protection on common wear areas. On the rear brake master cylinder, we flipped the pin around for easier removal.
In Missouri, the stock jetting is usually good. So, we leave that alone until there is an issue. From factory, the carb vent tubes are located at the bottom of the bike. This can allow dirt, sand, or water to be sucked up. Go ahead and prevent this, a carb vent kit is installed, relocating the vents to under the seat. For under $25, you will be saving yourself a lot of future wear and tear. Rerouting the vent hoses, also helps with prevent a throttle sticking wide open from sucking up dirt.
Time to address the cooling situation. Never in my life have I overheated a Beta two stroke. The thermostat located in the cooling hoses is pronged to leaking. Before it is a problem, a Boano hose kit is installed. This deletes the thermostat and also keeps the bike cooler. Samco hoses are also a great brand. The OEM coolant is removed and replaced with Engine Ice. We do this because when in a pinch it can be mixed with water unlike many other brands. We keep Engine Ice on hand, so it keeps it simple.
For added insurance, we install a fuel filter on the bike. It’s cheap so why would you not do that. We do add it to all new two strokes that we sell for another added bonus of buying new bikes from us.
Time to install the air filter. REMEMBER, a THICK bead of grease is applied around the rim along with filter oil applied to the filter. This is a MUST every time an air filter is installed. Otherwise, the filter is not properly sealed and will allow dirt in the carb, which may result in premature engine issues.
Time to install guards using blue Loctite. In the off road world, guards are pretty important. While the Loctite is out, be sure to Loctite the frame to subframe bolts and the seat bolts. For the rear disc protection, I chose a blue Bullet Proof Designs guard. In the past, I have changed the OEM chain guide for an aftermarket one but the 2022 Race Editions come with a decently thick one so I will use the stock one for awhile. When I do upgrade, BRP is the way to go. The tank vent tube is ran all the way into the skid plate. We cut the cooling line shorter so it is not running into the skid plate otherwise you will not know you leaked coolant in the skid plate. This is crucial for the tank vent tube because it could vapor lock or wash out your bearings if not routed correctly. Beta does come with a skid plate but I upgrade to a thicker one. I use the Eline carbon fiber skid plate paired with an Obie link guard. Bullet Proof Designs radiator guards are installed for radiator protection. I usually, do not run the stock exhaust and save it for when it is time to resell the bike. I run a FMF Fatty and FMF 2.1 silencer. After installing the exhaust system, install zip ties around the seal between the silencer and the header to prevent oil seepage. One item that I highly recommend on all brands of bikes is a Enduro Engineering slave cylinder guard! It saves your case and is better than the stock one!
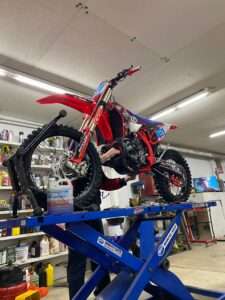
Guards are important, but so are the things I think I cannot live without! First up, Fasst Company’s Flexx Bars are crucial providing the extra comfort and absorption of the impacts. I also use Fasst Company’s Impact moto peg to help reduce vibration. ODI Emig lock-on grips are an absolute must. They eliminate spinning grips. I removed the stock levers and install ARC folding levers for the slimmer feel for my itty-bitty hands. Enduro Engineering handguards and deflectors are installed to protect my hands. All new bikes come with ultra thin tubes. Do not go to race like that. Remove them and either put Ultra Heavy Duty Tubes in or Bib Mousses. I prefer bibs paired with a Bridgestone M59 on the front and Dunlop MX33 on the rear.
With a new bike, I recommend springing the suspension for your weight, but no other changes until you have tested it out. This is based off your weight, your correct weight not a fantasy number. Suspension can make or break an opinion on how a dirt bike feels. Not everyone needs the KYB (closed chambered forks). Being aware of that is crucial. The RR models with open chambered forks work really well. If you are unsure about which forks would be better for you, we strive to assist our customers with making that decision.
I get a new set of plastics (keep the original’s in a box) and put my graphics on. Bike Graphix is my preferred graphics company. They use quality material and are fast with designs and getting graphics to me. An added bonus is they have TRUE BETA RED and not just Honda red. Be sure to check them out for all your graphic needs!
An IMS oversize dry break tank was installed. We put the vent to the left because it fits better over there instead of the right side.
I also drain the OEM brake fluid and put Catrol SRF in. It is impossible to boil your brakes with the liquid gold.
Notice, how we did not try to mod the engine or any outrageous, unnecessary things. When completely together, it is time to heat cycle. We start the bike up a few times and let it heat up to operating temperature. While running, we check for leaks and make sure everything is good. Then once it is at operating temperature, we let it cool down. Once cool, we check the coolant. Then do it a few more times. After the heat cycling is finished, we do a gentle test ride, shifting through the gears.
Pro tip: Anything that look like it might rub and get damaged, put an extra protector over it. This includes the radiator hoses and any wires. They all serve a purpose so protect them!
Now…. It is time to RIP!

