tech tip

What is the most underrated bike upgrade?

To me, there is TWO things that are underrated when upgrading components are you bike. Modern dirt bikes are really good in stock form. Most people don’t need to mod their engine or doing anything wild. My number 1 underrated bike upgrade: Getting your suspension sprung for your weight. I am not talking about valving. Just simply getting the springs for your weight for the bike you ride. A few factors go into determining this; your weight, your height, your skill, and what kind of riding you do. Be honest on all of this to get WHAT YOU NEED. After you have spent some time on the bike with the correct springs, we can talk about valving then. My other number 1 underrated bike upgrade: Handlebars. I feel like this is more of a factor for the shorties or the tall ones. When I get on most new bikes, right away I notice the bars. They feel like ape hangers and would definitely not be ideal to use. Having bars that are not good for you, can put you in the wrong position when riding and might even make your hands / wrist hurt. My bar of choice is Fasst Company Flexx Bars 14 degree, enduro low.

What is the most underrated bike upgrade? Read More »

How to change a spark plug on a two stroke dirt bike

Changing a spark plug on a two stroke is super simple and something we recommend to do BEFORE EVERY RACE! It is a cheap insurance policy so why not? Start by removing the tank for easier access to the plug. Once the tank is out of the way, remove the spark plug cap. Then grab the correct size wrench and loosen up the plug. Righty-tighty, lefty loosey. After the plug is loose, use your fingers to finish twisting it off until the plug is fully out. After that, remove the spark plug gasket. Make sure it is clean, if it is go ahead and install on the new plug. To re-install you hand tighten it then take your wrench to tighten it up. Don’t go over board on over-tightening otherwise you could strip the head. But don’t leave it too loose otherwise you will have running problems. Once installed, put the spark plug cap back on. You should here it click once it is on all the way. Some people will wire tie their spark plug cap on. It is preventive thing and not a bad idea if you travel a lot! Another thing we do is inspect the plug we took out. How does it look? Is it really black, oily, gasey, brown, white, gray, etc….? The spark plug tells the story and lets you know if you need to change something (jetting, air screw, oil) or if you may have a problem. In short, changing the spark plug is a cheap thing to do to ensure the likelihood of fouling a plug is minimal chance and let’s you know how the bike is running!

How to change a spark plug on a two stroke dirt bike Read More »

Suspension Set Up Tips for Smaller Rider’s – Why it matters

If you are a small rider – this is for you! Being small brings different challenges when it comes to bike setup Most new bikes are sprung from the factory for 170-180lbs. So it is definitely not a one size fits all! I am 5’2 and 130lbs and over the years I have learned how important it is to set up a bike FOR YOU and your needs! Especially coming off of a TTR 125 to a full size bike 10 years ago. When you ride a bike not sprung for your weight, it does not handle well, wears you out, and isn’t exactly safe. The first thing I always do is get it sprung for my weight. I then get valving done if necessary. After doing that, it is time to fine tune. Setting sag and adjusting clickers can make a world of a difference. The biggest thing to remember when messing with clickers is to know where you started and understanding you can’t “mess it up”, you can always go back to where you started. Keeping a suspension diary is helpful to gather data and know what worked where and get a better understanding to suspension. There’s a lot to it and can be overwhelming to even the very experienced rider. When it comes to bike setup and suspension, it is not always about your weight. The riders height, skill, and riding terrain make a difference on how the suspension is set up. I race GNCC’s and have my bike setup for that. When I come home and ride Missouri’s tight rocky terrain, I have to soften up my bike. Take a look at when you ride primarily and focus your setup on that. I want my bike to be able to handle hard hits especially when I mess up. I rather it save me then kill me haha. Over the years, I have wasted a lot of money on suspension but also spent money well on it. It is a learning game and finding a good tuner that listens to your needs and doesn’t put you in the “oh she’s just a girl category”. This year I am very fortunate to work with JDP Suspension. He has my set up really good. My bike is the best handling bike I have ever had. It stays straight and does not do anything unpredictable. Things to remember:

Suspension Set Up Tips for Smaller Rider’s – Why it matters Read More »

Top 5 Things Tayler Would put on a Beta 250 Race Edition

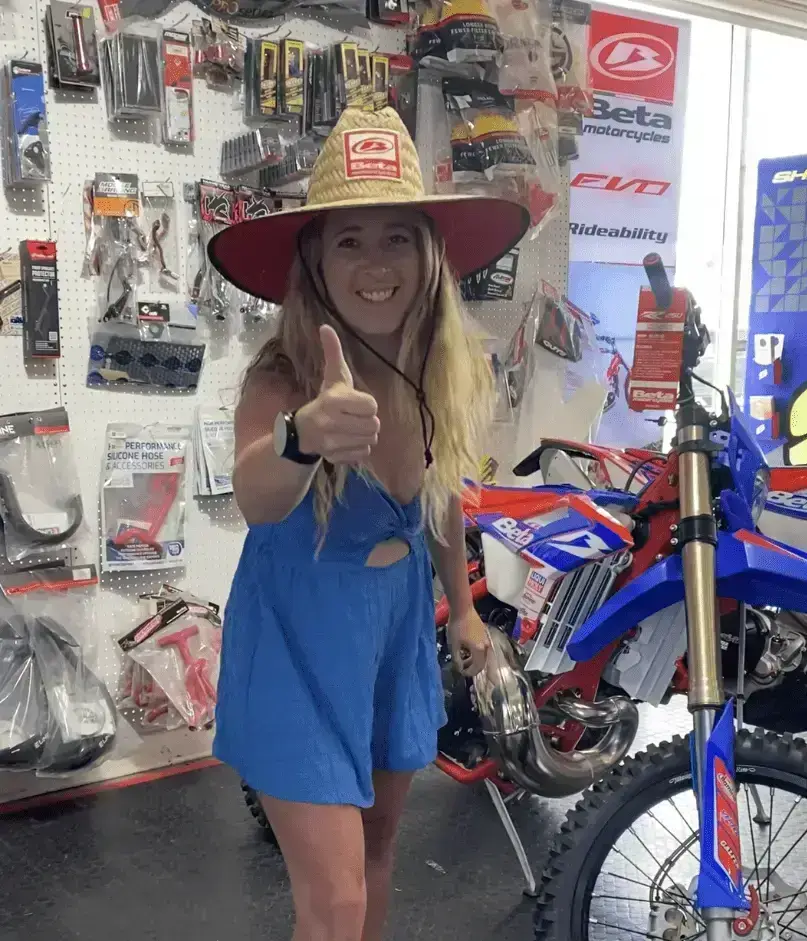
When purchasing a new bike, they are not necessarily ready to race off the showroom floor. If I was buying a brand new Beta 250 Race Edition, here are the top 5 things I would do right away to it. First off, I would put a separate kill and start button on and remove the other switches that are not necessary. I do this by installing the Beta Race Harness (can be found on our online store). For me, I like to have my start button on the left side. It makes it easier on my small hands for dead engine starts. I would also get rid of the speedo and the speedo cable because that is something else for me to break. The horn will be removed, the brake light wire, and the headlight as well. Since the speedo is removed, I install a hour meter so I can keep track of my hours and keep up on maintenance. Next up is changing the brake pins to a hex style head and eliminate the Allen headed ones. It is easy to strip the Allen heads and not always convenient to work with. We keep the Hex Pin set in stock! The third thing I would do is a seat cover. A rib style seat cover keeps me in place better than the factory ones. It also provides better grip. Over the years, the seat foams have gotten softer so I personally would not do a seat foam. Plus, it is a good reason to stand up more!! Next up is a Samco hose kit. The hose kit, deletes the thermostat, will keep the bike cooler, and the silicone hoses are thicker than stock! We keep these on the shelves. Lastly, guards! I run the basic amount. I use Enduro Engineering flag style hand guards, Eline Skid plate, Bulletproof Designs rear disc guard , swingarm guard, and radiator guards. I will also go ahead and upgrade the chain block to either a BRP or TM Designworks (both are great options). We keep all these products mentioned above in stock! They are available in store or on our online store.

Top 5 Things Tayler Would put on a Beta 250 Race Edition Read More »

Wrench Tip Wednesday: Drowning a bike in water

Wrench Tip Wednesday: Drowning a bike in water If you raced Ironman GNCC, then you know what this is about! Rule #1: CHOOSE A BETTER LINE! Yep, it is that easy! Hahah, just kidding! Sometimes it’s hard to tell how deep the hole really is when everything else prior was 2 inches deep and then one wrong line sent you 3 foot deep. Or even with creek crossings and rolling water, the current could push you over. I’ve seen that happen before. What should you do if you go for a swim on your dirt bike? If it is a quick submerge there is a chance the bike might still start. But a hot engine and cool water never mix. First, I would try to start it. If it does not start, pull the spark plug and flip the bike upside down. Kick the engine over. This helps push any water out of the top end. Flip it back over and install a sparkplug. If you do not have a spare with you, dry off the one you pulled out. Keep your fingers crossed that it starts otherwise you will be pushing the bike back. Be sure to change the air filter and oil once you get back. Also, pull your pipe off and dump the water out of it. What if the bike does not start and needs to be pushed or towed back? Load up and head home. The process is similar as above. Clean the bike! Take off the plastics and everything and get rid of the mud and dirt so it does not end up in places it shouldn’t! Take the spark plug out, flip upside down, and turn the engine over. Drain the oil and replace it a few times. Change the air filter. The float bowl could also be filled with water so check that. In extreme cases, it would not hurt to go ahead and replace the exhaust packing. With fresh oil, spark plug, and air filter installed go ahead and start the bike. Oh no! It still does not start; this could mean a complete engine rebuild may be needed. It all really depends how much water got in it. It is also not a bad idea to dielectric grease all connectors so they do not get corroded. While you’re at that, keep in mind all the grease on your bearings probably washed away too. Check your wheel, swingarm, and linkage bearings and make sure they are not rusty or loose. If still good, put more grease on them! Don’t fret if your mechanic skills are not up to par, take it to a local shop and let them dig into it. A good rule of thumb, always be honest about what has happened to the bike even if it is embarrassing, not just referring to the bike going swimming any instant something mechanical fails, tell the story. It helps the mechanic understand what has happened and why it happened. More Posts Back To Blog Page

Wrench Tip Wednesday: Drowning a bike in water Read More »

BLEED YOUR BRAKES – USE GOOD BRAKE FLUID

BLEED YOUR BRAKES – USE GOOD BRAKE FLUID Alright guys, if y’all watched my Wrench Tip video on Facebook or Instagram yesterday, you know one of my biggest pet peeves is when people complain about losing their brakes but did nothing to prevent the problem. Even better, if you know you are hard on brakes, prepare for it. I went through a phase where I was losing my brakes in a 35-minute race! LIKE WHAT?!?!! There are not many things that are scarier than the first moment you realize you have no brakes. It was 5 years ago when I was having this issue, so back in my ultra-beginner days, I had no idea what to do! As a result, I ran into a dirt pile, forgot how to use what little skill I had, and lost the race. That’s enough to make a little girl angry! I had a problem and it needed fixed! Fluid, brake pads, and rotors all contribute to this but for now we are going to hit on the fluid. The first thing we did was bleeding my brakes after every single race. During a MORE race weekend, I would even do it again Saturday night after racing so I was set up for Sunday! That alone made my problem better. When I started traveling further to races, it got a bit more serious. I switched to what I like to call liquid gold, Castrol React SRF Racing brake fluid, it comes in a 1L jug and is around $90. I look at it as the bigger picture, if I am going to travel 10+ hours to race, I am going to do what I can to prevent as many problems as possible. This brake fluid is cheaper than not finishing or struggling to finish. When you look into purchasing brake fluid, do your homework! Each bottle of brake fluid has the wet boiling point listed on it. Some even state the dry boiling point. All that we care about is the wet, because as soon as you open the bottle, moisture gets in it and therefore it is now “wet”. So, do not be fooled by the dry boiling points. We keep these brake fluids on the shelf: Castrol React SRF Racing: 518 *F wet boiling point Motul RBF 660: 399*F wet boiling point Maxima Racing: 399*F wet boiling point Lucas Synthetic: 116*F wet boiling point All of these vary in price. Remember, focus on what works and not what is the cheapest. Remember, riding your brakes in “overtime” is not worth it. How to know they need to be bled: If you are a serious racer, do it after every race. Braking power has reduced Inconsistent braking The lever feels spongy Pro tip: If it is hot outside, everything on your bike is that much hotter, including your brakes, which means they will boil faster! If you boil your brakes, the boiling temperature is reduced so that is why it is important to bleed them! More Posts Back To Blog Page
BLEED YOUR BRAKES – USE GOOD BRAKE FLUID Read More »

Tayler’s Bike Set Up

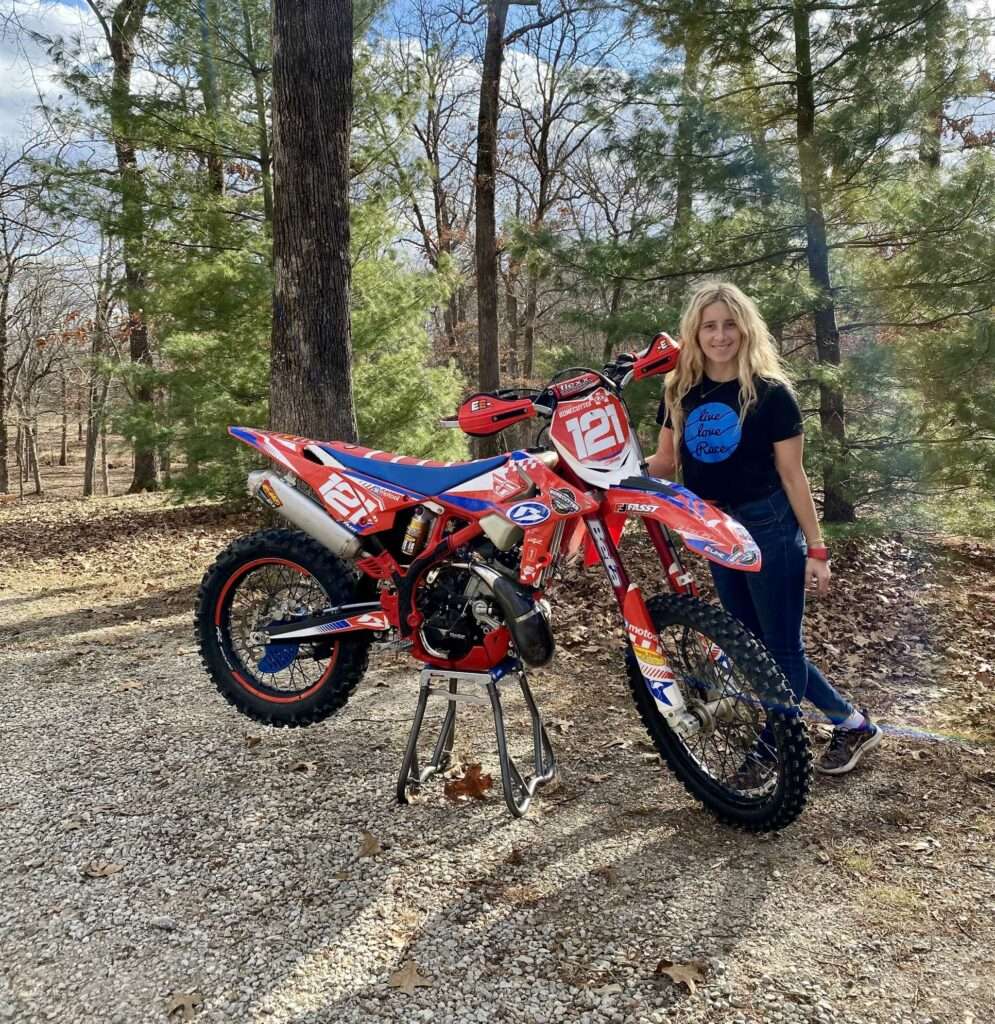
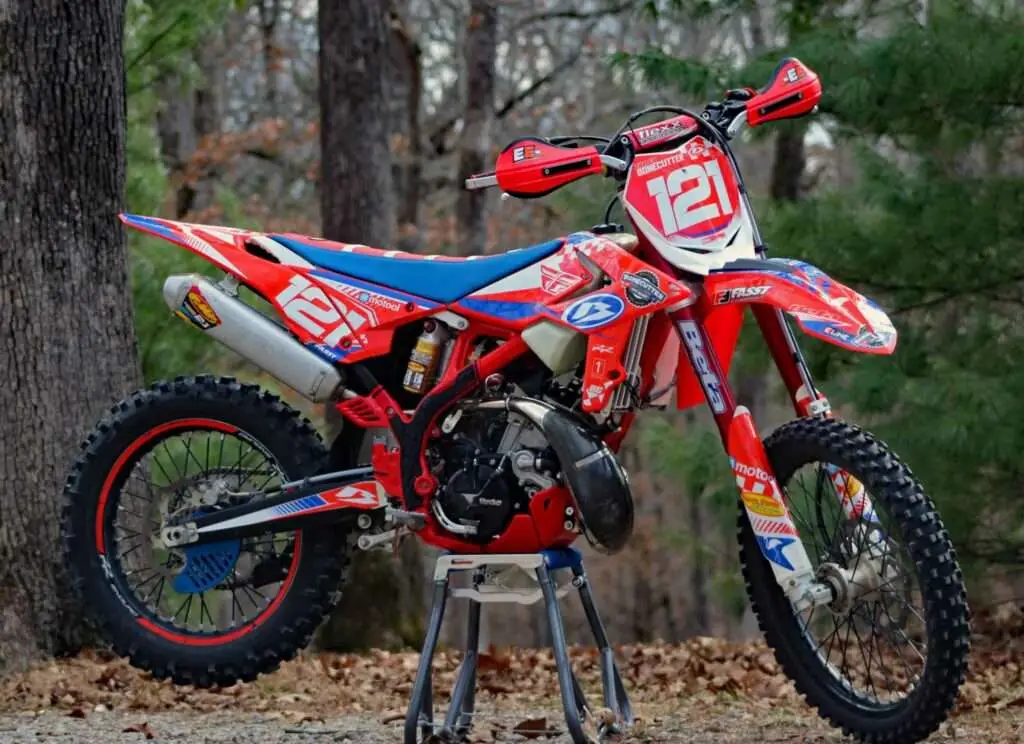
Tayler’s Bike Set Up Everyone is unique. I trust the brands that work and help me perform at my best. So, what does my bike set up look like? Let’s start with the handle bar area! I’ve been using Fasst Company Flexx Bars for three years now. They get rid of the rigid feel that standard bars have. With the added comfort, perfect bend for me, and help rid of some vibration, I refuse to go without. ARC levers are impossible to brake, help my small hands grab and feel the lever better, and the melmon version allows for extra flex in the lever. ODI Emig grips feel like a hard grip but ultimately do not make my hands/wrists hurt. I never get blisters. ODI Emig grips are also lock on which means NO MORE SPINNING GRIPS! For hand guards, I use Enduro Engineering full wraps. Next up, exhausts! I take the OEM exhaust off to save for when I resell the bike. I choose to put a FMF Fatty on paired with FMF Powercore 2.1. What about protection? As the years go on, I put the bare minimum needed for off road racing on. I upgrade the skid plate to Eline carbon fiber and an Obie linkage guard. I use Bullet Proof Designs radiator guards and rear disc guard. Some do not see the importance of a rear disc guard, but you are more likely to bend a rotor than you are to get a rock stuck in between it and the guard. I also upgrade from the OEM chain guide to a thicker one made by BRP. The case saver is upgraded to Enduro Engineering for better protection and easier cleaning. Plus, the handguards mentioned above. That’s it. I feel my most stable on the bike when using Fasst Company’s Impact Peg. The pegs are wider than OEM pegs and isolate the cleat from touching metal to metal making them absorb more vibration. The Impact Moto Peg also has the perfect tooth combo, I can remove my foot if I need to and not get “stuck”. I use the stock Beta seat foam; I actually prefer the firmness compared to a soft foam. I ditch the OEM cover and put a Seat Concepts 2.0 race ribbed seat cover on. Bike Graphix does all my graphic kits. They are the only company who I have found that has true Beta Red not Honda red! My current tire set up is Dunlop MX33 on the rear and a Bridgestone M59 on the front. I use Michelin Bib Mousses. They make the tires not bounce as much on the rocks and absorb some of the bigger impacts. Plus, that means no flats ever! I get my suspension set up for me to handle 90% of the terrain I ride. I get the proper springs for my weight and have the valving tweaked to meet my needs. I am 5’2 and do currently lower my bikes 1 inch. I keep the gearing stock. I adjust the powervalve to flush with the case and majority of the time, keep the stock jetting. I upgrade the stock cooling hoses to Samco or Boano to keep the bike cooler and eliminate the thermostat. The bike is designed a certain way so to make all this wild mods are not necessary for most rider’s. All of that gives me the best-looking bike, the best riding bike, and the most fun bike!   More Posts Back To Blog Page
Tayler’s Bike Set Up Read More »

Routine Check Up on Your Dirt Bike

Routine Check Up on Your Dirt Bike The number one way to keep a bike in good condition, is to clean it, check it, and perform maintenance. Just like how to keep yourself in good condition. Here is a list of our top things to check after a ride or race: Oil – Is it dirty? Is it low? Keeping fresh oil in a bike will make the engine components last a lot longer. Dirty oil makes everything else in the engine dirty. Air Filter – Does it need to be cleaned and serviced? Keeping a clean filter helps it not get clogged or dirt to accidently escape into the air boot. Brakes – Do you have brake pads left? Another tip, if you are hard on brakes, get into the habit of bleeding your brakes + good high temp fluid after every race. Bearings – Are your wheel bearings, linkage bearings, and swingarm bearings all in good shape? Tires – Is it time to replace or get another ride? If you run tubes, check PSI and make sure the valve stem is not rusty. Bolts – Are you missing bolts? Make sure everything is tight. Spokes – Make sure none or are broken. DO NOT overtighten, that will cause them to break more easily. Cables – Check over the condition of all cables. Chain, Master Link, and Sprockets – Most chain issues can be prevented. Make sure the master link is in good condition. The sprockets will start curling when it is time to replace. Coolant – Make sure it is full Bottom line, these are all small check overs that will help your bike last longer and allow you to ride it more often with less issues. Get into this habit and log everything you do. It’s worth it in the end. A mechanical DNF stinks and missing out on epic adventures does too! More Posts Back To Blog Page
Routine Check Up on Your Dirt Bike Read More »

What should you do if your dirt bike sits for months?

What should you do if your dirt bike sits for months? I’m sure this happens pretty often especially if life or injuries get in the way. Just like you, your bike gets lonely and will need some love! Letting a bike sit can be more expensive than riding it. So, what should you do before firing it back up? First off, dig it out! Check the seals! This includes for seals and engine seals. Fork seals can randomly start leaking. Who know?!? Maybe you put some engine work off because you knew it would be months before you could ride again. Check and change the oil, filters, and coolant. It is always a good idea to freshen a bike up before any kind of ride. Sometimes mice can find a home in your air box and chew up your air filter. It is best to check it for any holes! Check the coolant and make sure it does not need topped off. Fresh oil and oil filter is highly recommended. Bleed your brakes and make sure they are in working order. If you left gas in your bike, plan on getting rid of it and cleaning your carburetor unless you are using VP racing fuels. Pump gas goes bad quickly and can gum up, absorb water, and is no longer useable. Even high-quality pump gas can do this. If you know ahead of time your bike will be sitting, go ahead and put VP in it. It will save you a ton of time and money later. Next up, get to greasing! Grease the bearings and the chain. Check all nuts and bolts. This is something you should do after any ride anway. If you run tubes, check the air pressure. Make sure all controls are in working order. Look over the brakes, clutch, and the throttle. Ensure, all lines are in tact and not too tight. Charge up the battery and make sure it is still in working condition. Lastly, check the spark plug. It could have drawn in moisture. Now it is time to fire it up! If all goes well, the next step is to go out and RIDE! More Posts Back To Blog Page

What should you do if your dirt bike sits for months? Read More »

Preparing for Riding or Racing Adventures

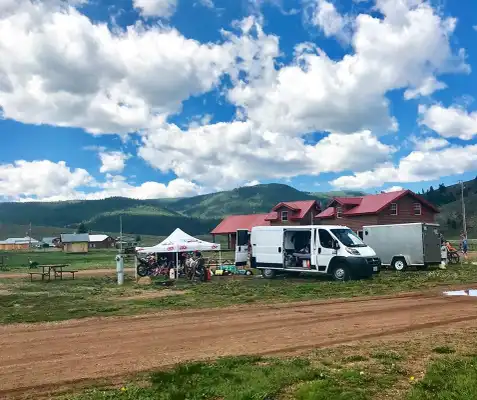
Preparing for Riding or Racing Adventures For many of us, dirt bike racing and riding is a family affair. If this is the case, have you ever wondered how handy it is to have your dad’s tools and extra parts right there? I didn’t realize this until I joined the van life a few years ago. So, if you are ready to start venturing out on your own here is some items to consider. Dirt bikes require fuel! Gas cans and mix cups if you ride a two stroke. If I am gone for an entire weekend, I will bring two gas cans. In my van, you will find an assortment of chemicals and oils; brake fluid, Engine Ice, chain lube, Lucas Tool Box Buddy, 2T oil, transoil. Spare parts never hurt! I carry a few spark plugs. I have extra hand levers and foot levers. Waterpump hose, bolts, handguards pieces, fork bleeder screws, brake pads, and a masterlink. I run bib mousse’s and do not have to worry about flats. If you run tubes, it never hurts to carry a front and rear with you, along with rim locks. If I am going racing for a weekend, I will have an extra header pipe, radiator, chain, chain block, and rotors. I have an assortment of tools, nothing too fancy. I carry basically everything I would ever need to do small or simple work on a bike at a track; wrenches, screwdrivers, ratchet and sockets, pliers. Some things you just should not do outside of your garage. I also keep my handy dandy Beta tool pack with me. It is always better to be over prepared than ruin an entire weekend from not having something minor with you. Having a fully stocked van or travel tool box does not mean to show up to the track or race without performing the maintenance the bike needed before hand. Check over before and you most likely will have less issues while on the trail. Happy riding! More Posts Back To Blog Page

Preparing for Riding or Racing Adventures Read More »

Scroll to Top