wrench tip

What is the most underrated bike upgrade?

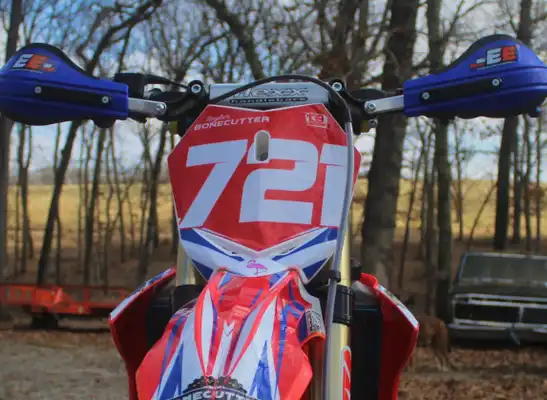
To me, there is TWO things that are underrated when upgrading components are you bike. Modern dirt bikes are really good in stock form. Most people don’t need to mod their engine or doing anything wild. My number 1 underrated bike upgrade: Getting your suspension sprung for your weight. I am not talking about valving. Just simply getting the springs for your weight for the bike you ride. A few factors go into determining this; your weight, your height, your skill, and what kind of riding you do. Be honest on all of this to get WHAT YOU NEED. After you have spent some time on the bike with the correct springs, we can talk about valving then. My other number 1 underrated bike upgrade: Handlebars. I feel like this is more of a factor for the shorties or the tall ones. When I get on most new bikes, right away I notice the bars. They feel like ape hangers and would definitely not be ideal to use. Having bars that are not good for you, can put you in the wrong position when riding and might even make your hands / wrist hurt. My bar of choice is Fasst Company Flexx Bars 14 degree, enduro low.

What is the most underrated bike upgrade? Read More »

How to change a spark plug on a two stroke dirt bike

Changing a spark plug on a two stroke is super simple and something we recommend to do BEFORE EVERY RACE! It is a cheap insurance policy so why not? Start by removing the tank for easier access to the plug. Once the tank is out of the way, remove the spark plug cap. Then grab the correct size wrench and loosen up the plug. Righty-tighty, lefty loosey. After the plug is loose, use your fingers to finish twisting it off until the plug is fully out. After that, remove the spark plug gasket. Make sure it is clean, if it is go ahead and install on the new plug. To re-install you hand tighten it then take your wrench to tighten it up. Don’t go over board on over-tightening otherwise you could strip the head. But don’t leave it too loose otherwise you will have running problems. Once installed, put the spark plug cap back on. You should here it click once it is on all the way. Some people will wire tie their spark plug cap on. It is preventive thing and not a bad idea if you travel a lot! Another thing we do is inspect the plug we took out. How does it look? Is it really black, oily, gasey, brown, white, gray, etc….? The spark plug tells the story and lets you know if you need to change something (jetting, air screw, oil) or if you may have a problem. In short, changing the spark plug is a cheap thing to do to ensure the likelihood of fouling a plug is minimal chance and let’s you know how the bike is running!

How to change a spark plug on a two stroke dirt bike Read More »

Tayler’s Beta 200 Race Bike Build

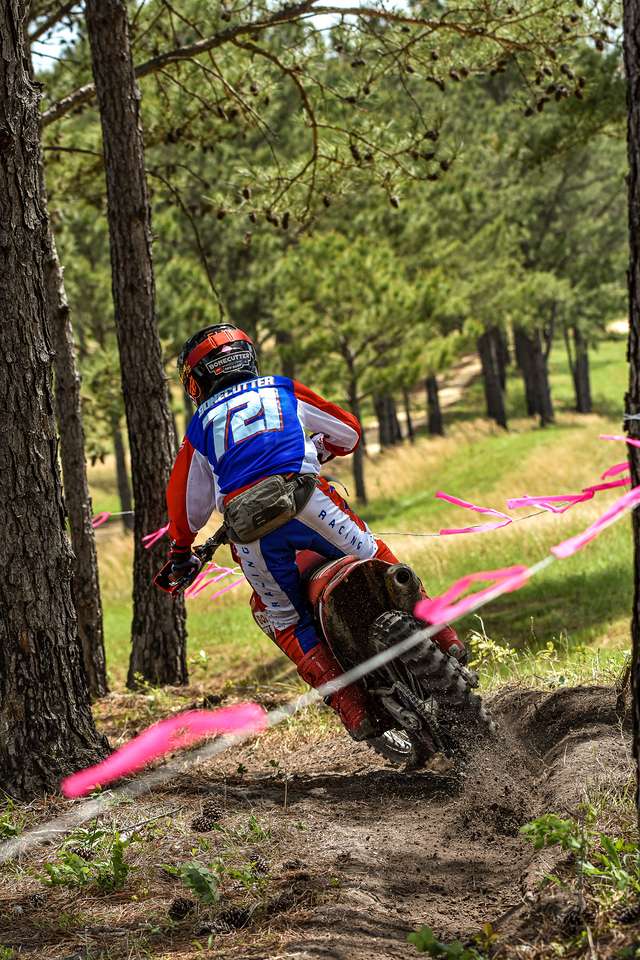
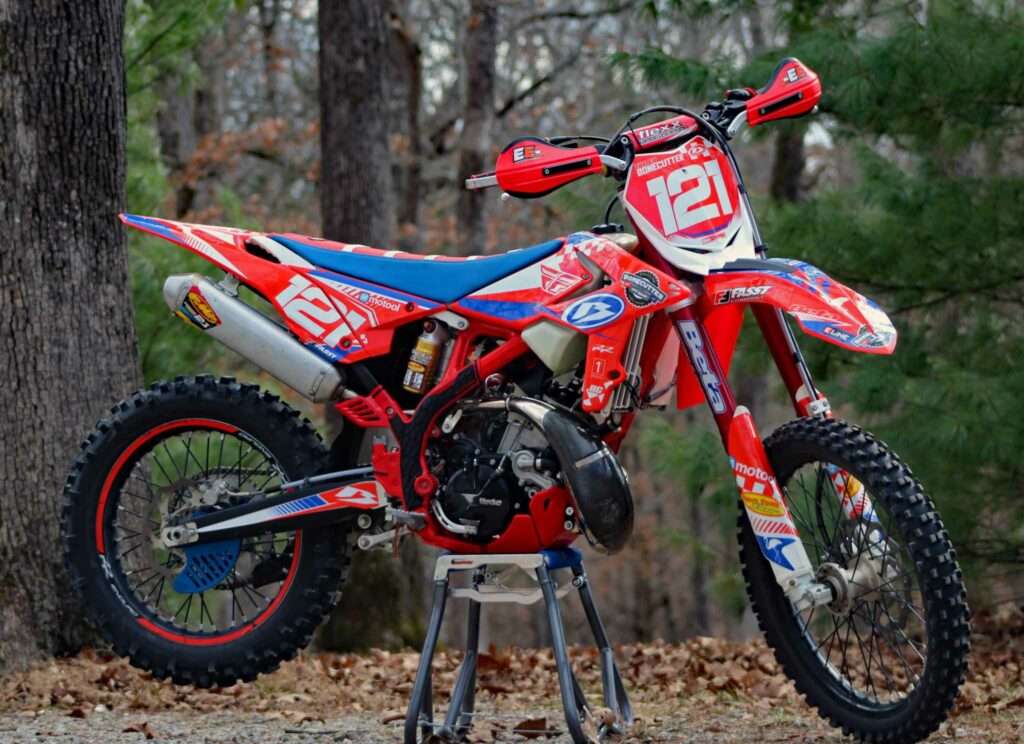
If you spend a lot of time at Bonecutter Off Road or around my family and I, you will hear the following statement often! When purchasing a new bike off the showroom floor with a racing intent or even the die-hard weekend warrior, a lot of things should be done to said bike to make it “ready”. This goes for all different brands of dirt bikes; no bike comes off the floor completely ready to ride. With that being said, a key secret to successful bike setup is knowing when to start riding and stop tuning. My new bike is a 2024 Beta 200 Race Edition. Most of the things done was what we felt like was necessary, but also personal preference. I have had many bikes over the years and this one is by far my favorite build. I absolutely love seeing a bike come together with all the little details and color choices. As soon as the bike arrived to the Bonecutter Headquarters, the first thing done was removing plastics, tank, and exhaust. I like to call it putting a new bike in a box! With a new bike, I recommend springing the suspension for your weight, but no other changes until you have tested it out. This is based off your weight, your correct weight not a fantasy number. Suspension can make or break an opinion on how a dirt bike feels. Not everyone needs the KYB (closed chambered forks). Being aware of that is crucial. The RR or X-pro models with open chambered forks work really well. If you are unsure about which forks would be better for you, we strive to assist our customers with making that decision. With that being said, I dropped my forks and shock off at JDP Suspension to get the correct springs and some valving done. Jay has done both my 200’s and honestly I am super impressed with his work. The bike stays straight and handles the rough GNCC chop like a champ! Next order of business was removing the linkage and swingarm to grease ‘em up. Most manufactures do not use a lot of grease on their bearings in the factory. By addressing this when the bike is new, the life of the bearings is prolonged. I was super impressed with how much grease was on this bike from the factory! A lot more than I have seen in recent years with other manufactures. There are times when Loctite is necessary and times when anti seize is necessary. Anti seize was applied to the chain adjusters and brake pins, helping to ensure upon removal, down the road, they would not strip. On the engine mount bolts, anti seize was applied to the bolt and Loctite on the nuts. Another crucial place for anti seize is on the bolts holding the plastics on, especially the tank ones. Strip out the tank and that’s no good. I also went ahead and changed the brake pins to hex head pins so it is less likely to strip out and way easier to remove. A couple “pro tips”: On the rear brake caliper, the brake line can be knocked loose, to help this issue, it is tightened to the inside and then wire tied. The front brake line is also prone to loosen up and get into the spokes which can destroy the brake line. It is very important to watch this and keep the fork guard clamp tight and position it accordingly. We also wrap gorilla tape around this area for extra protection. We also wire tie the rear spokes just incase of breaking them. If you do break it, and it is wire tied, it will prevent it from getting down in your caliper and rotors. On the rear, I run a solid rear rotor. I am hard on brakes and this helps with the overheating issue. I also run Castrol Brake fluid in my brake and clutch systems. The heat rating on it very high so it doesn’t boil over real quick! I use DP brake pads as well and have had great luck with them. I run Fasst Company rear brake clevis and return spring as extra insurance for keeping my rear brakes working well! All Beta’s are able to dual sport. In return, they come with extra wires to make that possible. My bikes are considered race bikes, so the wiring for the lights, horns, etc are unnecessary to me. My map switch is no longer on tank but is on the handlebars. All the wires and CDI were rerouted to the right side of the bike for extra protection and less likely to receive excessive water damage. Make sure the CDI is pointed downward. I install a TPS removal plug as well to clean it up too. In Missouri, the stock jetting is usually good. So, we leave that alone until there is an issue. From factory, the carb vent tubes are located at the bottom of the bike. This can allow dirt, sand, or water to be sucked up. Go ahead and prevent this, a carb vent kit is installed, relocating the vents to under the seat. For under $25, you will be saving yourself a lot of future wear and tear. Time to address the cooling situation. Never in my life have I overheated a Beta two stroke. The thermostat located in the cooling hoses is prone to leaking. Before it is a problem, a Samco hose kit is installed. This deletes the thermostat and also keeps the bike cooler. Samco hoses are also thicker than stock! The OEM coolant is removed and replaced with Engine Ice. We keep Engine Ice on hand, so it keeps it simple. I put a Funnelweb Air filter in. I choose Funnelweb because it is simply the best in dust and mud races. I trust it. REMEMBER, a THICK bead of grease is applied around the rim along with filter oil applied to the filter. This is

Tayler’s Beta 200 Race Bike Build Read More »

SPONSORSHIP

What is a sponsorship? I will tell you what it is NOT first.. 💥Entitlement💥 You are not entitled to shit. Reread that statement again. With the shop, we get asked for “discounts”, “a good deal”, “free stuff”, etc…. I can keep going. Here’s the thing, ARE YOU DOING ANYTHING TO BENEFIT THE SHOP?! (Or any company you try to get buddy deals with) If you’re not sure, then your probably not. So before you ask/expect maybe do something that helps us help you. 🔥 Like our pages, posts, and share them.🔥 Recommend us to your friends. We do stock parts riders/racers actually need.. and we ship anywhere in the USA🔥 Help us sell bikes.🔥 Tag us in posts.🔥 Put our logo on your bike. Being “sponsored” is not just about how fast you are. Its not just about being a “top rider”. It’s about who you are as a person. It’s about what you do that benefits us. It’s the little things that add up. The more you give, the more you bring to the table, the more of a positive impact, the more you will get in return. It is not just about YOU. It is about ALL OF US. It’s a TEAM effort. Sponsorship/discounts in exchange for growth of the brand. So PLEASE do your part BEFORE you expect. And also keep in mind, when searching for the “best deal”, think about the kind of service you are receiving, who keeps the parts in stock so you don’t miss a race, who helps with tech questions… This is an educational post. Hope you apply it or learn from it.

SPONSORSHIP Read More »

Fasst Company Flexx Bars 5 Year Anniversary

This month was my 5 year anniversary using Fasst Company Flexx Bars 🫶🏻 I made the switch from standard bars 5 years ago & never looked back. I was one of those people who just used whatever came on whatever I was riding. I experienced a lot of wrist pain when riding up until I switched. I’m a firm believer Flexx Bars help soften impacts. When I ride with standard bars, they feel too rigid like there is no give and I have more fatigue in my hands/wrists. Flexx bars are designed to reduce vibration with the use of rubber elastomers which help with arm pump, fatigue, and takes away the harsh pounding to the upper body. It can also help with arm pump or sensitive injuries. I run my Flexx bars ultra soft which allows for more give during impacts or bumps. I’m super thankful for Fasst Company and having the pleasure to work with them over the years. We are a dealer for Flexx Bars so if you’re in the market or have questions, let me know!

Fasst Company Flexx Bars 5 Year Anniversary Read More »

BLEED YOUR BRAKES – USE GOOD BRAKE FLUID

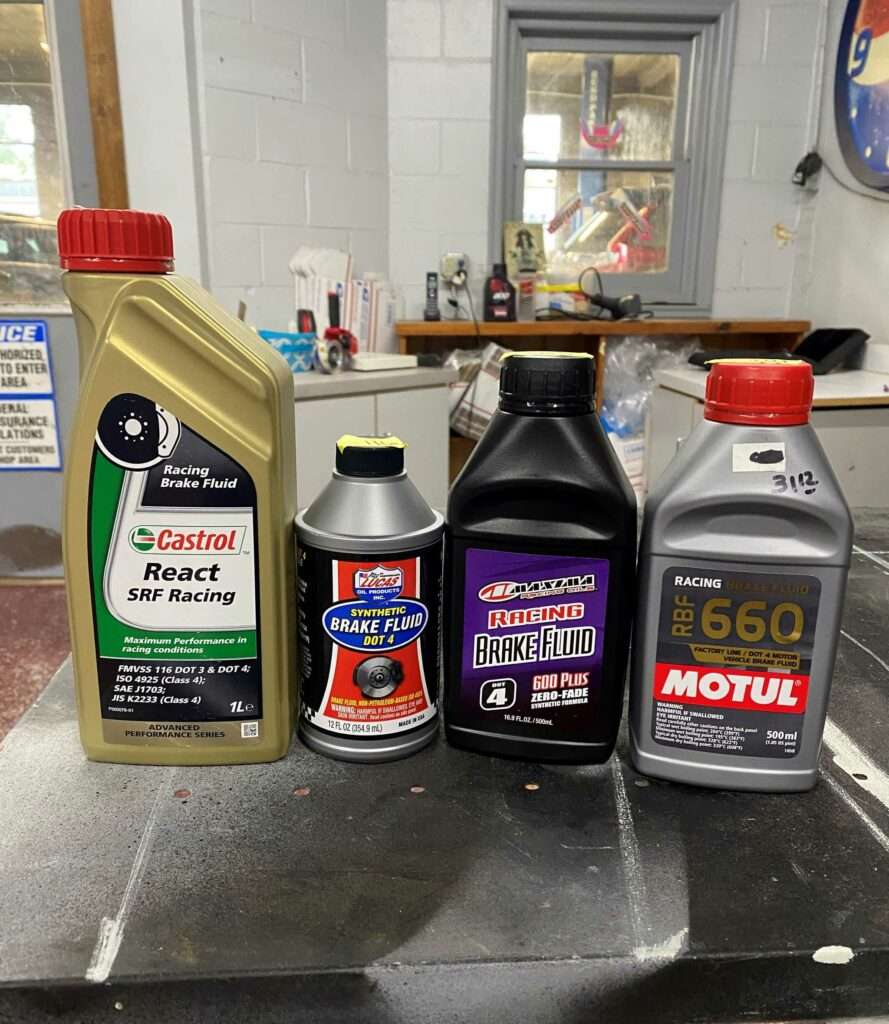
BLEED YOUR BRAKES – USE GOOD BRAKE FLUID Alright guys, if y’all watched my Wrench Tip video on Facebook or Instagram yesterday, you know one of my biggest pet peeves is when people complain about losing their brakes but did nothing to prevent the problem. Even better, if you know you are hard on brakes, prepare for it. I went through a phase where I was losing my brakes in a 35-minute race! LIKE WHAT?!?!! There are not many things that are scarier than the first moment you realize you have no brakes. It was 5 years ago when I was having this issue, so back in my ultra-beginner days, I had no idea what to do! As a result, I ran into a dirt pile, forgot how to use what little skill I had, and lost the race. That’s enough to make a little girl angry! I had a problem and it needed fixed! Fluid, brake pads, and rotors all contribute to this but for now we are going to hit on the fluid. The first thing we did was bleeding my brakes after every single race. During a MORE race weekend, I would even do it again Saturday night after racing so I was set up for Sunday! That alone made my problem better. When I started traveling further to races, it got a bit more serious. I switched to what I like to call liquid gold, Castrol React SRF Racing brake fluid, it comes in a 1L jug and is around $90. I look at it as the bigger picture, if I am going to travel 10+ hours to race, I am going to do what I can to prevent as many problems as possible. This brake fluid is cheaper than not finishing or struggling to finish. When you look into purchasing brake fluid, do your homework! Each bottle of brake fluid has the wet boiling point listed on it. Some even state the dry boiling point. All that we care about is the wet, because as soon as you open the bottle, moisture gets in it and therefore it is now “wet”. So, do not be fooled by the dry boiling points. We keep these brake fluids on the shelf: Castrol React SRF Racing: 518 *F wet boiling point Motul RBF 660: 399*F wet boiling point Maxima Racing: 399*F wet boiling point Lucas Synthetic: 116*F wet boiling point All of these vary in price. Remember, focus on what works and not what is the cheapest. Remember, riding your brakes in “overtime” is not worth it. How to know they need to be bled: If you are a serious racer, do it after every race. Braking power has reduced Inconsistent braking The lever feels spongy Pro tip: If it is hot outside, everything on your bike is that much hotter, including your brakes, which means they will boil faster! If you boil your brakes, the boiling temperature is reduced so that is why it is important to bleed them! More Posts Back To Blog Page

BLEED YOUR BRAKES – USE GOOD BRAKE FLUID Read More »

Routine Check Up on Your Dirt Bike

Routine Check Up on Your Dirt Bike The number one way to keep a bike in good condition, is to clean it, check it, and perform maintenance. Just like how to keep yourself in good condition. Here is a list of our top things to check after a ride or race: Oil – Is it dirty? Is it low? Keeping fresh oil in a bike will make the engine components last a lot longer. Dirty oil makes everything else in the engine dirty. Air Filter – Does it need to be cleaned and serviced? Keeping a clean filter helps it not get clogged or dirt to accidently escape into the air boot. Brakes – Do you have brake pads left? Another tip, if you are hard on brakes, get into the habit of bleeding your brakes + good high temp fluid after every race. Bearings – Are your wheel bearings, linkage bearings, and swingarm bearings all in good shape? Tires – Is it time to replace or get another ride? If you run tubes, check PSI and make sure the valve stem is not rusty. Bolts – Are you missing bolts? Make sure everything is tight. Spokes – Make sure none or are broken. DO NOT overtighten, that will cause them to break more easily. Cables – Check over the condition of all cables. Chain, Master Link, and Sprockets – Most chain issues can be prevented. Make sure the master link is in good condition. The sprockets will start curling when it is time to replace. Coolant – Make sure it is full Bottom line, these are all small check overs that will help your bike last longer and allow you to ride it more often with less issues. Get into this habit and log everything you do. It’s worth it in the end. A mechanical DNF stinks and missing out on epic adventures does too! More Posts Back To Blog Page

Routine Check Up on Your Dirt Bike Read More »

What should you do if your dirt bike sits for months?

What should you do if your dirt bike sits for months? I’m sure this happens pretty often especially if life or injuries get in the way. Just like you, your bike gets lonely and will need some love! Letting a bike sit can be more expensive than riding it. So, what should you do before firing it back up? First off, dig it out! Check the seals! This includes for seals and engine seals. Fork seals can randomly start leaking. Who know?!? Maybe you put some engine work off because you knew it would be months before you could ride again. Check and change the oil, filters, and coolant. It is always a good idea to freshen a bike up before any kind of ride. Sometimes mice can find a home in your air box and chew up your air filter. It is best to check it for any holes! Check the coolant and make sure it does not need topped off. Fresh oil and oil filter is highly recommended. Bleed your brakes and make sure they are in working order. If you left gas in your bike, plan on getting rid of it and cleaning your carburetor unless you are using VP racing fuels. Pump gas goes bad quickly and can gum up, absorb water, and is no longer useable. Even high-quality pump gas can do this. If you know ahead of time your bike will be sitting, go ahead and put VP in it. It will save you a ton of time and money later. Next up, get to greasing! Grease the bearings and the chain. Check all nuts and bolts. This is something you should do after any ride anway. If you run tubes, check the air pressure. Make sure all controls are in working order. Look over the brakes, clutch, and the throttle. Ensure, all lines are in tact and not too tight. Charge up the battery and make sure it is still in working condition. Lastly, check the spark plug. It could have drawn in moisture. Now it is time to fire it up! If all goes well, the next step is to go out and RIDE! More Posts Back To Blog Page

What should you do if your dirt bike sits for months? Read More »

Preparing for Riding or Racing Adventures

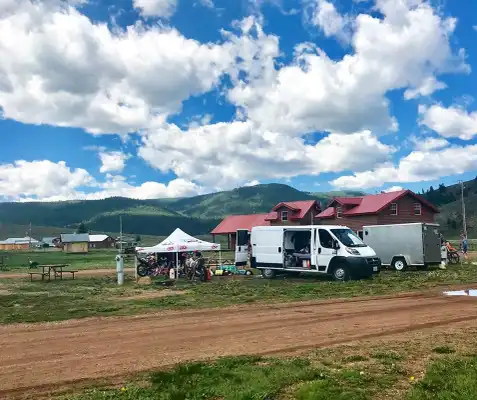
Preparing for Riding or Racing Adventures For many of us, dirt bike racing and riding is a family affair. If this is the case, have you ever wondered how handy it is to have your dad’s tools and extra parts right there? I didn’t realize this until I joined the van life a few years ago. So, if you are ready to start venturing out on your own here is some items to consider. Dirt bikes require fuel! Gas cans and mix cups if you ride a two stroke. If I am gone for an entire weekend, I will bring two gas cans. In my van, you will find an assortment of chemicals and oils; brake fluid, Engine Ice, chain lube, Lucas Tool Box Buddy, 2T oil, transoil. Spare parts never hurt! I carry a few spark plugs. I have extra hand levers and foot levers. Waterpump hose, bolts, handguards pieces, fork bleeder screws, brake pads, and a masterlink. I run bib mousse’s and do not have to worry about flats. If you run tubes, it never hurts to carry a front and rear with you, along with rim locks. If I am going racing for a weekend, I will have an extra header pipe, radiator, chain, chain block, and rotors. I have an assortment of tools, nothing too fancy. I carry basically everything I would ever need to do small or simple work on a bike at a track; wrenches, screwdrivers, ratchet and sockets, pliers. Some things you just should not do outside of your garage. I also keep my handy dandy Beta tool pack with me. It is always better to be over prepared than ruin an entire weekend from not having something minor with you. Having a fully stocked van or travel tool box does not mean to show up to the track or race without performing the maintenance the bike needed before hand. Check over before and you most likely will have less issues while on the trail. Happy riding! More Posts Back To Blog Page

Preparing for Riding or Racing Adventures Read More »

Should you be using VP Fuels?

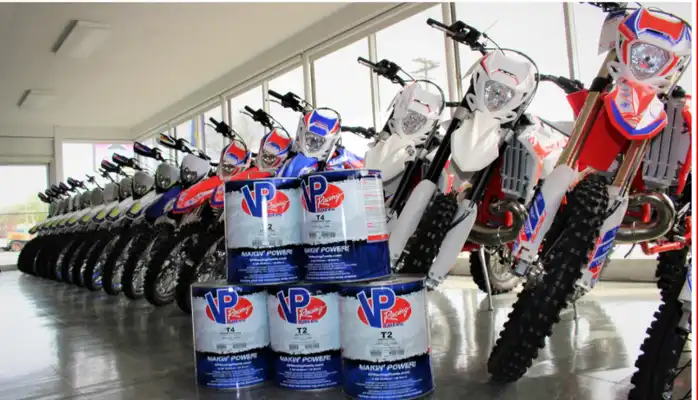
Should you be using VP Fuels? Have you removed the winter blues off of your dirt bike yet? If you use regular pump gas, it can go bad within a few weeks. Let it sit for even longer, it could be bad news. The fuel can thicken and clog up fuel lines and anything else gas flows through in the engine. The carburetor will also most likely be gummed up and disgusting. Prevent this by draining the fuel tank or adding fuel stabilizer like Sea Foam.. Or better yet, use VP! VP T2 is premix fuel at 40:1 and is great for two stroke dirt bikes. It has many benefits. T2 has higher octane content preventing against detonation and oxygenation to increase overall power. It can give your two stroke crisper and noticeably stronger top end power. T2 does NOT contain ethanol. This increases hours between rebuilds and extends the life of your engine. We have witnessed this first hand! Steve has took multiple Beta’s apart with 60-70 hours rode by A/AA rider’s and have all engine components look brand new still..most of those hours were race ones. Bottom line, T2 smells amazing burning in your two stroke dirt bike but it also lowers your long-term costs, keeping your bike in tip-top shape and makes more power than pump gas! 5gal – $7354gal drum – $674 VP T4 is designed for four stroke engines, stock or slightly modified. It is unleaded and ethanol-free. T4 is a direct pour-in replacement for premium pump gas. While riders facing extreme conditions are forced to add octane boosters or race fuel to increase the octane of pump gas, T4’s 97 octane rating (R+M/2) provides greater protection against detonation. T4 offers 2-3% more power and better throttle response across the entire RPM range. 5gal – $73 54gal drum – $674 Bottom Line – VP Fuels give the avid rider/racer peace of mind knowing their fuel is good. It eliminates the risk of purchasing bad fuel on the road and saves more money in the long run. If VP is not in the budget, I strongly recommend using ethanol free fuel. Ethanol likes water and ethanol-based gas draws moisture out of the air. The longer you leave ethanol based fuel sitting around the greater chance you end up with not only bad gas but bad gas mixed with water. So, always use ethanol free gas to eliminate a lot of issues. If you cannot find any ethanol free gas, try to at least purchase from a busy station to reduce the chance of moisture already in the fuel. We have even experienced, bad gas causing a hanging idle and overall make bad performance in the bike which can make intense riding or racing frustrating. We recommend the use of VP Fuels and are an official dealer. More Posts Back To Blog Page

Should you be using VP Fuels? Read More »

Scroll to Top