wrench tip

Wrench Tip Wednesday: Installing Handguards

Wrench Tip Wednesday: Installing Handguards Being an off road rider usually means you will see handguards on the dirt bike. But why is that? Obviously, to protect. Handguards keep your hands and levers safe on the trails, through the trees, down the creeks, anywhere you might go on a dirt bike. I am an off road rider, so handguards are an absolute must! I prefer full wrap around ones and most do. The following describes how to install full wrap around handguards. Before installing, choose which style you want! For the last five years, I have used Enduro Engineering handguards and deflectors. I like the way they look and the durability. But there are so many options out there! Start off by trimming the end of the grips off with a razor blade. This allows the inserts to go into the bars. For bar inserts, threaded ones work best! This helps handguards stay in place even during the craziest wrecks. Bullet Proof Designs or SRT both make threaded inserts. If your bars have not been previously threaded, you will need to use the tap to thread the bars. After that is finished, put the bolt through the indicated place on the handguard, insert into the tap, and start threading. Do not tighten all the way down yet. Next up, install the handguard clamps. Enduro Engineering sells bar mounts also. If you run Flexx Bars, you will need the special mounts for those bars. Do not place the mounts where any wires or cables run. After the mounts are installed, attach the hand guard at the opposite end where it is currently unattached. Tighten this end all the way down. Go back to the grip side and tighten that down. Install the deflectors, which just screw on to the metal handguards. All finished! Do another check to make sure the handguards are not pinching any cables or wires. Be sure to turn the bars right and left to ensure nothing unpredicted becomes pinched during your next ride! More Posts Back To Blog Page

Wrench Tip Wednesday: Installing Handguards Read More »

Keep Calm & Work on Your Dirt Bike!

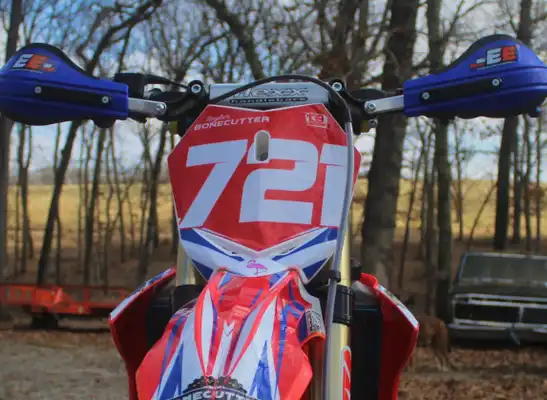
Keep Calm & Work on Your Dirt Bike! Have you been told to stay home? Sounds like it is the perfect time to do some much needed maintenance to your dirt bike! For starters, is the dirt bike clean? Like really clean? No – OK well give it a good scrub. In this particular scenario, I recommend going all out! Wash it, scrub it, remove plastics, tank, scrub some more. Remove the air filter and install the filter box plug then clean the air box. Lay the bike on its side. Really focus on getting every spec of dirt off. You do have a lot of free time. When washing the bike, pay attention to anything that is loose or broke and take mental notes to take care of it. Before doing anything else, refer to your previous entries in the dirt bike diary. Compare current hours to the hours the bike was last worked on. This will give you an indicator of what the bike needs before it has issues at the next ride or race. Preventive maintenance is far cheaper in the long run. At this time, general maintenance is needed. Below is what I consider routine maintenance, should be done after every race and every other ride, give or take. Clean the air filter. Let it dry before reinstalling. When installing apply oil to the air filter and a thick bead of grease around the rim. If rim grease is failed to be put on, the filter will allow dirt into the carb and it will cause many pre-mature problems that could have been prevented. So, oil the filter well and don’t forget the thick bead of grease on the rim! Check the spark plug! This lets the mechanic know how the bike is running, too lean or too rich. Plus, changing or cleaning the plug helps reduce the chances of fouling a plug. Bleed the brakes! Losing the brakes is super scary and usually can be prevented. We always bleed our brakes for insurance. Inspect the brake pads and make sure they do not need to be replaced. Change the oil! Keeping clean, fresh oil in the bike helps prevent premature wear. For Beta, we recommend Motul Transoil or Motul 7100 10w-40. For Sherco, we recommend Bel Ray Thumper. We have found that these oils are excellent quality and last longer than most which equals less oil changes. If you ride a 4t, don’t forget to change the oil filter. Check the battery! Most electrical failures go back to a battery that is not charged, connections are corroded, or connections are loose. Just be sure to check that it is charged and has no lose connections. Loose connections can cause damage to the battery. Keeping an eye on the battery also helps know when it is getting weak and should be replaced. Keep the chain clean and lubed! But do not forget to check the chain and sprockets! Are your sprockets missing any teeth or starting to curl? What about the chain, has it seen better days? A chain breaking or derailing can be expensive and dangerous. It can’t always be prevented but you’ll be on the safer side if condition as well as the masterlink are checked. Check the coolant! It isn’t a great idea to start with coolant levels already low and risking the chances of overheating and bike failure. Remember, do not mix different brands. If coolant is low and you are unsure what is in it, you are better off to drain it and start fresh. If you run tubes in your tires, check the air pressure. Or go a safer route and run Bib Mousses! Check the spokes! Make sure they are not loose or broken. Be sure to not overtighten because it could result in them breaking during the next ride. Lastly, go around the entire bike and make sure everything is tight. While doing this, do a visual inspection and see if anything else needs attention. Like are the cables in good shape? Have any leaks? Check to make sure all bearings are in proper working order and not seized or loose. If in good condition, add grease to them. Make sure all bolts are tight, engine mount bolts, subframe bolts, frame bolts, axle nuts, bar mounts, etc… This is just a basic list. The number of hours on the bike ultimately depends on what all is required for the next ride, it could be top end time! Keeping up on routine maintenance sounds expensive but in the end it will for sure save you more time and money in the long run! Let’s be productive, get your dirt bikes in tip top shape, support local shops, and let’s ride! More Posts Back To Blog Page
Keep Calm & Work on Your Dirt Bike! Read More »

Protect your Noggin

Protect your Noggin Many people think of dirt bikes as dangerous but truth is anything a person can do is dangerous. With the proper protection like a good helmet, injury is reduced. If the helmet doesn’t fit properly, protection is reduced. No idea how to measure your head for proper fitment? To measure, use a tape measure and go around your head’s circumference (around your entire head), one inch above your eyebrows then compare the measurements to a size chart for the brand you are purchasing. Measuring your head is just one thing that should be done. Here are more tips and tricks to determine if the helmet it one is the correct size. It should feel snug but not too snug that it is uncomfortable or painful. Tighten the chin strap then move your head in all directions, no movement should happen. If movement does happen, you need a smaller size. Put your hands under the back of helmet and pull it forward. You should not be able to pull it off your head. Check to see if you can put one finger between the helmets padding and your forehead, if you can, you need a smaller size. The helmet should feel slightly snug on your head but you should not notice excessive pressure, this excludes cheek padding. If excessive pressure or causes pain, the helmet is too small. When should a helmet be replaced? A helmet will not last forever, even without a wreck. If a wreck does happen and you hit your head, replace the helmet immediately. Once a helmet has received an impact, it is no longer safe to use. What if you have no impacts? Just like your bike, wear and tear does happen to the helmet. The lining and pads can get wore down to the point of the safety being significantly reduced. I ride roughly 200 hours in a year’s time, so for me, one year is max! Just try to use your best judgment and if you really don’t know, ASK! Take care of your helmet! After every ride, clean the helmet and visor. Don’t forget about the sweaty smelling lining and cheek pads. It can be hand washed in the sink or use a helmet clean/care product. I like to use Motorex Helmet Care. It smells great and shines the helmet nicely. Also, do not store your helmet in a place where it could fall. Now on to the biggest question most rider’s ask, what helmet should I buy?! This is my opinion and everyone is entitled to an opinion. If you want an excellent, type of line helmet, I STRONGLY recommend the Fly Formula helmet. It fits good, its comfortable, ultra-light, AND it has the best protection available on the market. It is certainly worth the money. MSRP price is $649.95. This helmet comes with a Fly helmet garage and an extra visor. Below are key features to this helmet: DOT/ECE Approved 12K carbon fiber shell-Produces an extremely lightweight shell with superior penetration resistance Impact Energy Cells-Made of RHEON, the Impact Energy Cells maximize absorption of low speed linear and rotational impacts, reducing forces transmitted to the brain. Conehead® EPS Technology-Provides a softer liner whereby the cones help manage or absorb an impact force more efficiently. Six critical zones have been fine tuned for a progressive response to low-speed and high-speed impacts Expanded volume EPS-Strategic areas of the helmet have more impact absorbing EPS, more suspension between your head and the ground EPP chin bar-Expanded polypropylene creates an additional element of impact mitigation Clavicle shell relief zone-Creates a soft zone filled with EPS and EPP to aid in reducing clavicle injuries Lightweight Custom visor screws and titanium alloy D-rings Comfort liner and quick release Cheek pads are made of a washable moisture wicking, anti-microbial material True Functional Ventilation (TFV)-When in motion air is forced through multiple air intake vents, then passed through aligned vent channels in the EPS and exits out multiple rear exhaust vents. My next choice would be Fly F2 Carbon Helmet. Before the Formula got released, this was the helmet I had been wearing for the last three years. The MSRP price is $299.95. Below are key features for this helmet: ECE/DOT approved Carbon Matrix composite shell Dual-density EPS (Expanded Polystyrene) liner Custom rubber trim with integrated nose guard Lightweight machined aluminum visor screws Stainless steel rivets and D-rings Removable and washable COOLMAX® comfort liner and cheek pads All FLY helmets have TFV (True Functional Ventilation). When in motion air is forced through multiple air intake vents, then passed through aligned vent channels in the EPS and exits out multiple rear exhaust vents Quad-vent above eye port draws air from goggle to reduce fogging A third option that I recommend is, Alpinestars Supertech M10. MSRP is $649.95. Below are key features for this helmet: Weight of S-M10 is 1240g for size Medium (ECE) – 1340g for size Medium (DOT) Heat mapping tests have resulted in specifically designed ducting which produces a positive flow into the helmet over and around the rider’s head, improving comfort while riding and reducing the on-set of heat stress in extreme conditions. Post-crash protection mechanisms are also a key feature of the Supertech M10 design, allowing rapid and safe intervention if the rider has suffered a major impact. MIPS is incorporated into the Supertech M10 to reduce rotational motion energies that impact the helmet causing damaging gyration force to be transmitted to the brain. Visor release mechanism is conceived to avoid the inherent weaknesses in other types of anchoring systems. Maintaining shell integrity is vital for safety and with the possibility of multi-directional forces impacting on the visor, separation at the critical point of loading reduces potentially damaging leverage and rotational accelerations that refer injury to the rider’s neck and spine. The base of the S-M10 has been sculpted to give a relief section, where the bottom profile is raised to clear the collarbone (Clavicle). Also, incorporated into the area of the

Protect your Noggin Read More »

Wrench Tip Wednesday: Short Legs + Tall Bike

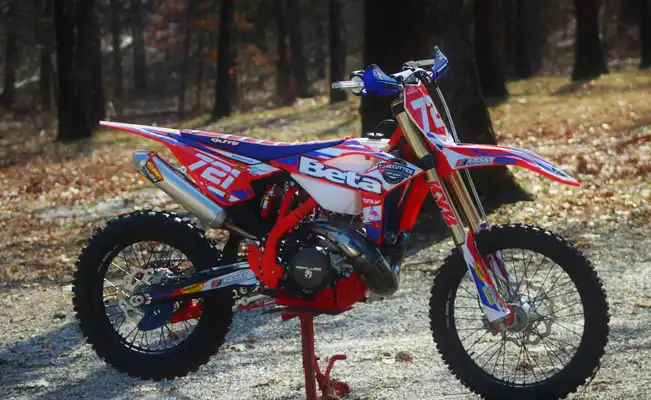
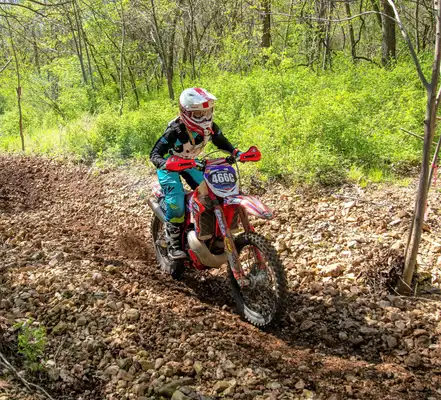
Wrench Tip Wednesday: Short Legs + Tall Bike When I moved up from a little TTR 125 to a full size 250, it was a shocker! My balance was bad and all I wanted to do was touch the ground. There are somethings a person can do to make it better but at my height 5’2, being able to touch flat footed on both sides is not going to happen. So, what do you do? ADAPT! You can lower the bike. It is recommended to lower it through the suspension instead of other options. 1 inch seems to be the most common. My current race bike, 2018 Beta 250 Race Edition is lowered 1 inch and I am personally glad I did it. It does help me in technical areas where I absolutely need to dab a foot. That much lowered only allows me tippy toes. Another option that many riders do is buy a Seat Concepts low seat. It does make you feel lower to the ground. BALANCE is key! The better your balance, the less you will have to rely on needing to touch the ground. I recommend doing balance drills on and off the bike often. It makes the difference. Pay attention! Don’t just stop and put your foot down. That will bite you more times than not, I know from experience. Plus, when riding with a group and you randomly fall over from not being able to touch is embarrassing. Try to spot places that are more even ground when you want to stop. Another thing that used to bite me often, not keeping my feet on the pegs when in motion! It was always in my head; I need to touch the ground for more balance but that is wrong. It led to many unnecessary wrecks. It took many times of being told, “Keep your feet on the pegs, your short little legs will not be able to touch anyway.” Being short, a big bike might be intimating and seem heavy to balance. Use your legs! Ryan Hughes posted a great video the other day and explained this well! “The weight of the bike is low centered not up by the handlebars so that means your control of the bike should also be low, your legs.” There is a lot more strength in your legs than your upper body, use it as much as you can. Lastly, be confident. Know you have the ability to ride a full-size bike. If you believe it, you can do it! More Posts Back To Blog Page
Wrench Tip Wednesday: Short Legs + Tall Bike Read More »

Wrench Tip Wednesday: Snapping a Chain

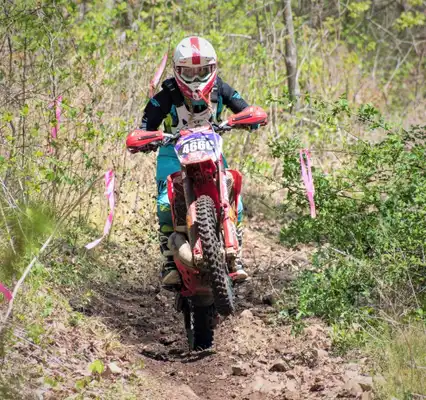
Wrench Tip Wednesday: Snapping a Chain How many of you have ever had a chain break? Better yet, how many of you use a slave cylinder guard? If you have a chain break, it can be very expensive! How do you prevent breaking a chain? It can’t always be prevented, but be sure to do a pre-ride/race check every time. The chain needs to be lubed often anyway so just check while you are doing that. If the chain looks rusty or corroded, has a flat wear pattern on the top and bottom, and/or demonstrates easy side to side play, then it is time to replace the chain. Sometimes a chain within its service limits, breaks. It could happen for many reasons: Master link clip falls off A rock or stick gets stuck in the chain stretching it No good reason at all Or the best one yet, the pre-ride inspection was not done A rider may never have a chain break on them but for insurance, use a slave cylinder guard. If you do not and the chain snaps, it will break your slave cylinder and case. The sound of that is expensive! Not all the cost of parts but the labor costs too, it is not a difficult job but requires time. Enduro Engineering makes slave cylinder guards for both Beta and Sherco. Other good options include, Topar Racing, Force, and Beta Boano slave guards. Bonecutter Off Road carries all these options – can be ordered through our online store! If you are in need for chain, you cannot beat quality. Our recommendations are the Firepower Gold O-ring chain, D.I.D. Gold O-ring chain, or SRT Gold O-ring chain. I have been using the Firepower chains on my bikes for over a year now and I seem to get longer use out of them compared to other chains. Appearance wise, the chain looks good and durable. The first two pictures are what the worst case scenario looks like if a chain breaks and the rider has no slave cylinder guard. More Posts Back To Blog Page
Wrench Tip Wednesday: Snapping a Chain Read More »

Wrench Tip Wednesday: Dirt Bike Maintenance Checklist

Wrench Tip Wednesday: Dirt Bike Maintenance Checklist How many of you just hop on the bike for a big riding trip or race without going over the bike? It seems to be way more common than what I think is ideal. Preventative maintenance is always good idea versus the alternative, sitting out when you could be riding! This list that follows is what we do to all of our Beta’s and Sherco’s before a race or a big ride. Number 1 – Is your bike still dirty? Sometimes I do slack and fail to get my bikes washed in a reasonable time frame. With a dirty dirt bike, it makes working on it and inspecting very difficult. Plus, it gets the workspace dirty and not many people enjoy working in filth. SO – WASH IT! Number 2 – Review your prior entries in the dirt bike diary and compare hours then to hours now. How is a person supposed to know what the bike needs without a reference! Number 3 – If you properly washed your bike, you should of already removed your air filter. If not, go ahead and inspect it. If it is dirty, remove, clean, and re-install. Pro tip – when installing make sure the filter has grease on the outside and a thick bead around the rim! Number 4 – Check the spark plug! This lets the mechanic know how the bike is running, too lean or too rich. Plus, changing or cleaning the plug helps reduce the chances of fouling a plug. Number 5 – Bleed the brakes! Losing the brakes is super scary and usually can be prevented. We always bleed our brakes for insurance. Inspect the brake pads and make sure they do not need to be replaced. Number 6 – Change the oil! Keeping clean, fresh oil in the bike helps prevent premature wear. For Beta, we recommend Motul Transoil or Motul 7100 10w-40. For Sherco, we recommend Bel Ray Thumper. We have found that these oils last longer than most which equals less oil changes. Number 7 – Check the battery! Make sure it is charged and has no lose connections. Lose connections can cause damage to the battery. Keeping an eye on the battery also helps know when it is getting weak and should be replaced. Number 8 – Check the chain and sprockets! Are your sprockets missing any teeth or starting to curl? What about the chain, has it seen better days? A chain breaking or derailing can be expensive and dangerous. It won’t always be prevented but always check its condition as well as the masterlink. Number 9 – Check the coolant! It isn’t a great idea to start with coolant levels already low and risking the chances of overheating and bike failure. Remember, do not mix different brands. If coolant is low and you are unsure what is in it, you are better off to drain it and start fresh. Number 10 – If you run tubes in your tires, check the air pressure. Or go a safer route and run Bib Mousses! Number 11 – Check the spokes! Make sure they are not loose or broken. Be sure to not overtighten because it could result in them breaking during the next ride. Number 12 – Go around the entire bike and make sure everything is tight. While doing this, do a visual inspection and see if anything else needs attention. Like are the cables in good shape? Have any leaks? Check to make sure all bearings are in proper working order and not seized or loose. This is just a basic list. The number of hours on the bike ultimately depends on what all is required for the next ride, it could be top end time! Keeping up on routine maintenance sounds expensive but in the end it will for sure save you more time and money in the long run! More Posts Back To Blog Page

Wrench Tip Wednesday: Dirt Bike Maintenance Checklist Read More »

Wrench Tip Wednesday: Battery Maintenance

Wrench Tip Wednesday: Battery Maintenance Battery maintenance is often overlooked but almost just as important as an oil change, especially if you have a fuel injected dirt bike. I am not just referring to charging the battery but also checking the battery. Constant contact between the cables and battery is absolutely necessary. Keep in mind, anything that can be tightened can also come loose. Be sure to check the battery terminals where the cables connect to ensure they are tight. If not, the bike will not receive full charge. If it is a lead acid, sometimes it can leak. It will be white stuff around the battery terminals. Do not touch or sniff it. Put on gloves and remove the cables. Use baking soda while scrubbing with a wire brush to get rid of it. If left alone, the terminals can corrode. Ensure the battery is secure in the bike. If the battery moves around, it can be ruined or temporarily not work. Keep up on charging. If the bike is going to sit awhile, hooking up a battery tender is not a bad idea. If the battery charge gets low it could ruin the battery. Fuel injected four strokes are voltage sensitive and it is hard on the bike to let the battery go low. IMPORTANT – If you use a lithium battery make sure the battery charger used is for lithium batteries! I recommend a good quality battery. It can make or break you! I have had excellent luck with WPS house brand, Fire Power featherlight lithium batteries! I have one in both of my bikes and one of them is almost 4 years old with no issues! Lead battery wise, I recommend Yuasa. I know light batteries are the thing now but some manufactures, such as Beta, recommend a lead acid battery in their four strokes. More Posts Back To Blog Page

Wrench Tip Wednesday: Battery Maintenance Read More »

Wrench Tip Wednesday: Chains & Sprockets

Wrench Tip Wednesday: Chains & Sprockets Chain and sprockets are a wear and tear item. If the chain is not properly cleaned and lubed it can cause premature wear on the chain and sprockets. When washing the bike, put it up on a stand so you can spin the wheel and get every part of the chain cleaned. Immediately after washing, lube the chain up. I prefer good, sticky lube and not the kind that splatter everywhere! BelRay Blue Tac chain lube is my go to. After you have a clean bike, inspect the condition of the chain and sprockets. Sprocket condition can be checked visually by looking at the sprocket teeth. The teeth take on a hook shape when worn, and in severe cases, shorten and round off when maintenance has been neglected. The condition of the chain can be checked by putting the bike on a stand. Rotate the rear wheel and visually inspect the chain’s condition. As you rotate, feel the chain for tight spots or links that are stuck together. Attempt to pull the chain away from the rearmost part of the rear sprocket. If the chain can be pulled off the rear sprocket by a half sprocket tooth or more, it is time for a replacement. If the chain moves significantly side to side when pushed and pulled on the sprocket, wear has occurred. So, you are to the point of needing a new chain and sprockets. Most of the time, it is a good idea to go ahead and replace both sprockets and chain at the same time. If not, the items replaced can wear prematurely. Usually, the front sprocket wears out a lot quicker. First off, remove the master link from the chain. Then, remove the chain from the dirt bike. Now, go ahead and remove the countershaft sprocket (front sprocket). Before installing the new countershaft sprocket, clean up the countershaft area. The front sprocket has a retaining clip and it is important to make sure it seats all the way into the groove. Time to move to the rear sprocket, before removing the wheel, go ahead and loosen up the sprocket bolts. This just makes it easier to remove. When that’s finished, remove the wheel from the dirt bike. Then remove the sprocket bolts and nuts and pull the old sprocket from the hub. Spray contact cleaner on the hub to clean the area up before installing the new sprocket. Apply Loctite to the threads of the sprocket bolts. Snug the bolts down with a ratchet and an open-ended wrench in a star-shaped pattern. This will ensure that the sprocket gets tighten down evenly. Then use a torque wrench to finish tightening them, refer to your bike manufactures service manual for torque specs. While the chain is off, inspect the chain slider and rollers. If they are wore out or damaged, go ahead and replace. Put the rear wheel back on the bike. Typically, you will have a chain that is a little longer than the one on your bike. So, measure it out and cut what needs to be cut off. Typically, a grinder is an easy tool to use to do this. Otherwise, a chain breaker tool is needed for the job. For us, it’s usually 4-5 links. Align the chain up with the rear sprocket and thread it up through and around the front sprocket. Then slide it through the chain guide and back up around the rear sprocket. For an o-ring style chain, make sure the o-rings are put on each pin before installing the master link. After the master link is installed, it is time to adjust the slack in the chain. Do a visual check, most people can tell just by looking at the chain if it’s too loose or too tight. A good rule of thumb is the three-finger method. Put three fingers on top of each other. You should get three fingers in between the chain and swingarm. If not, it’s obviously too tight or if there is still a lot of slack with your fingers in there, it’s too loose. So, adjust it. Loosen the rear axle. Tighten the chain tensioner bolt to loosen chain. Loosen the chain tensioner bolt to tighten the chain. Make sure the chain blockers are aligned properly. Tighten the rear axle up. Check the chain again. I run Firepower Gold O-ring chains on all of my bikes paired with a 50T Supersprox rear sprocket and PBI front sprocket. For Beta & Sherco gearing recommendations, go to our tech tip section on the website. Cover Photo Credit: Shan Moore More Posts Back To Blog Page

Wrench Tip Wednesday: Chains & Sprockets Read More »

Wrench Tip Wednesday: Jetting

Wrench Tip Wednesday: Jetting Touching a carburetor on a dirt bike may sound scary or a chore to some. So, if you need carburetor work or jetting done, taking it to a mechanic may be a good idea. Jetting your dirt bike’s carburetor is determining the proper air-to-fuel ratio the engine receives. Running the correct ratio of fuel and air makes your dirt bike run well. Jets of different sizes helps increase or decrease the fuel/air ratio depending on what your bike requires and many other factors. Most dirt bikes off the floor might look “ready to ride” but that is not the case and some may require jetting changes. A lot of factors influence whether or not you’ll need to jet the carb. Such as, the weather, humidity, altitude, upgrades to engine or exhaust system, or sometimes routine maintenance. The carburetor consists of four components: Pilot Jet – this controls the amount of fuel when idling Main Jet – this controls the fuel when you open up the throttle (between 50 and 100 percent power) Jet Needle – this controls the fuel when you open and close the throttle (between 20 and 80 percent power) Needle Jet – this is what the jet needle pops in and out of (between 15 to 60 percent of throttle But how do you know if the bike needs to be jetted? After breaking in your dirt bike, it’s easy to determine whether you need to jet the carb. BUT it will require you to look at the spark plug. Take the plug out and if they look clean, you’re good to go. However, if you see black soot then you’re running rich, meaning you’ve got too much fuel. If you see white residue then you’ve got too much air flowing in or you’re running lean. Another way to determine is how the bike rides. If your dirt bike tends to be sluggish when you get on it and/or it backfires when opened up a bit, you’re probably injecting too much fuel. If your bike can take off in a sprint but lacks overall power, then you’ve got too much air. Jetting can be easy but also tricky. If you’re running rich, check the main jet, jet needle, and needle jet. First, tinker with the main jet and if that solves the problem you found the easy solution. If it doesn’t solve the problem then you’ll need to check the jet needle and then the needle jet. Don’t mess with all three jets at once. Change the main jet first and see if that solves the problem. If you change all three you’ll never know what jet posed the air/fuel mixture problem, you’ll overcompensate to lean and create a bigger problem than necessary. Your bike might run rich in the late summer months and then run lean come early spring. Elevations also mess with jetting because of the dense air. Higher altitude (thinner air) requires less fuel or leaner jetting to run correctly. Jets can be bought separately but we favor towards using JD Jet Kit. It comes with a chart and you just follow the directions of what to do and what to change based on where you’re riding and temperatures. It makes it so easy! Plus, you will have extra jets if you need them vs not having extras. More Posts Back To Blog Page

Wrench Tip Wednesday: Jetting Read More »

Wrench Tip Wednesday: Clutch Problems

Wrench Tip Wednesday: Clutch Problems How long a clutch will last depends on the rider and conditions. If you are hard on a clutch, you hopefully are already aware of that otherwise DNF’s could be in your future. When a clutch slips or is in need of replacement, peak performance is hard to come by, so get ahead of the game and preform maintenance. Sometimes, new clutch plates is not the issue, all components that make the clutch work should be checked. If the clutch lever feels harder when pulled, the cable might need replaced. A cable that is routed badly can also cause this. Make sure the cable is not getting hung up in the handlebars or even the handguards when turning. If it does, fix it, if you don’t chances of it breaking all the way through the line is high which can cause an avoidable DNF. A slipping clutch is annoying because it impacts the power the bike puts on the ground. If you are in a race situation, this feeling is even worse. It will still shift but the doesn’t want to go. You may even smell burnt oil. Generally, worn out clutch plates or pressure plates cause the clutch to slip. In order to figure out which or both is bad, the clutch will need disassembled. Then measure the thickness of both new and used plates using a micrometer. Wore out plates will have less thickness than new plates. The drive plate (steels or aluminum), pressure plate, and fibers all need checked. Sometimes, it is obvious without evening measuring. Look for burn marks on the steels and some bikes are equipped with aluminum plates which will wear quickly. We have even seen broken fibers. A worn-out clutch basket can cause poor disengagement. The power is affected greatly by this but instead of the gears slipping, the gears are sticky. The shift lever will have a delay when shifting through the gears. If this is happening to you, disassemble the clutch and check the fingers on the basket and make sure they are smooth. Over time, clutch plates wear grooves in the fingers of the basket which makes the clutch not disengage properly. Before pulling the basket, check the pressure plate wear, look for broken fibers, or warped steel plates because that is an indicator for clutch basket and hub wear. What does a clutch pack include? Clutch plates such as fibers and steel make up the pack. The basket, pressure plates, and cover gasket are not included. Some manufactures, such as Hinson, sell springs in their clutch packs. If you burn a clutch often, the springs definitely need to be replaced. Putting stiffer springs is also an option to lessen the wear or better yet avoid being so aggressive on the clutch. If you have an auto clutch, such as Rekluse, all above is the same. From our personal experiences, if a Rekluse auto clutch is set up correctly the clutch pack can last a long time. My race bike (2018 Beta 250) has 100 hours on it and is just now needing a clutch. Getting that much time on a clutch makes the price worth it! If a rider keeps up on oil changes the clutch will last longer than the rider who lets their oil get burnt before changing. Using good quality oil also makes a difference. For Beta we prefer, Motul Transoil and the Beta USA race team uses Motul 7100 10w-40 and it works out great in the 2t clutches. Sherco has a wet clutch so we use BelRay Thumper in it. Keep in mind, clutch issues can make or break you come race day so pay attention prior to race day how the clutch feels and what the oil looks like coming out of it. If you are hard on a clutch, own up to it and keep track of your hours. More Posts Back To Blog Page

Wrench Tip Wednesday: Clutch Problems Read More »

Scroll to Top