Business Hours

Sunday Closed
Monday 8:00 AM to 5:00 PM
Tuesday 8:00 AM to 5:00 PM
Wednesday 8:00 AM to 5:00 PM
Thursday 8:00 AM to 5:00 PM
Friday 8:00 AM to 5:00 PM
Saturday Closed

November 2018

Wrench Tip Wednesday: Set the Sag

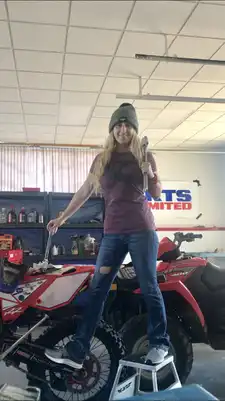
Wrench Tip Wednesday: Set the Sag WARNING, I am not a suspension expert but understanding how it works is something that interests me. Having the bike properly set up helps the overall rideability of it. I’m not saying you have to go spend a bunch of money to get your suspension tuned but suggesting to at least have your sag is set correctly. Doing so insures the correct size springs are in your bike along with allowing for better overall handling. The sag can be decreased to make quicker handling but will reduce high speed stability, this is good for tight courses because it can help improve steering accuracy. It is also recommended to do so in muddy conditions to handle weight build up. Increasing the sag, improves stability in high speed and sandy tracks. A spring too soft will ride high in the rear because it needs preloaded more than a stiffer spring. A stiffer spring will have a lower initial ride height but will feel firmer on bumps. Static sag is a measurement of the bikes distance that the rear end of the bike settles while on the ground, but only under the load of its own weight (no rider) and is checked before and after rider’s sag. For 125cc and above, the number should be 35mm +/- 5mm. Rider’s sag is the distance that the rear end of the bike settles when on the ground and under the load of the rider’s weight in full gear. This number should be 105 mm +/- 10mm. Linkage bikes should be 95mm – 105mm range and KTM PDS should be 105 mm – 115mm. If the measurements are above range values you need a softer spring. If it is below, then you need a stiffer spring. The most convenient and easiest way to measure is using Motool Slacker, a digital scale. Center the tool in the middle of the axel and always place the clamp in the exact same place every time. Put the bike up on a stand with both wheels off the ground and measure the static sag. Then, have the rider hop on in full gear and in “attack position”, standing not sitting in a granny position. Bounce up and down a few times and check the number. Just like anything, there is different way to do everything. I have heard some people like to stand up and then sit down naturally to measure the riders sag. Other people check both standing and sitting and do an average of the two. Everyone is entitled to their own opinion and this is just what I have learned over the years from experience and talking to different people. Have the rider get off and check the static sag measurement. Don’t have the digital tool? I hope you like math. A measuring tape can be used, preferably metric. Put the bike on a stand, with the wheels off the ground. Measure the distance from the rear axle to a vertical point on the rear of the bike. This is L1. Put the rider on the bike in full gear, standing, compress the rear suspension and slowly release back up. Measure between the two points rear axle to a vertical point on the rear of the bike. This is L2. Lift up on the rear slightly (about 20mm) and slowly release it downward, particularly at the end. If there was no friction it would continue to drop a bit more. Measure between the same two points. This is L3. The difference between lifting up L2 and pushing down L3 is caused by friction. If it is more than 4mm or 5mm the linkage needs attention. Sag is calculated by averaging L2 and L3 subtracting it from fully extended. Riders sag = L1 – [(L2 – L3)/2] As I mentioned above, if your linkage bearings are seized up, this prevents the rear shock working properly. Therefore, you will not get your sag set and your shock will not be moving like it should, you will be in for a rough ride. Keep up on your maintenance and your dirt bike experience will be much better. If further assistance is needed with setup Jim at Shock Zone Suspension would be a good place to go. Shoutout to the customer that got lucky enough to be in the picture to make sure I did not fall! haha I wanted to give a general idea of what it is like to check it. More Posts Back To Blog Page

Wrench Tip Wednesday: Set the Sag Read More »
Wrench Tip Wednesday: Greasy

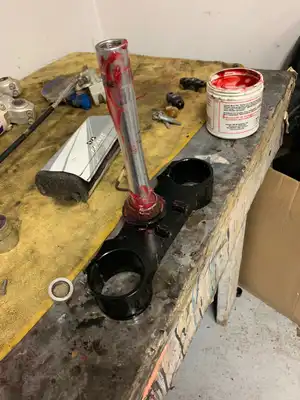
Wrench Tip Wednesday: Greasy When it comes to grease, use it like you have an endless supply. Keeping the bearings lubricated with an amble amount of grease can extend the life of them. This simple task will make them last longer and in the long run it will be cheaper. Most new bikes come with grease on the bearings, but normally it is not a sufficient amount. While the bike is still brand new, we like to take it apart and add additional grease to the steering head, wheels, linkage, and swingarm bearings. My #1 rule of thumb is, anything that makes parts last longer, is worth it. Bearings are a moving part with lots of friction. Think about the times you’ve ridden your bike in sand, mud, water, and other outside elements…that’s like every time you ride, right? Packing the bearings with waterproof grease protects the bearings from the elements and can also reduce the amount of friction. Not enough grease will allow water and dirt into the bearings, which will make it go bad fast!! Check the bearings often. Every time you prep the bike for a race, check for free play by spinning, twisting, or agitate each part side to side to feel for notches, restricted movement or excessive free play. Failure to replace wheel bearings when needed or keeping them greased can result in needing to replace the hub. That can be costly so be sure to keep an eye on it. Your bike have linkage suspension? Be sure to check that often otherwise your rear suspension can seize up. Swingarm bearings gone bad can also affect how the bike handles in the rear. Point is, do not be afraid to put some good waterproof grease on the bearings.. A LOT OF IT! More Posts Back To Blog Page

Wrench Tip Wednesday: Greasy Read More »

Wrench Tip Wednesday: Too Tight to buy Oil

Wrench Tip Wednesday: Too Tight to buy Oil Man, dirt bike specific oil is high! Can’t I use automotive oil and just change it every time? My answer is no but you do what you want. For starters, lets talk about the oils journey in the engine. 4 strokes use a recirculation oil system. Oil is forced into the filter by an engine driven pump. The filter picks up large particles that should not be there. After it goes through the filter, the oil enters the oil pump and then fed throughout the engine. Minimizing heat and friction build up is important. Low quality oils fail at doing this. The next concern is premature wear. Automotive oil lacks cleanliness or detergent. This can increase deposit accumulation resulting in power loss. Automotive oil can increase clutch slippage in bikes with wet clutches. Even bikes with split cases, using the cheap oil in the clutch side can cause faster wear to the clutch plates. In a years’ time, more money will be spent using the “cheaper oil” due to more frequent oil changes, oil filter replacement, and premature engine wear. So, I recommend sucking it up and spending the extra money on dirt bike specific oils. In the end, it really is cheaper even if the price on the bottle does not look that way. BETA RIDERS – Beta recommends Motul in their bikes, Transoil on the clutch side and 7100 10W-40 on engine side. Motul 7100 4T runs cooler than most oils and will work well in 2T clutches. Sherco has a wet clutch (meaning the cases are not split and the clutch and engine oil are in one spot), so make sure you are using a wet clutch oil such as Bel-Ray Thumper. More Posts Back To Blog Page

Wrench Tip Wednesday: Too Tight to buy Oil Read More »

MHSC B Class Champ – TEAM BETA

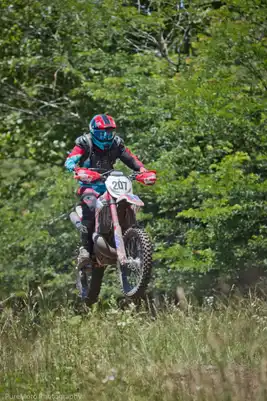
MHSC B Class Champ – TEAM BETA One of our local riders has had a ton of success this year on his Beta! Below, Jared Cheatham talks about his stellar year. “Hello, I’m Jared Cheatham, I’m 25 years old and been riding dirt bikes since I was 7, but just started racing in 2016. I generally rode Yamaha’s all my life. I started from the little ole PW80 to a trusty little (Honda) XR80, to a mean zippy little yz 85. That thing was a rocket, kudos to all you little kids that race them bad boys! I then made a huge step to a yz250 that was handed down from my dad. I rode that bike most my life. But when it came to racing Hare scrambles it just wasn’t my ticket. I tried a newer yz250f four stroke for racing. It was an amazing bike to learn all the finer details I needed for the hare scrambles. It helped me learn better clutch control for traction and a bit of cornering and just fitting in between the trees. Anyone that knows me and knows how I ride can probably say I still haven’t figured that out. But that still wasn’t my ticket. I didn’t know how to break and it just fell short of pace. One January 5th, 2018 I bought myself a very nice little B.E.A.U.T.Y. I purchased a brand new 2018 Beta 250rr Race edition! The day before was the 2017 MHSC award banquet, and guess what. The Bonecutter’s being the nice people they are brought my exact bike to show-off the 2018 bike models. I was more than stoked to see it there. Just the looks of this bike is out-standing! Sleek, sharp white fenders with the red white and blue graphics, matched with a nice, firm red and blue seat; begging for the woods! Finally, I ended up getting some good quality seat time in and started racing this beast almost immediately. This bike is honestly just an engineering masterpiece. I felt comfortable with this bike very quick. I was a mid to lower pack “B” class rider in the MHSC series coming into the 2018 season. With this bike I jumped straight to middle-upper “B” class, battling with others and really gaining motivation to push. And this bike was ready for it! I ended up pushing and battling my way up to the top. This was a rollercoaster but staying focused on 1 goal I accomplished it. I ended up placing 1st in “B” class championship. Words can’t describe how happy I am to pull this off. I never won at anything growing up and to accomplish this was HUGE. This will forever be a huge chapter in my life and I’m glad I can say I did this on my Beta! Let’s just say this race season was everything but dull! I worked my way up from 6th to the top three with a couple 1st places on top of it. The first couple races were wet, and with a new bike I was nervous. I knew this would be the time where I could get hurt the easiest. I ended up purchasing some better protective gear and my confidence sky rocketed. The second race was wet and slick, the year previous I hated it. I couldn’t get into the flow and it was just ruff. But this new Beta just sucked it up! Taking these huge hits with how slick and muddy it was soaked up just like riding on a couch. I ended placing second this race and I wanted more! Every race ended up being this way, even reaching the classes ahead. I passed, got passed, and battled my way to the top. I didn’t give up! Towards the end of the season the courses got rougher and faster, which I was ready for with my 250rr. My most fun experience this year was probably traveling out to Tennessee to race in the Tennessee Knock Out(T.K.O). This race was ridiculous, located in the Smokey mountains so of course the hills were massive. The day before it rained all day and night. It made this already stupid hard course an easily 207 times harder. I was determined to finish. The lap was only 16 miles. Nothing too crazy right? Wrong… Rock gardens everywhere along with hills and mud, more rock gardens and hills and people down in the easy lines. I was gassed like no other but somehow still managed to have fun, challenging myself learning along the way. Unfortunately I was not able to finish. I timed out on my first lap disappointingly just a mile from the end on this damn near impossible hill that was just snotty mud. The atmosphere of just nothing but what I love and love doing made this trip what it was. The courses were all a blast with this Beta! It handles like a dream and engine is just so smooth on power delivery. A smooth engagement and great feel. No matter if it was tight and technical or fast and flowy it ate it. I love the faster courses just flowing brushing trees. The feeling of just flying and dodging anything in your path, but the tight technical is where this thing shines. Stop on a dime brakes with very good bar feedback. I can’t wait to hit “A” class in 2019 looking forward to growing and pushing harder. So, get ready “A” class I’m coming to bang some bars!! Through this whole race season, the people and friends along the way were incredible. I honestly couldn’t have done it without the couple of people that helped me, coached me, and talked me through everything and was just present in my life. They deserve everything that I accomplished and more. Thank you!” – Jared Congrats Jared on your season, we are looking forward to seeing you in the A class in 2019! Good luck! More Posts Back To Blog Page

MHSC B Class Champ – TEAM BETA Read More »

Gobbler Getter National Enduro

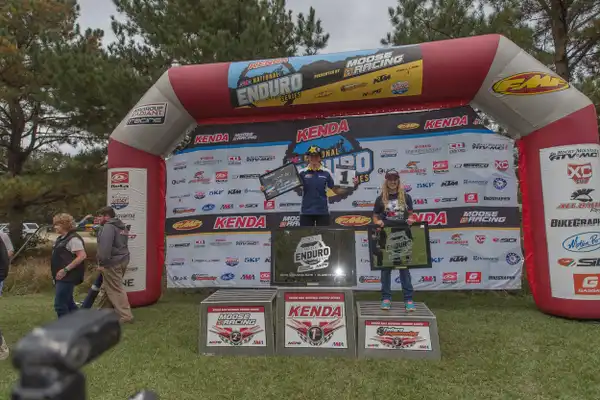
Gobbler Getter National Enduro Final round of NEPG took place in Stanton, AL. I have never ridden in Alabama but had heard it to be sandy, big whoops, and be aware of wet red clay in corners. A little over an inch of rain earlier in the week made conditions AMAZING! I mean, the dirt was PRIMO!!!! The first two tests were 8 miles each and brutal! 3 ft whoops to very tight trees was very demanding and kept my heart rate high. I could not find a flow through the whoops. I was really hoping all the tests would not be this bad. I reminded myself to stay positive and have fun. Test 3 was a short one. All I really remember about it was, I liked it more than the first two and I wrecked one time. Test 4 was another 8.8 miles but I was finally feeling like I could ride. The huge whoops were minimal and only a few tight tree sections. It flowed good, with hills and occasional rock. So far this was my favorite test and left me excited for test 5. In between test 4 and test 5, I had a 20-minute break. I sent my mom a text to see how I was doing. She said, “you really need to get focused for test 5, you are 1 minutes and 40 seconds from 4th place”. That was more than enough to get me pumped. Before the test started, I put in my head this is the last test for the year and so what if you have a hard wreck, just focus, ride, and make every second count. Right off the bat they shot us up Perry Mountain, a long flowing uphill. Only a few whoop sections, some muddy clay corners, rocks, uphill’s, downhills, a little bit of everything! I felt like I was riding well and the 10 miles went really fast!! Having my mindset different really showed in my times between test 4 and 5. Test 4 was 8.8 miles and it took me 34 minutes and 22 seconds. Test 5 was 35 minutes and 47 seconds. By the end of the enduro, I decided this place was not bad and actually fun. I finished the day in 5th place, down from 4th by 39 seconds and 3rd by 5 minutes and 21 seconds. I have learned a lot this year about riding in different terrains and how to push myself. Prior to Alabama, my dad wrecked really hard and dislocated his shoulder, resulting not getting to race. He was super bummed but joined Frank to help pit. Gobbler Getter Results: A +40 – Steve Leivan (Sherco) 1st A +40 – Scott Boyer (Beta) 3rd Womens Elite – Tayler Bonecutter (Beta) 5th NEPG Year End: A +40 – Steve Leivan (Sherco) CHAMPION A +40 – Scott Boyer (Beta) 3rd A +50 – Steve Bonecutter (Beta) 2nd Womens Elite – Tayler Bonecutter (Beta) 3rd Photo Credits: Shan Moore and Patrick Smith More Posts Back To Blog Page

Gobbler Getter National Enduro Read More »

Hillbilly GP – Lu’s Place

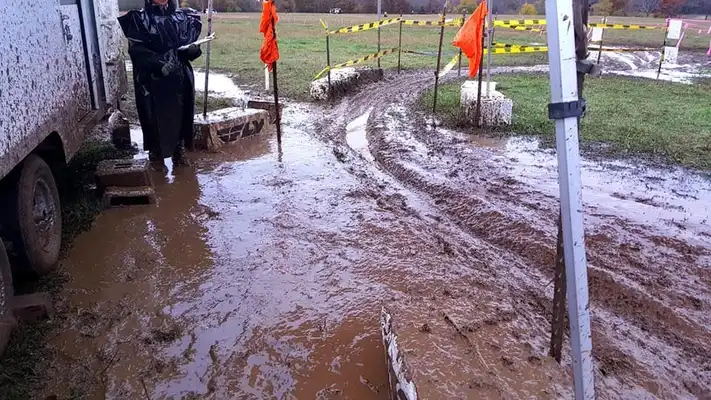
Hillbilly GP – Lu’s Place My dad and I raced the last round of NEPG last weekend but Wyatt decided to hit up the opening round of the HBGP. Sunday was a cool, cloudy day and overnight rain made conditions wet. The field had standing water and scoring lane got a little soupy. Late fall-winter racing requires riders to “Hillbilly Up”! Wyatt’s Race Report: “14 Pros on the starting line. I was about mid pack off the line. The trail was muddy but still fast and fun as always. My favorite section was the creek, I could blast through there. My clutch burnt up during the first lap, so I could not charge as hard as I wanted. I did 8 total laps causing a lot of trail traffic. During the riders meeting, Chili gave his usual speech about lappers getting over for the faster riders but no one seemed to listen. I had zero wrecks, made some passes, and finished the day with 5th overall.” – Wyatt Bonecutter GREAT JOB to Wyatt and all of our other Beta & Sherco riders!! Bonecutter Off Road Results: Pro – Wyatt Bonecutter (Sherco) 5th C Vet – Jeremy Harris (Beta) 5th C Vet – Aaron Shepered (Beta) 9th C Vet – Mike Rothganger (Beta) 17th C Vet – Travis Opie (Sherco) 23rd C Vet – Rob Steele (Beta) 26th C 45+ – Jon Hill (Beta) 27th Women – Kylie Harris (Beta) 3rd More Posts Back To Blog Page

Hillbilly GP – Lu’s Place Read More »

Wrench Tip Wednesday: Dirt Bike Diary

Wrench Tip Wednesday: Dirt Bike Diary Do you write a diary about your dirt bike? If not, you should and not just write about how much you love your bike. You need to track stuff, regarding hours, conditions of what you are riding, work done to the bike, etc..? Some riders tend to wait until something fails on their bike before fixing it. Wouldn’t it suck to pull up to the start and all of sudden your clutch does not work… Something to ponder on How many legitimate hours are on your bike? The only accurate way to know is to use a hour meter vs mentally keeping track. The problem with mentally keeping track is, did you really ride for 2 hours or was it really 30 minutes ride time and talk for the rest. Hour meters do not lie. There are two types of hour meters: -Wireless, which runs off engine vibration. When transporting a bike, sometimes a meter can vibrate and add hours to it. Now, PC Racing makes a meter that can be locked when not riding. -Wired, the wire attaches to the coil or spark plug Most of our bikes have wireless ones on but we do still have a few wired ones on and no complaints on either. Now that you are properly tracking your hours, it is time to talk about the diary. EVERYTHING needs to be wrote down! Dates, current hours, what kind of oil used, what has been changed and why, maintenance, literally every little detail regarding the bike. It is the most accurate way to keep track of work done. All manufactures come with a maintenance manual, it shows at “X” number of hours certain things should be checked or even replaced. An example is, Beta recommends on 2 strokes around 65 hours it might be time for a top end. Writing everything down sounds like tedious work but in the end, it takes less time doing that than the time and money wasted from a mechanical DNF. More Posts Back To Blog Page

Wrench Tip Wednesday: Dirt Bike Diary Read More »

Scroll to Top