Business Hours

Sunday Closed
Monday 8:00 AM to 5:00 PM
Tuesday 8:00 AM to 5:00 PM
Wednesday 8:00 AM to 5:00 PM
Thursday 8:00 AM to 5:00 PM
Friday 8:00 AM to 5:00 PM
Saturday Closed

October 2018

Wrench Tip Wednesday: Dirty Bike = NO GOOD

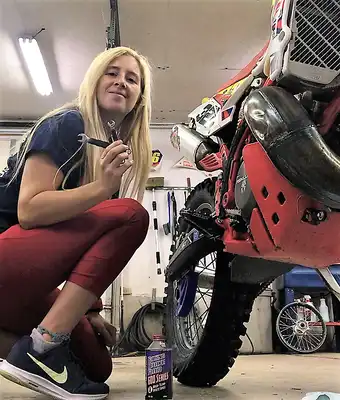
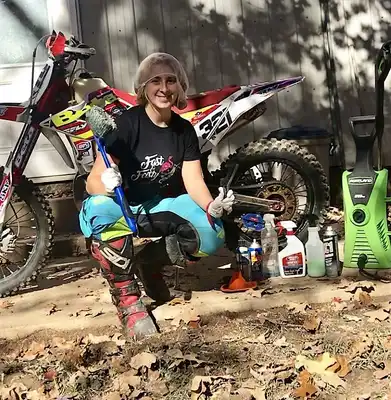
Wrench Tip Wednesday: Dirty Bike = NO GOOD A clean bike is a happy bike. I get extremely bent out of shape if my bike is dirty for long. Washing bikes is tedious work and I personally do not enjoy it but I can’t stress the importance of it enough. When the dirt bike is clean, it is easier to inspect damage and work on. What is your opinion, is it a good idea to have dirt clumps falling inside the engine or reservoir’s? How I wash my bike varies on the scenario. It depends on if it was a mudder, what needs worked on, or just needs cleaned. If the bike is just typical dirty and it only needs routine maintenance, I do not take a lot apart. Pull the seat off and install an air filter plug. When it is a mudder, I remove EVERYTHING after washing to my best ability. If you have never done this, you would be shocked at how much dirt hides in the little crevices of the bike. If it is rebuild time (no matter how dirty), I pull the seat, air box cover, and the tank. Anytime the tank is pulled off, make sure the fuel line connection is blocked off. Removing the tank and plastics leave a lot of wires exposed, make sure you don’t spray an excessive amount of water on them. Time to learn how to scrub! Major key items; power washer, scrub brushes, and soap. Without them you are wasting your time. I first rinse as much dirt off as possible. Then, I will lay it down on its side. This helps get areas hard to see clean. For soaps. I use purple power, bleach white (for white plastics), or Maxima Biowash. Before using any type of cleaner make sure the bike is wet and DO NOT let it sit too long. Most cleaners can stain. Once the soap is applied, I start scrubbing and immediately following I will wash it off. If you run a raw header that is not completely rusted, a good way to clean it is purple power and Brillo pads. Brillo pads can be used on any raw metal service, to bring the shine back. Make sure you are not just focusing on plastics. Mud that sits in bearing or seals makes them go bad faster. Get the chain clean. Let’s just go with, there should not be any dirt or grime on your bike when you are finished washing it. After washing, use an air nozzle and blow the bike off. Use common sense and do no blow places off you shouldn’t. Over time the bike and plastics start to look dull, Maxima SC1 smells wonderful and will brighten it back up! Lastly, apply chain lube to the chain so it won’t rust. If you have a raw header such as FMF Fatty, make sure you oil it. I prefer to use Lucas Tool Box Buddy, it is nice and thick. Now that you have a sparkly clean bike, you should have an idea what needs fixed and it is time to get to work!! More Posts Back To Blog Page

Wrench Tip Wednesday: Dirty Bike = NO GOOD Read More »
Wrench Tip Wednesday: Spark Plugs

Wrench Tip Wednesday: Spark Plugs Alright, lets show up to a race or play ride day with a bike not wanting to start. Kick and kick, no fire. By the time you start thinking about what is wrong with the bike, you are already physically exhausted. Majority of the time, it is the spark plug. How important is a spark plug to a dirt bike? A lot of people say they have never fouled one so they do not check or replace it. It all comes down to personal preference on preventative maintenance but realistically it is one of the cheapest things to replace, so why not? Let’s start with this… Do you know what the purpose of a spark plug is? It fits into the cylinder head and the plugs purpose is create a spark to ignite the fuel. The plug is connected to the ignition coil. NO SPARK = NO START A spark plug can tell you a lot about how the bike is running by the color. Light grey or light tan means your bike is running well. You can spray contact cleaner on it to clean it up and reinstall. Carbon fouled has black dry soot on the electrode caused by a dirty air filter, riding at low speeds, bike is too rich, or has been idling too long. Oil fouled has black oily deposits on the electrode caused by oil leaking into the cylinder, finding the source of the leak is important. A wet looking plug is caused by flooding the engine. It can be cleaned and reused. Burned looking, melted electrodes, or white deposits means the bike is running too hot. It can be caused by engine overheating, wrong spark plug, plug being loose, incorrect ignition timing, or the bike is too lean. Worn looking electrodes means the plug has been in the engine too long and is ready to be replaced. How to change the spark plug: Remove the spark plug wires by pulling off the cap, do not tug on the wires because it can damage the connection with your spark plug cap. Make sure you have the correct spark plug socket and attach it to the ratchet. Loosen the plug and finish removing it with your hand. Inspect it and decide if a new plug is needed. Generally, if it is borderline right before a race, we replace it. I know some people still gap their plugs but we do not. We inspect it, make sure it is not damage and install it. Majority of the time they are already pregapped from the manufacture. Go ahead and install the plug, tighten it, and put the plug cap back on. Being around my dad has made me very particular on a lot of things. It is like everything he has ever taught me just replays in my head, “do this, keep this” and so on. So, I like to keep an extra plug for both my bikes in my van, gear bag, and another in the fanny pack. There is no such thing as being too prepared but being unprepared is common! More Posts Back To Blog Page

Wrench Tip Wednesday: Spark Plugs Read More »

Solo Ride

Solo Ride Fantastic weekend! No racing for me meant the perfect time to get the 2018 dialed in for Alabama in a few weeks. Beautiful weather, primo dirt, and by far one of the most enjoyable times riding by myself. Once my breakfast settled Saturday, I geared up. I did not really have any plans to work on anything specific, just wanted to be on the bike. After I finished my AM ride, I took some time to reflect on what I could do better. The first thing that came to mind was FOCUS. I really needed to be in the present moment, not letting my mind wander, or let negative thoughts creep in. I geared back up and it was time to truly focus! Anytime my mind started to leave the now, I started to count and soon enough the concentration was back. Reflecting on the afternoon ride, I had way less fear on trying new things and overall just rode good. I sincerely enjoyed it. Saturday night, I decided to do a night ride. A humongous rock, a wreck, broken radiator, and a bent header cut that short. I don’t have a wild story, I just simply hit the rock and hit the ground. If you have never been night riding, I strongly suggest to get some Task Racing lights and give it a shot. It is so exciting and everything looks cooler in the dark. Original plan was to do more riding on Sunday but I was not sure if my bike would be fixed. Luckily, the mechanic (my dad) is an early riser and got it all fixed up in the morning. I rode a very intense 45 minutes going back and forth between the moto track and the trails, keeping my heart rate average at 185 and a max of 199. I felt good and was riding well. My nephew showed up and saw Aunt Tayler was riding, so of course he had hop on his bike! It was the first time he had been on the bike all year and he did wonderful. After he got really comfortable and knew which way to go, I decided to work on logs, controlled wheelies, and balance. I will admit this was not a very fun thrilling post but I wanted to remind everyone to always think about how you could better yourself on the bike or in everyday life. Know your weaknesses and learn from it. Random thought to end this post with; CONTROL YOUR FOCUS – BE CONFIDENT – BE POSITIVE – ALWAYS LEARN More Posts Back To Blog Page

Solo Ride Read More »

Wrench Tip Wednesday: Bleeding Rear Brakes

Wrench Tip Wednesday: Bleeding Rear Brakes Are you a rear brake rider? Well, I am no professional but I have learned in the past year that if you are in the so called “proper position” on the bike (STANDING ON YOUR TOES) it is impossible to ride your rear brakes. Anyways, back to the point, do you bleed your brake fluid before or after every race? It is not a must but I personally prefer doing preventative maintenance, the risk of losing the rear brakes in a race is not worth it to me. First step, make sure you have brake fluid on hand. There is a lot of good brands out there varying in prices and boiling points. If you boil your fluid often, I highly recommend Castrol RBF or Motul 660 RBF. Another good brand out there is Maxima RBF. Next, remove the rear brake reservoir cover. Try to avoid getting any dirt or debris inside. I go ahead and pour brake fluid in and top the reservoir off. Attach a clear piece of tubing to the bleeder nipple (located on the brake caliper), routing the other end into a drain tub. When in a pinch, I will lay down an old towel or rag to catch the fluid vs the tubing. Press down on the brake pedal, then, take your wrench and open the bleeder a ¼ – ½ of a turn. Brake fluid should be traveling through the tube. Close the bleeder. Pump the brake pedal a few times and reopen. NEVER DEPRESS AND RELEASE THE BRAKE PEDAL WITH THE BLEEDER OPEN!!! Pay attention to the color of the fluid coming out. If it is a lot darker than the new fluid keep on bleeding the brakes. There is no sense in keeping any old worn out fluid in there. Another key tip, do not let the fluid reservoir run out of fluid. If you do, it can result in getting air in your lines. Which can be a big pain in the rear! Once you are done bleeding the rear brake, check the level of fluid in the reservoir before putting the cover back on. Make sure it is above the minimum and below the maximum. Having too much fluid can also cause the brakes not work as well. Remember, doing preventative maintenance might result in LESS oh sh!t moments come race day! More Posts Back To Blog Page

Wrench Tip Wednesday: Bleeding Rear Brakes Read More »

MORE Panther Creek 2018

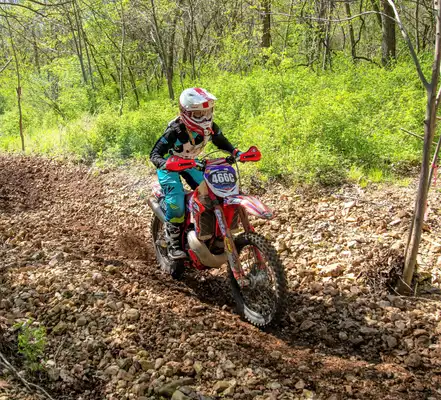
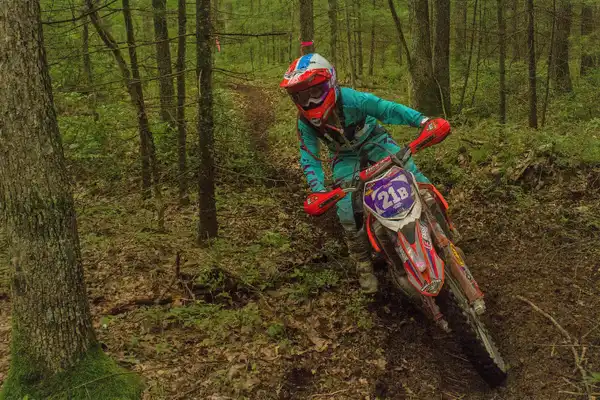
MORE Panther Creek 2018 Final round of MORE took place at Panther Creek in Tuscumbia, MO. The entire week leading up to the race it rained and rained. Surrounding areas received 8+ inches!! The hot topic at the shop was, is it going to be a mudder or will conditions be perfect? The drive to the race site showed a lot of signs of mud; water flowing over low water bridges and standing water in the parking lot. During the riders meeting, Steve claimed the property only received two inches of rain. My first thought was, is this “promoter talk” or was Leivan being legit. I was only concerned because I really wanted to wear my new RAD Fly Racing Special Edition Seafoam & Port gear. Anyways, I cornered Steve and his response was “unless you plan on riding behind someone and getting roosted like I did by Mackenzie Tricker, you’ll be fine”. I go out for my practice lap and conditions were slick but great. Tons of different line choices with a good flow, long uphills that you could let your bike eat. Just a little bit of everything. I was pumped for the race. During the Sportsman Intermediate race, I did not have a good start. I’m not really sure why, but I was slow at getting started. I had a few battles but just did not make any ground. A highlight of the race was, this long uphill with two humps in it. I jumped the first one and landed doing a wheelie. I COULD NOT GET MY FRONT END DOWN and it was not intentional. Little sketchy but super fun!! The Saturday ladies race is split into three classes, Ladies A, Ladies B, and Ladies +30. There was only 6 of us total so everyone wanted to do a one row start. I asked if I could start a minute behind them on my own row. I was told I could only do that if I start with my bike facing the opposite way of the direction to go. Of course, I was game for that! The trail was around 2 miles long and I did not do a practice lap. I was very unsure if I would pass all of the other ladies before the end of the first lap but I got it done. I ended up 1st in my class. Rain moved in Saturday night and into Sunday morning. Race started at 10:30 with drizzle coming down. The trail was a total of 16 miles long and we had only ridden around 6 miles of it the day before. It for sure had a lot more mud and slickness but was still very AWESOME! My day wasn’t the best but as Boyd told me mid-race “champions are built on their bad days”. I continued on and finished the day 6th in B. My dad, Steve, had a really rough race. He was chasing a fella in his class and decided it was time to make a pass. His line choice involved a super slick sideways log, watch out for those things. He ended up going down hard and described it as the fastest but longest wreck ever. It was painful and the bike had some damage. Luckily, there was great sweepers and one of them was able to get the bike fixed so he could finish 3rd in his class. Great job to all of our Beta & Sherco riders!! It has been an excellent season. Big thanks to the MORE crew for an outstanding race season. Action shot P/C : Stephanie Pratt Bonecutter Off Road Results Pro – Broc French 4th (Beta) Pro – Wyatt Bonecutter 5th (Sherco) A – Chris Cassil 3rd (Sherco) A – Colton Pratt 6th (Sherco) A+35 – Steve Bonecutter 3rd (Beta) B – Tayler Bonecutter 6th (Beta) +50 – Roger Mackay 4th (Beta) C+30 – Wade Mislevich 2nd (Beta) C+30 – Travis Opie 5th (Sherco) C+40 – Steve Summers 7th (Beta) C+40 – Mike Rothganger 9th (Beta) C+40 – Brad Kress 10th (Beta) Sportsman Expert – Wyatt Bonecutter 2nd (Sherco)Sportsman Expert – Colton Pratt 3rd (Sherco) Sportsman Expert – Chris Cassil 4th (Sherco) Sportsman Expert – Steve Bonecutter 6th (Sherco) Sportsman Intermediate – Tayler Bonecutter 2nd (Beta) Sportsman Amateur – Wade Mislevich 4th (Beta) Sportsman Amateur +40 – Philip Burger 7th (Beta) Sportsman Amateur +40 – Rob Steele 10th (Beta) Ladies A – Tayler Bonecutter 1st (Beta) Ladies +30 – Missy Bonecutter 2nd (Beta) More Posts Back To Blog Page

MORE Panther Creek 2018 Read More »

Wrench Tip Wednesday: Cleaning an Air Filter

Wrench Tip Wednesday: Cleaning an Air Filter If you consider yourself a “dirt biker”, a good habit to have is, always check your air filter after every ride or race. If your race/ride was not dusty it MIGHT not be necessary to clean but when the filter does need to be cleaned, it can no longer do its job of stopping dirt. For starters, figure out where your air filter is located. It varies from bike to bike. On Beta’s you just remove the LH side cover and boom it’s there. Sherco’s have their air filters underneath the seat. Once you find the air filter, be sure to inspect it, if it looks ragged and falling apart safe to say it is time for a new one. Take a clean bowl or pan and pour some of your favorite cleaner in it, sometimes a small amount can go a long way. Lots of good options out there, such as Maxima, Bel Ray, and No Toil. Some brands recommend to use their air filter oil with their cleaners for best results. Soak the dirty air filter in the cleaner. Foam filter cleaners gets the oil and most of the dirt off. Next, use some warm soapy water to rinse the rest of the dirt out of the filter. Gently ring it out. Before it can be installed the filter needs to be completely dry, so go ahead and hang it up to let it air dry. While the air filter is out of the air box, it is a good idea to clean it up as well. Twin Air makes an air filter plug for almost all bikes out there. Install it and use a degreaser to get it cleaned. Now that you have a dry, clean air filter refer to last weeks blog post to install. More Posts Back To Blog Page

Wrench Tip Wednesday: Cleaning an Air Filter Read More »

Wrench Tip Wednesday: Air Filter Installation

Wrench Tip Wednesday: Air Filter Installation Did you know an air filter is one of the most important components on a dirt bike? The purpose of it is to capture dirt to prevent it getting in the carb and sucked into the engine. So, it is kind of a SUPER BIG DEAL! A leaky air filter can cause premature wear, such as, top end components (piston and rings) wearing out sooner than they should. Glove up and let’s install an air filter properly. First off, a clean air filter is a must. If you install a dirty clogged filter, it can reduce performance and make the bike sluggish. Take your clean filter and apply foam filter oil to it. Lots of good ones out there – PJ1, Motul, Bel Ray, etc. Most oils can be purchased in two different ways aerosol or pourable. It is personal preference but we prefer to use aerosol spray because it allows control of the amount of oil applied to the filter. It is important to insure coverage of the entire filter, sometimes kneading the oil in is necessary. The oil helps catch the dirt so having too much is always better than not enough. Now that the air filter is all oiled up, install your filter cage. The most vital step that is often forgot; apply a THICK BEAD OF GREASE around the rim. If this step is skipped you will guarantee yourself a leaky filter and premature engine failure. We recommend a good water resistant grease that has stability under high temperatures such as Lucas Red “N” Tacky Grease or Bel Ray Waterproof Grease. It is time to install the air filter. Make sure it lines up with the filter box, to insure its 100% sealed. Now you are ready to ride! We stock all products discussed and can be purchased on our online store! CHANCES ARE IF YOUR FACE LOOKS LIKE THIS SO DOES YOUR FILTER! More Posts Back To Blog Page

Wrench Tip Wednesday: Air Filter Installation Read More »

Scroll to Top