Business Hours

Sunday Closed
Monday 8:00 AM to 5:00 PM
Tuesday 8:00 AM to 5:00 PM
Wednesday 8:00 AM to 5:00 PM
Thursday 8:00 AM to 5:00 PM
Friday 8:00 AM to 5:00 PM
Saturday Closed

May 2019

Wrench Tip Wednesday: Changing the Power Delivery on a Dirt Bike

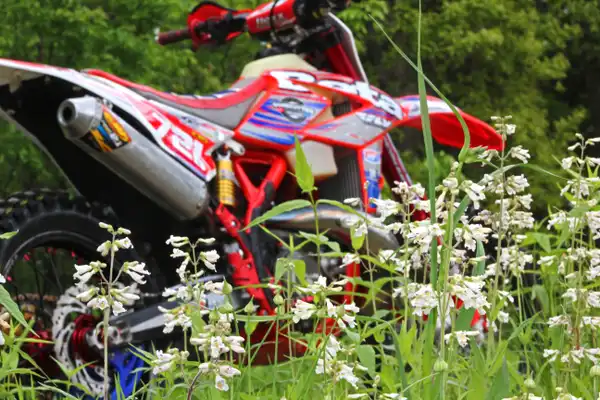
Wrench Tip Wednesday: Changing the Power Delivery on a Dirt Bike So, you have been riding the same dirt bike for awhile and you are ready to start playing around with sprockets, power valve springs, and exhausts. A goal in mind to make the power delivery of the bike better suited for you and what terrain you ride. I have been riding Beta’s four years now with the last two years being on a Beta 250. With that being said, I already know that I want to go up one tooth on the rear sprocket. OEM sprocket is a 49T and I prefer a 50T because I do not have to shift as much. If you change the front sprocket, going down one tooth on the front is the same as going down three – four teeth on the rear, so keep that in mind before you get really crazy. My personal opinion on the 2018+ Beta 250 a 14T front sprocket paired with a 50T on the rear works well for the Missouri hills and rocks along with the out of state places I travel. Changing the header pipe can make a difference in the power. A FMF Fatty tends to make the bike hit harder and quicker, whereas the FMF Gnarly makes the power more user friendly. Majority of the time, I run a Fatty. If I plan on doing hard endure stuff, I will put the OEM pipe back on which is similar to the FMF Gnarly otherwise the power difference is not usable in that type of situation. Next up is the power valve. I do not do any changing to mine. The power valve is a movable flap located on the cylinder exhaust port of a two-stroke engine, where burnt gasses are flushed out of the cylinder. At low RPM, the flap is held partially closed to make the exhaust port smaller. This helps the engine generate torque at low speeds. As revs build, the flap gradually opens, expanding the size of the exhaust outlet for greater top-end power. The ability to vary the size of the exhaust port gives your two-stroke engine broad, usable power. The power delivery characteristics of the engine are affected by the timing and speed at which the power valve opens. Power delivery is not the same for all riders or riding conditions, this making it beneficial to alter power delivery characteristics fairly easy. Generally, there is three different springs you could put into the power valve. One gives the bike more low end, one is about in the middle, and the other takes away from the low end and adds more of a harder hitting top end. A person can also change the main spring preload. This will change when the exhaust flap starts to open. If the flap opens faster, the powerband engages sooner. Those are just a few options that we and our customers do to the Beta and Sherco. The possibilities are endless with many more options to piddle with. As always, it boils down to personal preference but keep in mind, it is possible to make a nice riding bike completely not ridable. More Posts Back To Blog Page

Wrench Tip Wednesday: Changing the Power Delivery on a Dirt Bike Read More »
Wrench Tip Wednesday: O-Ring or Standard Chain

Wrench Tip Wednesday: O-Ring or Standard Chain The more you ride dirt bikes, the more you learn about how many different options there is out there. Lots of choices and for a newbie can certainly be overwhelming. When it comes to chains, there is two styles and tons of different brands available. So, the question is which one is better? Manufacturers construct both chains quite similarly however you can tell the difference pretty quickly. The o-ring chain looks beefier and feels quite a bit heavier. On visual durability the o-ring chain would win every time. The o-rings, actually somewhat self-lubricating rubber inserts that fit in between the outside link plates and inside roller link plates, seal in lubrication and seal out dirt and debris around the pin and in between the plates. The added o-rings along with requiring longer pins bulks up the overall chain. Compared to a standard chain, the o-ring is more durable but does add more weight than a standard change would. For off road, weight is not a huge deal especially if you are mounting tons of guards to the dirt bike. There is a cost difference between the two types, o-ring will cost more. The longevity is worth the price difference. A good general rule of thumb is, the cheaper the price, the cheaper the product. Let’s talk brands! Everyone has their own personal preference but mine leans towards WPS Firepower o-ring gold chain. I ride a lot and in a lot of different terrains and conditions. I have been using Firepower chains for over a year now and it seems to be the longest lasting brand I have ever used, the appearance is nice too. With a MSRP of $78.98, it is not super high and worth it! Don’t forget to lubricate!! A rusty and badly treated chain will not be good. The rider risks the chance of snapping it and getting whipped in the back or ruining their case. Chain lube is cheap, use it! My favorite is the ultra-sticky Bel-Ray Blue Tac Chain Lube. It is very tacky and will stay on the chain and not all over the bike! More Posts Back To Blog Page

Wrench Tip Wednesday: O-Ring or Standard Chain Read More »

MORE Thayer Extreme

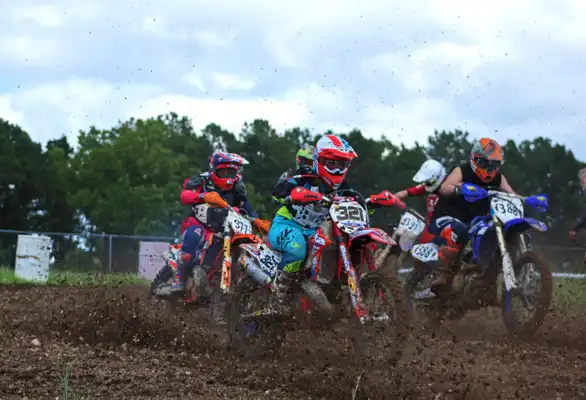
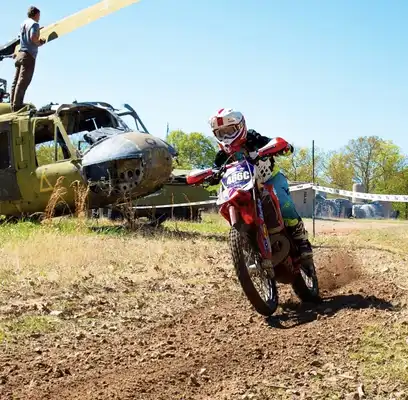
MORE Thayer Extreme Round 1 of the MORE series kicked off this past weekend at a new venue, Thayer Extreme in Couch, MO! Really far south and near the border of Arkansas. The initial thought was loads of rocks and massive hills but really not sure what to expect. The property has an “old school” moto track and recon stated we would be using it. Saturday the track and field areas were dusty, but in the woods, the perfect amount of moisture was present. I took two practice laps. The first one I felt great but wanted a second one to figure out some of the jumps. The woods had the perfect amount of dirt and rock mixture (if there must be rocks), flowed well, and the corners were sweeping. The moto track was definitely mellow with mainly tabletops, a few doubles, and a step up. Jumping is out of my comfort zone but there is no fun staying inside a comfort zone so I embraced the fear! Race time rolled around and the sun was shining! I lined up with the Sportsman Intermediate class and did not get the greatest start. It was kind of sketchy with how dusty it was. First lap, I made a few passes. The second lap, I spotted what I believed was the “front of the pack”. I continued to ride smart and made more passes. Going into the last lap, I was sitting in 3rd. Towards the end of the lap, I knew one of my last chances to make a pass for 2nd was near the end but I ended up wading myself and the 4th place guy up. I finished 3rd out of 16! Saturday afternoon, I raced Ladies A. Fast and flowy course made the race fun. We got to also ride the moto track and by the end of that, I was feeling more confident being in the air which resulted in me going faster! I got 1st in that class. Late Saturday night, a thunderstorm rolled in and brought rain. Most people chickened out at the thought of rain or another “mudder” but by Sunday afternoon conditions could not be any better. The dirt was epic!!! I lined up with the B class and had a much better start. A extra mile of trail and field section was added. The field was fast and the traction in the corners were out of this world!! On the first lap, I was right behind a guy going into that field section. He took a corner a little too wide so I used less brake and more throttle and got the pass done! By the end of the first lap, I was in 3rd. On the second lap, the guy who was in 2nd made a mistake and I got around him. Then shortly after, the guy in 1st made a mistake and I got around him! I was feeling spectacular. I lead the rest of that lap and almost the entire next lap until the moto track right before scoring. I continued to battle with the 1st place guy until the last few laps and I started to get tired. Happy to maintain second with all the issues and mistakes I was having. Pretty pumped with how I rode, the trail AND moto track was a ton of fun. I set some personal bests with 10th 0verall on Saturday and 15th overall on Sunday along with my class finishes! Shout out to the MORE crew, for putting on an excellent race weekend and not cancelling because of what the forecast showed!! Great job to the Bonecutter Off Road riders!! Saturday: Sportsman Expert – Colton Pratt 3rd (Sherco) Sportsman Expert – Steve Bonecutter 5th (Sherco) Sportsman Expert – Jared Chetham 6th (Beta)Sportsman Intermediate – Tayler Bonecutter 3rd (Beta)Sportsman Intermediate – Roger Mackay 11th (Beta) Sportsman Intermediate – Jackson Cassil 16th (Sherco) Sportsman Amateur – Megan Kennon 15th (Beta) Sportsman Amateur +40 – Mike Rothganger 6th (Beta) Sportsman Amateur +40 – Steve Summers 7th (Beta) Ladies A – Tayler Bonecutter 1st (Beta)Ladies B – Missy Bonecutter 1st (Sherco) Sunday: A – Colton Pratt 1st (Sherco)A – Steve Bonecutter 5th (Sherco) B – Tayler Bonecutter 2nd (Beta) B +50 – Roger Mackay 3rd (Beta) C +40 – Travis Opie 4th (Sherco)C +40 – Mike Rothganger 7th (Beta)C +40 – Jon Hill 8th (Beta)C +40 – John Lewis 9th (Beta)C +50 – Steve Summers 6th (Beta)Ladies – Missy Bonecutter 3rd (Sherco) More Posts Back To Blog Page

MORE Thayer Extreme Read More »

Wrench Tip Wednesday: Breaking the Dirt Bike in

Wrench Tip Wednesday: Breaking the Dirt Bike in The feeling of a new dirt bike never gets old! It is so shiny, clean, no scratches or dents; the definition of perfection. The urge to go out and ride it is strong. For me, I hate bearing the thought of running a brand stinking new bike through mud or boulders and will do whatever it takes to prevent from laying the bike over. There is a proper way to break in a brand spanking new dirt bike. Everyone is entitled to their opinion on this but we (Bonecutter Off Road) recommend doing some type of a break in on the engine. A person should want the engine to last a long time and this helps ensure that. Think about how fresh all the small parts moving at high speeds are. Doing a proper break in helps seal the piston rings into the cylinder surface. If you fail to do so, it might not be an immediate but it will most likely premature wear. One way to do it is three heat cycles. Start by turning the engine on and let it idle for 10 minutes. Then give it a couple of revs and shut it off. Let it cool completely and repeat two more times. This is just the basic way but there are many different variations to this method. The other method is to let the bike sit and idle and properly warm up. Then go out and ride it some without “getting on it”. Be gentle and do not rev the crap out of it. After 10 minutes or so, let it cool down. Then do this two more times. The most crucial thing to remember is to properly warm up the bike prior to riding a new or freshly rebuilt engine, no matter the size of the dirt bike. All new parts in the engine are mating together and the aluminum parts need a chance to expand. Riding before the engine is warm, this goes for heat cycling and the people who insist riding it hard off the showroom floor, can cause the ring to sit prematurely causing wear and possibly damage. After the break in is finished, go ahead and change the oil. Remember, although Motul and BelRay are pricey compared to other options, the quality of the oil is worth it and helps all engine parts last as long as they should. Bottom line – do what you want but this is our recommendations! Let’s just say this, I ride and race my bike constantly but how many hours does it look like it has? You tell me. More Posts Back To Blog Page

Wrench Tip Wednesday: Breaking the Dirt Bike in Read More »

Wrench Tip Wednesday: Accessorizing a Dirt Bike

Wrench Tip Wednesday: Accessorizing a Dirt Bike One of the best parts of a new bike is getting to make it your own! Whether it is adjusting the levers or putting the “must have” accessories on to enhance your riding experience or protecting the precious bike. Everyone has their own list but mine looks like; Fasst CO Flexx Bars and Impact Moto Pegs, ARC folding levers, Oversized tank, a better than OEM skid plate such as TM Designworks, BRP Chain block (OEM ones are pretty thin), Samco hose kit, Enduro Engineering hand guards, a rear disc guard (TM Deisngworks, Topar Racing, and Bullet Proof Designs all great brands), and Bullet Proof Designs radiator guards. When adding aftermarket accessories to your bike, you should ALWAYS check how it fits. Even if it is made for your bike, the fit might not be exact and could be hitting or rubbing something it should not be. A good example would be installing an oversized tank. The tank is obviously bigger than the OEM one so where is it bigger at? Is it sitting on top of the wiring or what about the radiator hoses? If neglected to look or watch it over time an expensive repair can be in the future. So, maybe you do not notice it upon install, that is why inspecting your bike while washing or after a good wash is crucial. Pretty much just be aware. What about hand guards? Sometimes these things are a booger to get to fit. Off road specific bikes generally have a ton of switches on the bars so adding clamps to the mix can be difficult. I have seen the metal hand guard rub on things it shouldn’t such as a throttle cable or clutch line. Paying attention during install will help prevent wearing through the line. What if you show up to a race and DNF and the reason is, “Oh, my hand guards rubbed through my throttle cable.” To me, that is embarrassing and preventable unless a wreck caused it. Bottom line accessories are cool and definitely make the bike your own but PAY ATTENTION! More Posts Back To Blog Page

Wrench Tip Wednesday: Accessorizing a Dirt Bike Read More »

Wrench Tip Wednesday: Don’t Forget the Fork Fluid

Wrench Tip Wednesday: Don’t Forget the Fork Fluid When something is not leaking it is easy to forget or disregard it. Changing the fork fluid should be on your list of things to do. Fork oil/fluid is like engine oil, it does wear out and needs replaced, even if nothing is leaking. If fork seals are leaking, get that taken care of as soon as possible. Always follow the manufactures recommendations. Beta says with their Sachs forks, every 30 hours the fluid should be changed and would not hurt to do the fork bushings as well. A good rule of thumb for racers is every 35 hours and a casual trail rider could get by with every 50 hours. When the fork fluid is wearing out or “dirty” it affects the handling and can prematurely wear the seals and bushings. Fork fluid or fork oil? Fork fluid is lighter than fork oil even if they are rated for the same rate. It is recommended to use fork fluid. A good brand that we use is Maxima Fork Fluid. Here are some pro tips on keeping your seals lasting long! After finishing a ride and before loading up, wipe the chrome tube off. This helps to keep dirt out of the seals. Don’t power wash around the seal or directly at it. Use some type of fork socks or mudscraper. We use the SKF mudscrapers on our bikes. Cleaning the seals every few rides is a great habit to be in, especially if it is the muddy time of year or if you ride a lot of sand. To do this, use Risk Racing’s Seal Doctor. Having the proper tools to work and take apart the forks is important. If you are not comfortable or do not want to purchase the tools, take it to someone who is. At Bonecutter Off Road, we will change the fluid, seals, bushings, and springs in both Beta and Sherco forks. A suspension shop, such as Shock Zone Suspension can also do it and even help fine tune the suspension! More Posts Back To Blog Page

Wrench Tip Wednesday: Don’t Forget the Fork Fluid Read More »

Scroll to Top