Business Hours

Sunday Closed
Monday 8:00 AM to 5:00 PM
Tuesday 8:00 AM to 5:00 PM
Wednesday 8:00 AM to 5:00 PM
Thursday 8:00 AM to 5:00 PM
Friday 8:00 AM to 5:00 PM
Saturday Closed

March 2019

Huckle-Beta Alligator NEPG Race Report

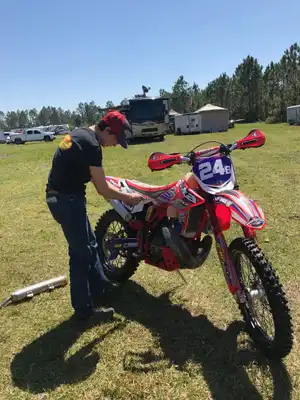
Huckle-Beta Alligator NEPG Race Report Huck Jenkins tells about how the long haul to the sunshine state and playing in the sand went. Huck currently sits 5th in the NEPG Beta Cup Challenge. “Round 2 of the NEPG series is in the books! The Bonecutter Beta crew went to Ormond Beach, Florida last weekend. As it was such a long drive, we dragged along Scott Boyer as an extra driver. Steve and Tayler left around 4am and went to grab Scott. I met them at a gas station to start the 18hr plus drive south. It was amazing to see the scenery change as we headed south. Missouri was cold and nasty. As we drove it got steadily greener and warmer. I was wearing jeans and two coats and when we stopped for gas in Alabama I wanted to wear shorts! We stayed in Tallahassee on Friday night. Next morning was a short drive to the race site. We set up and got signed up for the 68th Alligator National Enduro in no time. To bed at 8:00 and up at 6:00 ready to race. My grandparents showed up to watch at 8:00 in the morning. They were full of embarrassing stories to tell about me (what are grandparents for?!!) I was row 13 with Steve. Scott was 6 rows behind me, and Tayler 5 rows behind Scott. I soon found out that even more than I hate rocks, palmetto roots are FAR WORSE!!!!!!!! Good ole NEPG decided to cut a special section in test 2 called “Palmetto Hell”. I can’t thank them enough! Florida has loooots of sand and palmettos. That’s pretty much what the whole race was. I had fun though, despite the not so great trail marking. They thought it would be good to have you blast through a palmetto patch and then all of a sudden make a 90 degree turn. We did that over, and over, and over… But after a long day of that it was nice to a take rest and be done. I finished 9th in A 200, I have my work cut out for me. Tayler gave me a wonderful workout regimen which is full of picking up my bike every lap…UGH. Sadly, we had to say goodbye to the nice weather and green grass. I soon found out that they brought Scott for an extra driver because we were driving through the night–and that I was supposed to not only stay awake, but keep Scott awake. I didn’t do a very good job of either. I was asleep, awake, asleep, awake, from 8:00pm to 1:30am. I guess I’m not reliable for keeping someone awake at the wheel after a full day of racing…sorry Scott. After stopping for gas and switching drivers, I fell asleep instantly in my chair. When I woke up I found that the van was stopped and everyone was asleep. I was very confused as to where we were, but seeing everyone asleep I joined them, (surprising huh?). It was great, I woke up at 8:00am and was ten minutes from home. It was then that I found out that we had stopped at a rest area for an hour or so. I departed the Bonecutter’s and headed for home. It was a great weekend. I can’t thank the Bonecutter’s enough for all their help and support. Thanks Bullet Proof Designs for keeping my bike safe and Shock Zone Suspension for keeping me and the bike planted in those sandy whoops. And Perfect Pitch Guttering Systems for the support!! Can’t wait for the next one!!!!!” More Posts Back To Blog Page

Huckle-Beta Alligator NEPG Race Report Read More »
Wrench Tip Wednesday: Keeping Bikes Going in Race Season

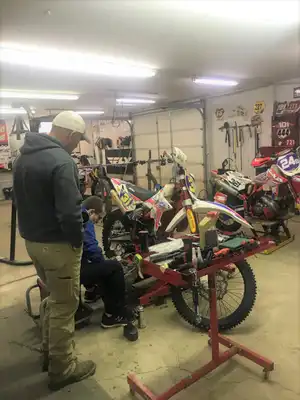
Wrench Tip Wednesday: Keeping Bikes Going in Race Season If you are a regular follower of the weekly wrench tips, you should know how anal my family is about keeping up on bike maintenance. It helps prevent mechanic DNF’s but yes flukes can still happen. In our race season, there is a lot of back to back racing which requires preparation. Sunday after a race, if I get back home early enough with energy, I start washing bikes. If not, I get after it Monday. The bike needs to be clean, including the air box area. If the air box is full of dirt, you risk the chance of dirt falling inside the air box then to the carb or improper installation of the air filter. Twin Air makes a filter plug for all bikes, it is worth the money! When washing, this is the time to spot leaks and obvious broken parts – make note of it. Look at your maintenance diary to see what you did to the dirt bike last time and replay the race in your head to see if anything happened that should be checked on the bike. Look at the current hours on the bike. Keep in mind, the earlier you do this in the week the more ready you will be for the race weekend which will eliminate last minute fixes day before the race. If it is back to back races, we always change the oil, clean the air filter, check and replace if needed, bleed brakes, check the coolant, and check the condition of the brake pads and tires. That is just the basics. The person riding the bike needs to know if the bike got hot or if the clutch was slipping and then remember to figure out why and what the damage is. If parts are needed, keep in mind to try to spend money with the local shops. Bonecutter Off Road keeps enough parts for Beta and Sherco that we can always get you going! Remember, it is better to be a step ahead than sitting on the sidelines mid race. More Posts Back To Blog Page

Wrench Tip Wednesday: Keeping Bikes Going in Race Season Read More »

Alligator National Enduro 2019

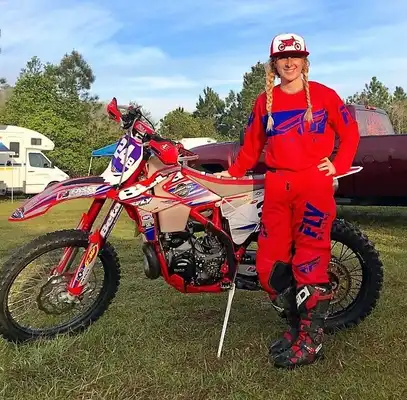
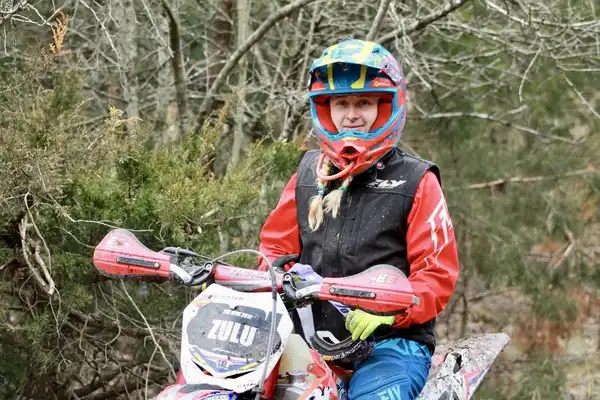
Alligator National Enduro 2019 Round 2 of NEPG took place this past weekend in Ormond Beach, FL (just outside of Daytona), which is roughly an 18 hour drive for us. The weather was looking like upper 70s and sunny skies! Saturday, we arrived early enough to walk part of test 6 and soak up the sunshine. I am glad we did because it gave us a huge indicator of how the trail would be, thick and lots of sharp corners. Test 1 was 6.5 miles, flowed decently but I did blow a handful of corners. The trail was really hard to read because of all the palmettos grown up and arrows being low to the ground. I was feeling pretty good. I came up on Rachel Gutish (Beta USA rider) with her helmet off and not looking so good. I stopped to check on her and she asked me to get help. I found the first course worker and attempted to instruct him on where she was. Rachel ended up breaking her elbow, wishing her a speedy recovery! Test 2 was palmetto root hell. Billons of these nasty things in two miles of the 5. It was horrible. I rather ride over boulders any day. For those of you who do not know, palmetto roots are big, hard, and slick. I was so glad to finish that test. Test 3, I do not remember a lot about it but it was my favorite. It flowed the best and it was the least amount of times of blowing corners. It had more sandy conditions and less palmettos. Test 4 and 5, was tight and lots of 90 degree turns. Even had marshy sections causing deep ruts and mud holes. I made good line choices and did not come close to getting stuck. In 5, there was a massive rattle snake in the middle of the trail. It absolutely scared the shit out of me. I raised my leg over my bars and screamed. I am not a fan of snakes! I got so bent out of shape about it, I tensed up and did everything possible to not end up on the ground. Super sketchy. Test 6 was back to palmetto root hell. Part 0f 6 was test 2 backwards and of course it was the 2 miles of palmetto roots. That was horrible. They got even bigger and slicker!! The heat started to get to me in this one and I fell off my pace. I was happy to see the end. The palmetto roots were a shocker. The lack of vision made it feel like we were racing through a jungle and getting comfortable with the terrain was difficult. I finished the day 6th out of 8 in womens elite. The 2019.5 Fly kinetic mesh gear is bright and vibrant (my fave) and I was pumped to have a set to tackle the Florida heat. Great job to the Bonecutter Off Road riders who made the haul! Womens Elite – Tayler Bonecutter 6th (Beta) Womens Elite – Jessica DeLee 7th (Beta) Womens Amateur – Kylie Harris 3rd (Beta) A 200 – Broc French 3rd (Beta) A 200 – Huck Jenkins 9th (Beta) A +40 – Scott Boyer 3rd (Beta) A +50 – Steve Bonecutter 12th (Beta) C+40 – Jeremy Harris 2nd (Beta) More Posts Back To Blog Page

Alligator National Enduro 2019 Read More »

THE RIDE

THE RIDE Well….. spending 3 days on a dirt bike is spectacular but I think next time I could go for 4+ days! Can you picture 30+ miles of epic single track with good friends plus an appearance from a kind of fast guy!! Ok, maybe Damon Bradshaw is not that fast…HAHA yeah right, “the beast from the east” can still ride a bike! Good times were had. Friday was a get to know the trail day and get tire tracks on the virgin trail. BTW, there was roughly 12 miles of that, so that is sick. The “leaders” and floaters had a blast! Saturday, we split off into groups, I had 13 riders + 2 sweepers following my excellent trail guiding skills. The first loop was around 12 miles and was virgin trail. It was a little harder than the old race trail but it had some cool formations and waterfalls to look at! In the middle of the woods, out of nowhere, it looked like someone had tried to make a cobblestone road out of hundreds of small boulders. This ended up being my favorite section. The reactions to this section by the unsuspecting was priceless. The first time through reactions were great. Lol After the 12 miles was finished, we breaked for lunch. The next loop was old race trail and was roughly another 12 miles. It had some ruts, rocks, hills, ditches, and my not so favorite section “Tayler Turn-pike”. There is a story behind that but I will save it for another day. First 8 miles were going great for us, seemed to making good time, and having fun. Someone might have got fooled by a dummy locked gate so we could get a couple extra miles in. Let’s just say my group members found it a little funny and was totally ok with being lost for a split-second. One of the members said, “I knew you were lost when you started to stop & 180 & stop & 180.” Probably a funny sight. Anyway, my sweepers helped me figure it out and we got back on track. After that incident happened, I was convinced I would miss another trail and it was so mentally draining. Finished out that loop and anyone who wanted to go on the next 6-mile loop could. A handful of us went on to do that loop. Something funny that happened on this loop, was watching Boyd fall over for no apparent reason. After trail riding was finished for the day, it was time for the games. I set Boyd up on our 2019 Beta 300 RR demo bike. He participated in the slow race and got second place against Drew Higgins. It was a blast watching all the shenanigans. Damon wheelied over another bike, t-boning among other riders, and kicking. My extra couple of miles mess up, caused Saturday night dreaming about the trail and the gates. Could I figure it out going the opposite direction? Lol. Sunday my group was much smaller. I guess I scared everyone off with my guiding skills. We ran the 6 mile loop backwards and quickly moved on to the 12 mile loop with the formations. Damon rode with our group for the first loop and almost half of the second loop. Shortly after he went around to catch the next group, I waded it up pretty good. I hit slick roots faster than intended and hit the ground. Thankful to be wearing a Fly Racing helmet. After that incident, I had a hard time staying focused on the trail resulting in a lot of wrecks. My group bared with me and we took it down a couple notches. After lunch, lots of people were heading home. So, the groups were combined to two but really kind of like just one. We rode most of the old race trail and cut off onto the “easy part of the hardest loop”. Massive rocks in this section but everyone made it just fine. It was around 17 miles by the time we made it back to camp. The entire weekend, I had a 13-year-old on a Honda 150 in my group. He rode all the miles he could and made it up massive uphill’s and over rock ledges. It was impressive. The number of miles covered in the weekend seemed to be more than enough for everyone. But get this, I was not sore at all!! So, that means we did not ride enough. The GPS on my Polar tracked 98 miles from Friday – Sunday. I will say I was pretty mentally fatigue and shout-out to anyone who puts on races. It would be rough and the hard work is greatly appreciated. Sometimes it is not always about racing. Sometimes it is about being on the bike riding epic single track with friends and people who love it. It was a great experience getting to meet and ride with Damon Bradshaw and Bob with WPS/FLY. Nice catching up with everyone! Also, big thanks to Fly Racing for being a sponsor in this ride. More Posts Back To Blog Page

THE RIDE Read More »

Wrench Tip Wednesday: Seizing Up

Wrench Tip Wednesday: Seizing Up Lets talk anti-seize…. What the heck? Anti-seize is a grease like paste containing high concentrations of copper, nickel, aluminum, graphite, and molybdenum and helps prevent galvanic corrosion when unlike metals are joined together. It helps resist heat and moisture and will definitely help ease removal. This product is perfect to use on chain adjusters and all plastic bolts, especially ones in the tank area. Think about all the places on a dirt bike galvanic corrosion can take place.. what about the water pump bolts? Light bulb moment, steel and aluminum meeting together in an area that holds “water”. Anti-seize will help prevent all the corrosion that could be happening in there. Another key place is the motor mount bolts. Apply anti-seize to the bolt and blue Loctite to the nut. All of these are key places that would not be good to strip out from a stuck bolt. Fun fact, from the factory, Sherco’s come with anti-seize already applied to the specific bolts that need it. Anytime you are working on your bike, always re-apply anti-seize just like you would Loctite. Great news! Anti-seize is way cheaper than replacing broken bolts and repairing stripped threads. But beware it can be messy so don’t go lathering up in it. Keep in mind, Loctite has its place and anti-seize is just as important! More Posts Back To Blog Page

Wrench Tip Wednesday: Seizing Up Read More »

Wrench Tip Wednesday: Footpegs

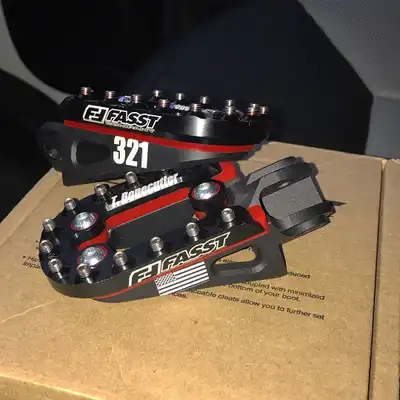
Wrench Tip Wednesday: Footpegs A common upgrade on a dirt bike is replacing the OEM pegs with beefier, wider, colorful, or vibration absorbing footpegs. Keeping your feet stable on the pegs is so important, you ride a dirt bike with your lower body not so much on the upper body! So many good brands out there varying in prices. My peg of choice is Fasst Company’s Impact Moto Peg. Since I have started using them, I feel more stable on my toes in sketchy situations. They are wider than OEM pegs and isolate the cleat from touching metal to metal making them absorb more vibration. The Impact Moto Peg also has the perfect tooth combo, I can remove my foot if I need to and not get “stuck”. MSRP $259.99 and well worth the money! On the cheaper end, Moose Racing makes a wide footpeg with extremely sharp teeth coming in just under $100. Warp9 is another good brand for wider footpegs, also under $100. Fastway is a big seller at our shop. They offer lots of different options; adventure, wide, adjustable height, and ankle savers. Prices are from $199 – $275. Basically, either you know what you like or you research them all and see what is worth it to you. But if you are standing on skinny OEM pegs, I strongly recommend investing in a set of wide ones. Time to learn how to put these fancy pegs on. Grab your tools! All that is needed is a set of needle-nose pliers, a hammer (best to stick to a rubber mallet), and a long, flat-head screw driver. Some bikes need the brake pedal removed to get the footpeg pin out. If that is the case, a few more tools might be needed. Be sure to check the backside of the brake pedal pin for a lock nut or cotter pin. If you don’t, the cotter pin can be damaged or strip the nut. A washer and split pin lock the pivot pin in place. Locate the split pin at the bottom of the footpeg. Grab the needle-nose pliers, get the split pin as straight as possible. Sometimes this can be a chore but be patient! Once it is straight, grip the head of the split pin and pull it through the hole in the pivot pin. Now the pivot pin can be pushed up and out. Warning, the footpeg spring is stiff and puts a lot of pressure on the pivot pin, so it could be harder than one would think. Wigging the peg around while pushing or pulling on the pivot pin will help the removal. Now that it is off, clean and remove old grease and dirt from the surface of the footpeg mount. Inspect the mounts for signs of wear or cracks. PRO TIP: Put the pivot pin back through to see if the holes have been elongated over the years. Excessive wear in this area can cause the footpegs to droop and become difficult to ride with, increasing the chance of your foot slipping off. Which could be bad! Inspect the pivot pins for wear, deep grooves mean it is time to replace. Time to install the new pegs! Apply waterproof grease to the pivot pin as lubrication. Put the return spring in the correct position, there will be some tension as the footpeg is inserted. Using a screwdriver can help guide the peg into position by levering it against the spring tension. Push the pivot pin in. The footpeg might need to be wiggles to get it all the way in. Hold the washer in place then slide the split pin through the holes in the end of the pivot pin. The washer is there to prevent wear on the split pin as the footpeg pivots. Always use a new split pin. An old split pin may be weak from metal stress; vibration can also cause the split pin to fail. Fold both legs round the pivot pin and trim them with side cutters. Use the largest split pin that will comfortably slide through the hole. Remember – if you get yourself new, fancy foot pegs that means you better be standing and not sitting on your rear!! More Posts Back To Blog Page

Wrench Tip Wednesday: Footpegs Read More »

Okie Sprint Enduro – Discover Your Speed

Okie Sprint Enduro – Discover Your Speed Round 1 and 2 of Okie Sprint took place this past weekend in Sand Springs, OK just outside of Tulsa. I have never raced a sprint enduro and the format is different. In Sprint enduro’s riders are given two separate tests that must be navigated three times each. Each test is roughly three miles long and should take 10-15 minutes. Riders are staged by class at the start of test one and will be released one at a time in numerical order, every 15 seconds. Once a rider has cleared Test 1, they will have approximately 20 minutes before starting Test 2. Riders will stage by class in front of test two and be released one at a time. After test two is completed, riders will have approximately 40 minutes before heading back to test one for their “second lap” in which they repeat the process but now sorted by placement within their class. Basically, it is fast paced, go as hard as you can immediately! Sounds fun, right? YESSS This was my first ever solo race trip….and of course it had to be a mudder! I kept my attitude positive and was looking forward to riding my dirt bike on this adventure. Early Saturday morning, a massive rain storm came through and put tons of moisture in the ground. I had the pleasure of driving through it, almost pulling over three times because of the lack of vision. Thinking to myself, “oh boy, what did I get myself into.” Lol. Another thing to note, there is no practice at these events. I arrived, unloaded, did my registration, and got ready. I have never ridden in this area prior to this race so I was unsure what to expect. I had heard it had some rocks and a few small hills. The ground ended up having a hard base in most places so there was a bottom. Race time rolled around and the sun was out bringing temperatures to the upper 60s!! WHICH IS AMAZING!! I signed up in B class, it was stacked with 21 additional racers. The trail for the first go on both tests was wet and a little slick. The second go was a much different story. It had changed so much, deep ruts, massive roots. The third go it started to be sketchy because of all the unknowns, which line is safe? Am I going to drown my bike in this water hole? I had no issues, scraped mud off my bike in between each test, and only wrecked two times!! Those of you who do not know my abilities in the mud, THAT IS REALLY GREAT AND IMPRESSIVE FOR ME! I finished 10th out of 22. Sunday was a different story. A few course changes were made to eliminate the trouble spots. But believe me it was possible to still get stuck, I witnessed a few people take the wrong line. The mud was not really wet anymore and became “sticky” which makes it harder to ride, in my opinion. My plan was to stay warm (it was in the upper 30s) and ride consistent, not get stuck. My transponder was not working correctly so at one point I had to start last, in a way that was beneficial for me. I ended up riding faster because I did not like the thought of being last. I wrecked a little more than I did the day before but it was just piddly wrecks. I finished 13th out of 20. Overall, sprint enduro formats are a blast. I had so much fun this weekend! Beware, my heart rate was much higher than it would be at a normal restart enduro or harescramble so be ready for that! I enjoyed camping in my van, getting to experience a new series and meet new people. If you have never raced a sprint enduro, put this series on your list to try, Oklahoma really is not that far from Missouri! I am looking forward to the next one! Great job to all of our Bonecutter Off Road Riders: Saturday: Pro – Steve Leivan 3rd (Sherco) A – Broc French 1st (Beta) A – Nick Smith 16th (Sherco) B – Tayler Bonecutter 10th (Beta) Women – Lindsay Williams 2nd (Beta) Sunday: Pro – Steve Leivan 3rd (Sherco) B – Tayler Bonecutter 13th (Beta) Women – Lindsay Williams 4th (Beta) More Posts Back To Blog Page

Okie Sprint Enduro – Discover Your Speed Read More »

Is Sherco just a fad?

Is Sherco just a fad? The name Sherco derives from combing two words, Bultaco & Sherpa…SHER-CO. Sherco was born in 1998 due to Marc Teissier’s passion for trials. The Spanish factory was first opened and only produced trials bikes. In 2003, the French factory opened their doors welcoming the enduro dirt bike range. Sherco motorcycles is the only active French brand. An independent company making their presence known by fifty countries selling their brand across the world. Fun fact probably only known by the enduro enthusiast. In 2008, Graham Jarvis won the Red Bull Romanics. OK that is common knowledge, but what bike did he do it on? It was a history making day being it was the first time ever a rider won on a four stroke… Sherco 450 at that! Jarvis had been riding Sherco trials bikes from the start of production to the early 2000s when he made his switch to enduro riding and racing bringing the Sherco enduro line victories. Bonecutter Off Road has been selling Sherco since late 2017. The first initial thought from us and the public is how pretty they look! There is not a lot of set up from the showroom to racing, just do not forget the basics. A good amount of 2018 Sherco’s came out of our shop but when the 2019 Factory and Cross Country models got released with KYB suspension it was a door opener! The number one concern that we always hear is, what is it like to get parts? Getting parts is not an issue. We keep the basics in stock; air filters, spark plugs, brakes, levers, etc. We have a few odds and ends gaskets and oil seals, clutch plates for OEM engine parts but at this point in time if we have not broken it or needed to replace it, it is most likely not in stock. With that being said, we can order anything at any time but it may take 3-7 days at most to get it here. You will not be able to get many aftermarket parts if any. That means you will get to support your local dealer! Over the last few years, we have witnessed Sherco bikes being raced by top riders putting the bikes on top! · 2019 Revlimiter Extreme Enduro – 6 Sherco’s in the top 11 · 2017 & 2018 The Ozark 100 Miler – Nick Farhinger 2nd on a Sherco · Steve Leivan – 2018 NEPG A+40 Class Champion · 2018 TKO – Mario Roman & Wade Young went 3rd & 4th · Chris Cassil – MORE A Class Champ The list could go on and on but I think the point has been made, this is not just some “fad” Sherco is here and building their name so believe the hype! Photo Credits: Shan Moore and mjsmotophotos More Posts Back To Blog Page

Is Sherco just a fad? Read More »

Wrench Tip Wednesday: Dirt Bike goes for a Swim

Wrench Tip Wednesday: Dirt Bike goes for a Swim This time of year, Missouri tends to be very wet. Really no way to avoid it, if you want to ride. Creeks can be misleading! Or the random holes filled with water. Not sure what is worse the shock to your body of the cold weather or letting the bike swim. If it is a quick submerge there is a chance the bike might still start. But a hot engine and cool water never mix. First, I would try to start it. If it does not start, pull the spark plug and flip the bike upside down. Kick the engine over. This helps push any water out of the top end. Flip it back over and install a sparkplug. If you do not have a spare with you, dry off the one you pulled out. Keep your fingers crossed that it starts otherwise you will be pushing the bike back. Be sure to change the air filter and oil once you get back. What if the bike does not start and needs to be pushed back? Load up and head home. The process is similar as above. Take the spark plug out, flip upside down, and turn the engine over. Drain the oil. Change the air filter. The float bowl could also be filled with water so check that. In extreme cases, it would not hurt to go ahead and replace the exhaust packing. With fresh oil, spark plug, and air filter installed go ahead and start the bike. Oh no! It still does not start, this could mean a complete engine rebuild may be needed. Don’t fret if your mechanic skills are not up to par, take it to a local shop and let them dig into it. A good rule of thumb, always be honest about what has happened to the bike even if it is embarrassing, not just referring to the bike going swimming any instant something mechanical fails, tell the story. It helps the mechanic understand what has happened and why it happened. More Posts Back To Blog Page

Wrench Tip Wednesday: Dirt Bike goes for a Swim Read More »

Scroll to Top