Business Hours

Sunday Closed
Monday 8:00 AM to 5:00 PM
Tuesday 8:00 AM to 5:00 PM
Wednesday 8:00 AM to 5:00 PM
Thursday 8:00 AM to 5:00 PM
Friday 8:00 AM to 5:00 PM
Saturday Closed

Uncategorized

2020 Beta 250 Race Edition Race Bike Build

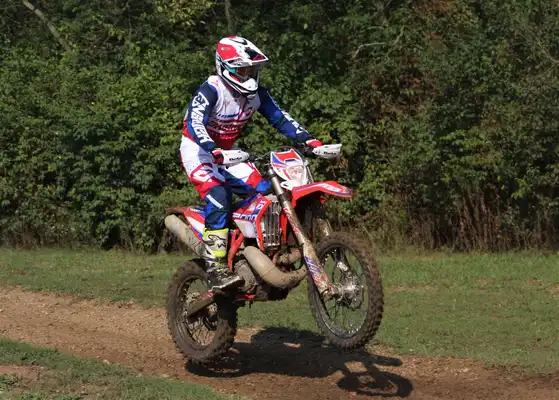
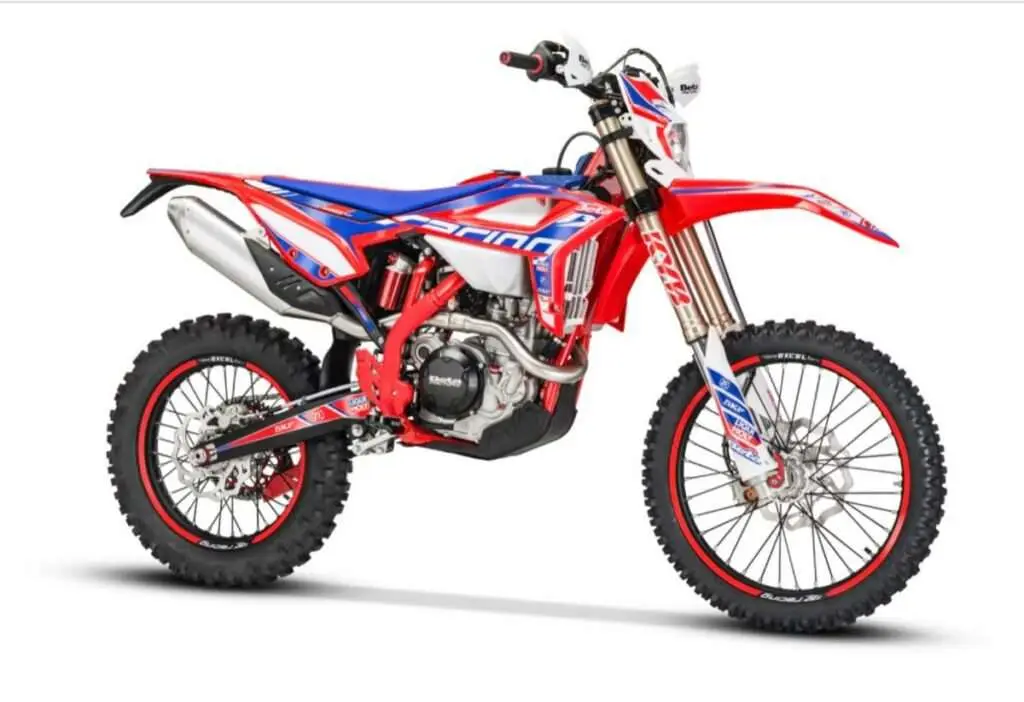
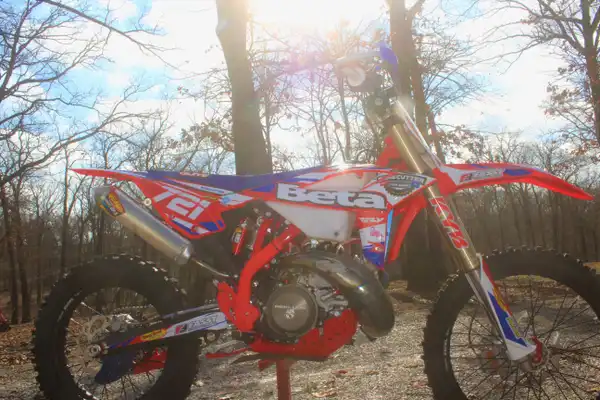
2020 Beta 250 Race Edition Race Bike Build If you spend a lot of time at Bonecutter Off Road or around my family and I, you will hear the following statement often! When purchasing a new bike off the showroom floor with a racing intent or even the die-hard weekend warrior, a lot of things should be done to said bike to make it “ready”. This goes for all different brands of dirt bikes; no bike comes off the floor completely ready to ride. With that being said, a key secret to successful bike setup is knowing when to start riding and stop tuning. My new bike is a 2020 Beta 250 Race Edition. Most of the things done was what we felt like was necessary, but also personal preference. In the past, I have had a 2015 Xtrainer 300, 2017 Beta 250 RR, 2018 250 Race Edition, and a 2019 Beta 125 Race Edition. For 2020, Beta without a doubt upped their game! All new stronger body style, redesigned frame, counterbalanced engine, longer swingarm, KYB forks paired with a ZF Sachs shock. To me, it sounds like the ultimate dirt bike! As soon as the bike arrived to the Bonecutter Headquarters, the first thing done was removing plastics, tank, and exhaust. Older Beta forks was put on the bike so it could be moved around. With a new bike, I recommend springing the suspension for your weight, but no other changes until you have tested it out. This is based off your weight, your correct weight not a fantasy number. Suspension can make or break an opinion on how a dirt bike feels. Not everyone needs the KYB (closed chambered forks). Being aware of that is crucial. The RR models with open chambered forks work really well. If you are unsure about which forks would be better for you, we strive to assist our customers with making that decision. With that being said, I dropped my forks and shock off at Shock Zone Suspension to get the correct springs and I went ahead and had it lowered an inch (I am 5’2”). Coming back from an injury, I felt like I would be more comfortable with both those things done before I tried to ride it. Next order of business was removing the linkage and swingarm to grease ‘em up. Most manufactures do not use a lot of grease on their bearings in the factory. By addressing this when the bike is new, the life of the bearings is prolonged. There are times when Loctite is necessary and times when anti seize is necessary. Anti seize was applied to the chain adjusters and brake pins, helping to ensure upon removal, down the road, they would not strip. On the engine mount bolts, anti seize was applied to the bolt and Loctite on the nuts. Another crucial place for anti seize is on the bolts holding the plastics on, especially the tank ones. Strip out the tank and that’s no good. A couple “pro tips”: On the rear brake caliper, the brake line can be knocked loose, to help this issue, it is tightened to the inside and then wire tied. The front brake line is also prone to loosen up and get into the spokes which can destroy the brake line. It is very important to watch this and keep the fork guard clamp tight and position it accordingly. We also wrap gorilla tape around this area for extra protection. All Beta’s are able to dual sport. In return, they come with extra wires to make that possible. My bikes are considered race bikes, so the wiring for the lights, horns, etc are unnecessary to me. We did notice that in 2020, Beta cleaned up the wiring. Eliminated a lot and everything had a nice home. We almost did not install the race harness but I already had it, so we did. This eliminated some things. My map switch is no longer on tank but is on the handlebars. All the wires and CDI were rerouted to the right side of the bike for extra protection and less likely to receive excessive water damage. Make sure the CDI is pointed downward. In Missouri, the stock jetting is usually good. So, we leave that alone until there is an issue. From factory, the carb vent tubes are located at the bottom of the bike. This can allow dirt, sand, or water to be sucked up. Go ahead and prevent this, a carb vent kit is installed, relocating the vents to under the seat. For under $25, you will be saving yourself a lot of future wear and tear. Time to address the cooling situation. Never in my life have I overheated a Beta two stroke. The thermostat located in the cooling hoses is proned to leaking. Before it is a problem, a Boano hose kit is installed. This deletes the thermostat and also keeps the bike cooler. Samco hoses are also a great brand. The OEM coolant is removed and replaced with Engine Ice. We do this because when in a pinch it can be mixed with water unlike many other brands. We keep Engine Ice on hand, so it keeps it simple. In 2020, Beta redesigned the air box and air filter for easier install. Similar to the newer KTM’s but it is not exactly the same. REMEMBER, a THICK bead of grease is applied around the rim along with filter oil applied to the filter. This is a MUST every time an air filter is installed. Otherwise, the filter is not properly sealed and will allow dirt in the carb, which may result in premature engine issues. Time to install guards using blue Loctite. In the off road world, guards are pretty important. While the Loctite is out, be sure to Loctite the frame to subframe bolts and the seat bolts. For the rear disc protection, I chose a blue Bullet Proof Designs guard. In the past,

2020 Beta 250 Race Edition Race Bike Build Read More »
Protect your Noggin

Protect your Noggin Many people think of dirt bikes as dangerous but truth is anything a person can do is dangerous. With the proper protection like a good helmet, injury is reduced. If the helmet doesn’t fit properly, protection is reduced. No idea how to measure your head for proper fitment? To measure, use a tape measure and go around your head’s circumference (around your entire head), one inch above your eyebrows then compare the measurements to a size chart for the brand you are purchasing. Measuring your head is just one thing that should be done. Here are more tips and tricks to determine if the helmet it one is the correct size. It should feel snug but not too snug that it is uncomfortable or painful. Tighten the chin strap then move your head in all directions, no movement should happen. If movement does happen, you need a smaller size. Put your hands under the back of helmet and pull it forward. You should not be able to pull it off your head. Check to see if you can put one finger between the helmets padding and your forehead, if you can, you need a smaller size. The helmet should feel slightly snug on your head but you should not notice excessive pressure, this excludes cheek padding. If excessive pressure or causes pain, the helmet is too small. When should a helmet be replaced? A helmet will not last forever, even without a wreck. If a wreck does happen and you hit your head, replace the helmet immediately. Once a helmet has received an impact, it is no longer safe to use. What if you have no impacts? Just like your bike, wear and tear does happen to the helmet. The lining and pads can get wore down to the point of the safety being significantly reduced. I ride roughly 200 hours in a year’s time, so for me, one year is max! Just try to use your best judgment and if you really don’t know, ASK! Take care of your helmet! After every ride, clean the helmet and visor. Don’t forget about the sweaty smelling lining and cheek pads. It can be hand washed in the sink or use a helmet clean/care product. I like to use Motorex Helmet Care. It smells great and shines the helmet nicely. Also, do not store your helmet in a place where it could fall. Now on to the biggest question most rider’s ask, what helmet should I buy?! This is my opinion and everyone is entitled to an opinion. If you want an excellent, type of line helmet, I STRONGLY recommend the Fly Formula helmet. It fits good, its comfortable, ultra-light, AND it has the best protection available on the market. It is certainly worth the money. MSRP price is $649.95. This helmet comes with a Fly helmet garage and an extra visor. Below are key features to this helmet: DOT/ECE Approved 12K carbon fiber shell-Produces an extremely lightweight shell with superior penetration resistance Impact Energy Cells-Made of RHEON, the Impact Energy Cells maximize absorption of low speed linear and rotational impacts, reducing forces transmitted to the brain. Conehead® EPS Technology-Provides a softer liner whereby the cones help manage or absorb an impact force more efficiently. Six critical zones have been fine tuned for a progressive response to low-speed and high-speed impacts Expanded volume EPS-Strategic areas of the helmet have more impact absorbing EPS, more suspension between your head and the ground EPP chin bar-Expanded polypropylene creates an additional element of impact mitigation Clavicle shell relief zone-Creates a soft zone filled with EPS and EPP to aid in reducing clavicle injuries Lightweight Custom visor screws and titanium alloy D-rings Comfort liner and quick release Cheek pads are made of a washable moisture wicking, anti-microbial material True Functional Ventilation (TFV)-When in motion air is forced through multiple air intake vents, then passed through aligned vent channels in the EPS and exits out multiple rear exhaust vents. My next choice would be Fly F2 Carbon Helmet. Before the Formula got released, this was the helmet I had been wearing for the last three years. The MSRP price is $299.95. Below are key features for this helmet: ECE/DOT approved Carbon Matrix composite shell Dual-density EPS (Expanded Polystyrene) liner Custom rubber trim with integrated nose guard Lightweight machined aluminum visor screws Stainless steel rivets and D-rings Removable and washable COOLMAX® comfort liner and cheek pads All FLY helmets have TFV (True Functional Ventilation). When in motion air is forced through multiple air intake vents, then passed through aligned vent channels in the EPS and exits out multiple rear exhaust vents Quad-vent above eye port draws air from goggle to reduce fogging A third option that I recommend is, Alpinestars Supertech M10. MSRP is $649.95. Below are key features for this helmet: Weight of S-M10 is 1240g for size Medium (ECE) – 1340g for size Medium (DOT) Heat mapping tests have resulted in specifically designed ducting which produces a positive flow into the helmet over and around the rider’s head, improving comfort while riding and reducing the on-set of heat stress in extreme conditions. Post-crash protection mechanisms are also a key feature of the Supertech M10 design, allowing rapid and safe intervention if the rider has suffered a major impact. MIPS is incorporated into the Supertech M10 to reduce rotational motion energies that impact the helmet causing damaging gyration force to be transmitted to the brain. Visor release mechanism is conceived to avoid the inherent weaknesses in other types of anchoring systems. Maintaining shell integrity is vital for safety and with the possibility of multi-directional forces impacting on the visor, separation at the critical point of loading reduces potentially damaging leverage and rotational accelerations that refer injury to the rider’s neck and spine. The base of the S-M10 has been sculpted to give a relief section, where the bottom profile is raised to clear the collarbone (Clavicle). Also, incorporated into the area of the

Protect your Noggin Read More »

Gobbler Getter National Enduro 2019

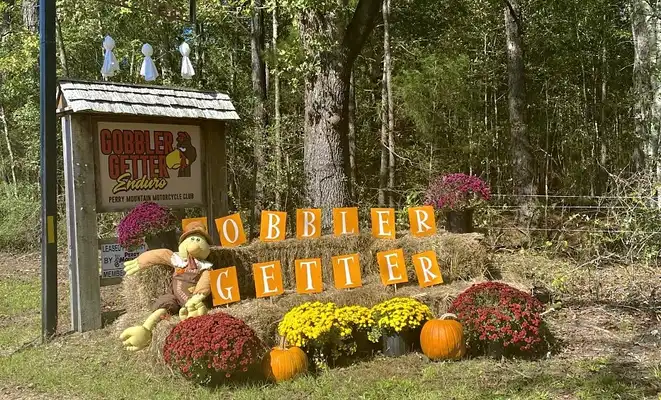
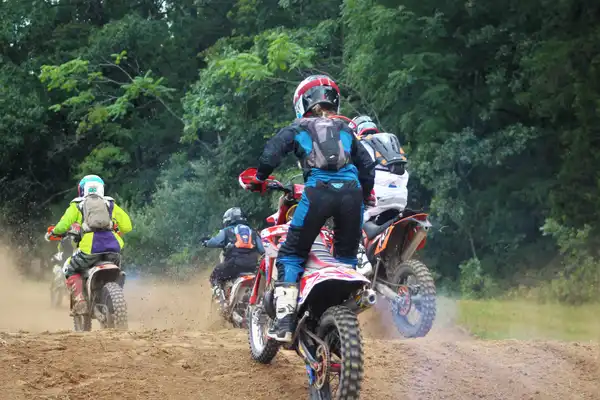
Gobbler Getter National Enduro 2019 The National Enduro finale was last weekend in Alabama. Looked like conditions were prime and the trail was fun. Since, I am not back to riding or racing yet, I took advantage of the nice weather and went for a run. Sand and whoops are not easy on a dirt bike but they are far much harder on foot trying to run! It was fun though. Considering, I am thrilled with increasing my mileage and speed. It helps to have all those little goals to reach the big goals. I am looking forward to getting back on the bike and ready for next years season! Steve (my dad) had an alright day. He struggled getting around other riders. Then test 4, he lost a fight with a vine. He came back in covered with blood all over his face and jersey. We got him doctored up and he finished out the day with a 6th place finish. It put him 3rd for the year in A+50. Huck Jenkins attended this with us and his report follows: “Well it was quite a 2019 season to say the least. Last weekend the Bonecutter Offroad team wrapped up the NEPG series in Alabama. Conditions in the sandy whoops were PRIME!! Got row 103… quite the adventure. Let’s just say it was good training. Test one I had the win in 200A but then little mistakes put me back to 3rd for the day, but it was freakin amazing trail! I’ve never ridden on such fast and flowy terrain!! The @bonecutteroffroad crew has that 125 dialed! Finished out the season with a 6th in 200A, so ready to try and grab a championship next year! I can’t thank the whole team that helped make this 2019 NEPG season happen, it was more than a dream come true. Bring on 2020!!!!?? Photo credit-@egutishphotography @bonecutteroffroad @betausa @shockzonesuspension @bulletproofdesigns @139designs @perfectpitchguttering” Huck participated in the Beta Cup and finished out 5th in that class and 6th in A200. Rylan Frankford also participated in the Beta Cup class and finished 4th in that class and 5th in A200. The third Beta Cup rider out of our shop is off serving our country at this moment and didn’t get to finish out the season. Broc French ended up 3rd in the Beta Cup and 4th in A200. It has been a pleasure helping these boys go after the Beta Cup prize, 2019 Beta 250 RR. In the A+40 class, Scott Boyer finished the year 2nd on his 2019 Beta 250 Race Edition. Picture Credits – Kenneth King and Erin Gutish More Posts Back To Blog Page

Gobbler Getter National Enduro 2019 Read More »

Wrench Tip Wednesday: Short Legs + Tall Bike

Wrench Tip Wednesday: Short Legs + Tall Bike When I moved up from a little TTR 125 to a full size 250, it was a shocker! My balance was bad and all I wanted to do was touch the ground. There are somethings a person can do to make it better but at my height 5’2, being able to touch flat footed on both sides is not going to happen. So, what do you do? ADAPT! You can lower the bike. It is recommended to lower it through the suspension instead of other options. 1 inch seems to be the most common. My current race bike, 2018 Beta 250 Race Edition is lowered 1 inch and I am personally glad I did it. It does help me in technical areas where I absolutely need to dab a foot. That much lowered only allows me tippy toes. Another option that many riders do is buy a Seat Concepts low seat. It does make you feel lower to the ground. BALANCE is key! The better your balance, the less you will have to rely on needing to touch the ground. I recommend doing balance drills on and off the bike often. It makes the difference. Pay attention! Don’t just stop and put your foot down. That will bite you more times than not, I know from experience. Plus, when riding with a group and you randomly fall over from not being able to touch is embarrassing. Try to spot places that are more even ground when you want to stop. Another thing that used to bite me often, not keeping my feet on the pegs when in motion! It was always in my head; I need to touch the ground for more balance but that is wrong. It led to many unnecessary wrecks. It took many times of being told, “Keep your feet on the pegs, your short little legs will not be able to touch anyway.” Being short, a big bike might be intimating and seem heavy to balance. Use your legs! Ryan Hughes posted a great video the other day and explained this well! “The weight of the bike is low centered not up by the handlebars so that means your control of the bike should also be low, your legs.” There is a lot more strength in your legs than your upper body, use it as much as you can. Lastly, be confident. Know you have the ability to ride a full-size bike. If you believe it, you can do it! More Posts Back To Blog Page

Wrench Tip Wednesday: Short Legs + Tall Bike Read More »

Muddobbers National Enduro 2019

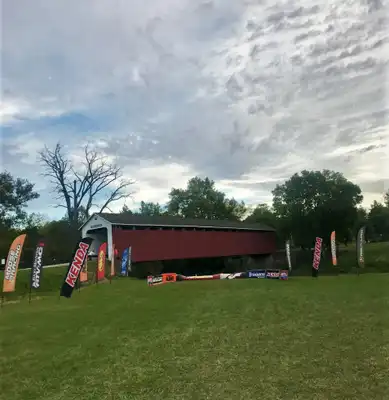
Muddobbers National Enduro 2019 This was our second time to the famous Cumberland Covered Bridge in Matthews, IN. Last year this place was one of my top favorites. There is nothing like riding through corn fields holding it wide open. Fast is thrilling! I was certainly bummed to sit it out this year but gave me “motivation” to continue to push through this injury. Saturday, Beta USA hosted a Demo for their new 2020 bike’s. The lines were LONG and the bike’s did not sit empty! Huck Jenkins had an eventful day. His race report follows: “Well the NEPG in Indiana was one for the books. We left Saturday morning seeing as it was close and arrived about 1 or 2pm. Set up camp and enjoyed watching some of the Beta Demo riders. Good night’s rest and it was on to Sunday race day! This time I was on row 18 with Scott Boyer and I had a blast battling him all day. Test one, my tire decided to come off the rim so I had to limp it to the end of the test. Nobody I knew had a tire or rim that would work. So, I’d like to thank the Beta USA crew who saved the day by loaning me a wheel!! I showed up late to test 2 and lost a minute or so. Test 3, I got lost with a group of other guys which put me late to test 4 as well. Although, they did scratch test 3, it was frustrating to be late to 4. On the upside, I got to battle with AM Pro Yamaha’s Rachel Archer the whole test which was super fun!! Test 5 and 6 were a good time, lots of sweet trail and passing between Scott and me. The trails there were so awesome I wish I could go back and ride them more. Again I can’t thank Steve and Tayler enough for putting up with me all the way there and back. Looking forward to the last 2 rounds. Oklahoma here we come! I really appreciate all the amazing help I’m getting!!! @bonecutteroffroad @betausa @bulletproofdesigns @shockzonesuspension @perfectpitchguttersystems” Huck finished 9th in A 200 on his Beta 125 right behind Rylan Frankford, who is also on a Beta 125. In the Beta Cup class, Rylan sits 4th and Huck sits 5th. Steve Bonecutter had a so, so day. Loads of mistakes and the bike spent a lot of time on the ground. He seemed to struggle navigating the tight, turny trail. He was on row 13 with Ron Ribolzi, the Eline guy, and they had a fun time battling each other! He finished the day 7th in A +50. Bonecutter Off Road Results: A 200 – Rylan Frankford 8th (BETA) A 200 – Huck Jenkins 9th (BETA) A+40 – Scott Boyer 5th (BETA) A+50 – Steve Bonecutter 7th (SHERCO) B+50 – Jeff Ellingsworth 6th (BETA) More Posts Back To Blog Page

Muddobbers National Enduro 2019 Read More »

2020 Beta Race Editions & Other Models Review

2020 Beta Race Editions & Other Models Review Pictures of the 2020 Beta Race Editions do not do the bike justice. They support an all new sleek design which is astounding! When I seen the early morning release, I was literally shaking with excitement. KYB Forks, red plastics, red frame guards, redesigned stronger body components, counter-balanced engine; sounds like the ultimate Beta dirt bike! Unfortunately, all I got to do was drool over the bikes since I am still recovering from an injury. I did get feedback from my dad, brother, and a couple employees. Well it is not always about the looks. What about performance? The 250/300 with counter-balanced engines add extra smoothness to the two strokes and less vibration. The KYB forks work exceptional in stock form. Everyone seemed to very pleased with them. I am so stoked for all the changes for the 2020’s! As mentioned above, the suspension on the Race Editions is KYB forks and Sachs ZF shock. To save weight, the bikes are pre-mixed, no oil injection like the standard models. Special components on the Race Edition models include: front quick release axle pull, Vertigo hand guards, Metzeler Six Days tires, black aluminum wide foot pegs, red dual sprocket, red aluminum chain tensioner blocks, transmission oil cap, engine oil cap and oil filter cap in red anodized aluminum, and special racing graphics. The two-stroke race edition model lineup consist of 125, 250, and 300. The four-stroke race edition model lineup consists of 350, 390, 430, and 480. These ranges give a model for everyone to ride. The four strokes have a new electrical system making it more performing with increased battery capacity. Like the RR-S models, the Race Edition 4T, also have the completely redesigned engine, with the aim of reducing the weight and bulk of moving parts. It was achieved by raising the clutch and moving the crankshaft back. Moving the center of gravity closer to the swingarm pivot allows for better handling. An overall weight reduction of 2.2 lbs was also achieved. New water pump system that improves flow-rate, making the efficiency of the cooling system’s ability to transfer heat, keeping average temperatures lower, improving performance, and providing a more simplified cooling hose system. The Xtrainer supports a stylish blue look and received the counter-balancer. Since being released in 2015, Xtrainer has been a fan favorite and still will be. The bike performed well on the gnarly terrain in Ohio. The Xtrainer received updated internal valving to the front forks and rear shock for improved handling. A longer swingarm provides a more stable ride. As stated in the release of the Beta 2020 RR’s; new frame, subframe, and body components making it more durable. Counter-balancer in the 250/300 CC engines. A new battery charging system making it more efficient and reliable for the four strokes only. These bikes are all new and redesigned for a new Beta generation. Beta sticks to their roots, keeping the dirt bikes easy to ride and reliable. – Rideability If all these updates and changes don’t excite you, find a Beta Demo Day near you! Go to www.betausa.com and see where they are headed next. You will not be disappointed. RR-S, Race Editions, and Xtrainer available starting in November! 2020 Models MSRP: 125 RR – $7,999 200 RR – $8,699 250 RR – $8,799 300 RR – $9,199 Xtrainer 300 – $7,699 350 RR-S – $10,599 390 RR-S – 10,699 430 RR-S – $10,799 500 RR-S – 10,899 125 Race Edition – $8,399 250 Race Edition – $9,099 300 Race Edition – $9,499 350 Race Edition – $10,499 390 Race Edition – $10,599 430 Race Edition – $10,699 480 Race Edition – $10,799 ​TAKING ORDERS NOW AT BONECUTTER OFF ROAD! More Posts Back To Blog Page

2020 Beta Race Editions & Other Models Review Read More »

2020 Beta Race Edition First Look

2020 Beta Race Edition First Look The wait is finally over! The standard RR models were released back in July. But what about the Race Editions? I woke up this morning and one of the first things I saw was this picture. Two things stuck out to me; KYB Forks and red frame guards. I have never cared for black guards covering up the pretty red Beta frame. A few months ago, I rode on stock KYB forks, stock forks compared to other stock forks, KYB definitely stood out to me in a good way. Actually, the fact that the Race Editions have red plastics, excite me even more! White looks good but you cannot beat the BETA RED! I mean, it is my favorite color. I am so stoked for all the changes for the 2020’s! As mentioned above, the suspension on the Race Editions is KYB forks and Sachs ZF shock. To save weight, the bikes are pre-mixed, no oil injection like the standard models. Special components on the Race Edition models include: front quick release axle pull, Vertigo hand guards, Metzeler Six Days tires, black aluminum wide foot pegs, red dual sprocket, red aluminum chain tensioner blocks, transmission oil cap, engine oil cap and oil filter cap in red anodized aluminum, and special racing graphics. As stated in the release of the Beta 2020 RR’s; new frame, subframe, and body components making it more durable. Counter-balancer in the 250/300 CC engines. A new battery charging system making it more efficient and reliable for the four strokes only. Stay tuned… We head to Ohio for the Beta dealer meeting this weekend and will have the opportunity to demo ALL of the new Beta’s! More Posts Back To Blog Page

2020 Beta Race Edition First Look Read More »

Wrench Tip Wednesday: Wheel Maintenance

Wrench Tip Wednesday: Wheel Maintenance Alright, I washed my wheels when I washed my dirt bike. I guess that means my wheel maintenance is all done until after the next ride, right? WRONG! Wheels often get neglected which can result in DNF’s or spending money to get new ones. BTW – wheels are not very cheap! Wheel components include: A hub which holds the axle in place. A rim “hugs” the tires. Lots of spokes which holds the assembly together. Like all components that involve connections, spokes can become loose. Think about how much abuse the wheels experience. When you do your routine check make sure all spokes are tight but NOT too tight. If a person overtightens a spoke, it can cause them to break when riding/racing which can cause a DNF or a bent wheel! Fasst Company sells a Spoke Torque Wrench which helps ensure the spoke is tightened to the proper amount of tension. A regular spoke wrench can also be used, just be cautious. Overtightening seems to be a big problem. Don’t flex your muscles when tightening spokes. Wheel truing is hopefully something you do not have to do often. To check if a wheel needs trued, put the bike up on a stand and spin the wheel. If the wheel has a wobble, it needs trued. To correctly do this, you will need a wheel truing stand. Remove the wheel from the bike and put it on the truing stand. All spokes will need to be tighten evenly. Tighten every 3rd spoke around the wheel and go 3 full rotations around the wheel. Tightening ever 3rd spoke helps ensure the load is equally distributed throughout the wheel. Continue to do this until the wheel does not have any more hops. If the spokes are regularly checked and kept torqued it will keep the wheel true longer. Don’t forget about the wheel bearings. If the bearings go bad and stay that way for a while, you will be buying a new hub. If its wet, muddy, or sandy, do regular checks. Keep them greased and replace when needed. $30 wheel bearings are way cheaper than a hub. Pro Tip – If you break your spokes regularly, zip-tie or wire two together at their crossing points. Do this for the entire wheel. More Posts Back To Blog Page

Wrench Tip Wednesday: Wheel Maintenance Read More »

Old Lady on a Sherco with New Skills

Old Lady on a Sherco with New Skills Here is my mom’s (Missy Bonecutter) race/weekend report from the Lead Belt National Enduro. “While this old lady has been racing dirt bikes for about 7 years now, it was her first time at trying the NEPG circuit. Was not sure what to expect as I have never even ridden at Park Hills. So, I had the brilliant idea to walk one of the sections. I filled my water pack, grabbed my phone, and off I went walking test 3. The trail was plenty wide with lots of up and down hills, but I just wasn’t seeing anything that I thought would be above my skill level. Before I knew it, I was 3 ½ miles in. Having only raced the local races I was just sure I was going to pop up out of the woods any time. Sure enough, in a couple more miles I came to a black topped walking path, but do you turn left or right. Afraid of getting lost I thought I better keep following the orange arrows. Now 6.4 miles down the trail, legs shaking and just a sprinkle of water left I am beginning to wonder if I should call for a rescue. I have been saved! A few guys and a couple of UTV’s were sitting at the top of the next hill. PLEASE, don’t move – wait till I get up there. Sure enough my prayers were answered. I explained I thought I was a bit lost, but they assured me I was still in Missouri. They said as the crow flies, I was only a couple miles from camp, but you know in the woods you don’t fly like a crow. These young men were kind enough to offer me a ride back. I certainly did not turn down that offer and in about 15 minutes they had me back to civilization! Moral of the story is I got plenty of good exercise and felt comfortable with the lay of the land. Off to the sign-up trailer to get registered. Most people are smart and pre-register the month before, but for the last-minute decision makers, you will get the back of the pack. This particular National had 110 rows available with 5 riders in each row. By the time I signed up I was placed on row 103, which was not a bad thing for me because there were only about 15 riders behind me that got around me pretty quickly and then I was just out there riding alone. No STRESS, No PRESSURE, No WORRIES! I cruised along on test one with only one mistake. Tried to tackle a tree a little bigger than thought and totally destroyed a bark buster. I wasn’t sure at all how this test stuff worked, but there was a group of people at what I believed to be the end of test one writing down numbers. I was told to keep following the orange arrows to the next test start. Got there with 3 minutes to spare before my row was to take off! Test two was a little scarier than test one. A lot of off camber hills and a lake that appeared to nearly swallow the trail in a few spots. My fear obviously caused me to go even slower than normal. I was late to the next test by 7 minutes. Between test 2 and 3 I should have been able to take a quick break & fuel up, but did neither and darted off to test 3. I made decent time on test three and came in with 2 minutes spare before having to taking off on test 4. My time on test four says it all – nearly 70 minutes for just 1 test that was 11.5 miles. I noticed my fuel light came on with about 1 ½ miles left of the test. I let a sweep rider know and he was kind enough to ride behind me to the finish just in case I ran out of gas. My total combined time was 3 hours and 24 minutes of straight riding. I know I am slow and do not have a lot of skill, but am still proud to say I FINISHED my race! I have learned you are never too old to try something new and out of your comfort zone. In the long run you will be a stronger person. I also have to say I love my SHERCO!! Just give him a little throttle and he would climb the hill. Thank you Steve Bonecutter for getting me all set up and continuing to keep my Sherco in top running condition.” More Posts Back To Blog Page

Old Lady on a Sherco with New Skills Read More »

Wrench Tip Wednesday: Snapping a Chain

Wrench Tip Wednesday: Snapping a Chain How many of you have ever had a chain break? Better yet, how many of you use a slave cylinder guard? If you have a chain break, it can be very expensive! How do you prevent breaking a chain? It can’t always be prevented, but be sure to do a pre-ride/race check every time. The chain needs to be lubed often anyway so just check while you are doing that. If the chain looks rusty or corroded, has a flat wear pattern on the top and bottom, and/or demonstrates easy side to side play, then it is time to replace the chain. Sometimes a chain within its service limits, breaks. It could happen for many reasons: Master link clip falls off A rock or stick gets stuck in the chain stretching it No good reason at all Or the best one yet, the pre-ride inspection was not done A rider may never have a chain break on them but for insurance, use a slave cylinder guard. If you do not and the chain snaps, it will break your slave cylinder and case. The sound of that is expensive! Not all the cost of parts but the labor costs too, it is not a difficult job but requires time. Enduro Engineering makes slave cylinder guards for both Beta and Sherco. Other good options include, Topar Racing, Force, and Beta Boano slave guards. Bonecutter Off Road carries all these options – can be ordered through our online store! If you are in need for chain, you cannot beat quality. Our recommendations are the Firepower Gold O-ring chain, D.I.D. Gold O-ring chain, or SRT Gold O-ring chain. I have been using the Firepower chains on my bikes for over a year now and I seem to get longer use out of them compared to other chains. Appearance wise, the chain looks good and durable. The first two pictures are what the worst case scenario looks like if a chain breaks and the rider has no slave cylinder guard. More Posts Back To Blog Page

Wrench Tip Wednesday: Snapping a Chain Read More »

Scroll to Top