Business Hours

Sunday Closed
Monday 8:00 AM to 5:00 PM
Tuesday 8:00 AM to 5:00 PM
Wednesday 8:00 AM to 5:00 PM
Thursday 8:00 AM to 5:00 PM
Friday 8:00 AM to 5:00 PM
Saturday Closed

Author name: Brenna Baker

Wrench Tip Wednesday: Bleeding Rear Brakes

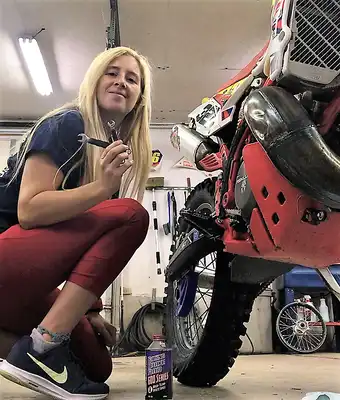
Wrench Tip Wednesday: Bleeding Rear Brakes Are you a rear brake rider? Well, I am no professional but I have learned in the past year that if you are in the so called “proper position” on the bike (STANDING ON YOUR TOES) it is impossible to ride your rear brakes. Anyways, back to the point, do you bleed your brake fluid before or after every race? It is not a must but I personally prefer doing preventative maintenance, the risk of losing the rear brakes in a race is not worth it to me. First step, make sure you have brake fluid on hand. There is a lot of good brands out there varying in prices and boiling points. If you boil your fluid often, I highly recommend Castrol RBF or Motul 660 RBF. Another good brand out there is Maxima RBF. Next, remove the rear brake reservoir cover. Try to avoid getting any dirt or debris inside. I go ahead and pour brake fluid in and top the reservoir off. Attach a clear piece of tubing to the bleeder nipple (located on the brake caliper), routing the other end into a drain tub. When in a pinch, I will lay down an old towel or rag to catch the fluid vs the tubing. Press down on the brake pedal, then, take your wrench and open the bleeder a ¼ – ½ of a turn. Brake fluid should be traveling through the tube. Close the bleeder. Pump the brake pedal a few times and reopen. NEVER DEPRESS AND RELEASE THE BRAKE PEDAL WITH THE BLEEDER OPEN!!! Pay attention to the color of the fluid coming out. If it is a lot darker than the new fluid keep on bleeding the brakes. There is no sense in keeping any old worn out fluid in there. Another key tip, do not let the fluid reservoir run out of fluid. If you do, it can result in getting air in your lines. Which can be a big pain in the rear! Once you are done bleeding the rear brake, check the level of fluid in the reservoir before putting the cover back on. Make sure it is above the minimum and below the maximum. Having too much fluid can also cause the brakes not work as well. Remember, doing preventative maintenance might result in LESS oh sh!t moments come race day! More Posts Back To Blog Page

Wrench Tip Wednesday: Bleeding Rear Brakes Read More »
MORE Panther Creek 2018

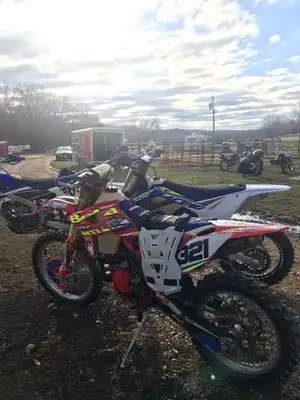
MORE Panther Creek 2018 Final round of MORE took place at Panther Creek in Tuscumbia, MO. The entire week leading up to the race it rained and rained. Surrounding areas received 8+ inches!! The hot topic at the shop was, is it going to be a mudder or will conditions be perfect? The drive to the race site showed a lot of signs of mud; water flowing over low water bridges and standing water in the parking lot. During the riders meeting, Steve claimed the property only received two inches of rain. My first thought was, is this “promoter talk” or was Leivan being legit. I was only concerned because I really wanted to wear my new RAD Fly Racing Special Edition Seafoam & Port gear. Anyways, I cornered Steve and his response was “unless you plan on riding behind someone and getting roosted like I did by Mackenzie Tricker, you’ll be fine”. I go out for my practice lap and conditions were slick but great. Tons of different line choices with a good flow, long uphills that you could let your bike eat. Just a little bit of everything. I was pumped for the race. During the Sportsman Intermediate race, I did not have a good start. I’m not really sure why, but I was slow at getting started. I had a few battles but just did not make any ground. A highlight of the race was, this long uphill with two humps in it. I jumped the first one and landed doing a wheelie. I COULD NOT GET MY FRONT END DOWN and it was not intentional. Little sketchy but super fun!! The Saturday ladies race is split into three classes, Ladies A, Ladies B, and Ladies +30. There was only 6 of us total so everyone wanted to do a one row start. I asked if I could start a minute behind them on my own row. I was told I could only do that if I start with my bike facing the opposite way of the direction to go. Of course, I was game for that! The trail was around 2 miles long and I did not do a practice lap. I was very unsure if I would pass all of the other ladies before the end of the first lap but I got it done. I ended up 1st in my class. Rain moved in Saturday night and into Sunday morning. Race started at 10:30 with drizzle coming down. The trail was a total of 16 miles long and we had only ridden around 6 miles of it the day before. It for sure had a lot more mud and slickness but was still very AWESOME! My day wasn’t the best but as Boyd told me mid-race “champions are built on their bad days”. I continued on and finished the day 6th in B. My dad, Steve, had a really rough race. He was chasing a fella in his class and decided it was time to make a pass. His line choice involved a super slick sideways log, watch out for those things. He ended up going down hard and described it as the fastest but longest wreck ever. It was painful and the bike had some damage. Luckily, there was great sweepers and one of them was able to get the bike fixed so he could finish 3rd in his class. Great job to all of our Beta & Sherco riders!! It has been an excellent season. Big thanks to the MORE crew for an outstanding race season. Action shot P/C : Stephanie Pratt Bonecutter Off Road Results Pro – Broc French 4th (Beta) Pro – Wyatt Bonecutter 5th (Sherco) A – Chris Cassil 3rd (Sherco) A – Colton Pratt 6th (Sherco) A+35 – Steve Bonecutter 3rd (Beta) B – Tayler Bonecutter 6th (Beta) +50 – Roger Mackay 4th (Beta) C+30 – Wade Mislevich 2nd (Beta) C+30 – Travis Opie 5th (Sherco) C+40 – Steve Summers 7th (Beta) C+40 – Mike Rothganger 9th (Beta) C+40 – Brad Kress 10th (Beta) Sportsman Expert – Wyatt Bonecutter 2nd (Sherco)Sportsman Expert – Colton Pratt 3rd (Sherco) Sportsman Expert – Chris Cassil 4th (Sherco) Sportsman Expert – Steve Bonecutter 6th (Sherco) Sportsman Intermediate – Tayler Bonecutter 2nd (Beta) Sportsman Amateur – Wade Mislevich 4th (Beta) Sportsman Amateur +40 – Philip Burger 7th (Beta) Sportsman Amateur +40 – Rob Steele 10th (Beta) Ladies A – Tayler Bonecutter 1st (Beta) Ladies +30 – Missy Bonecutter 2nd (Beta) More Posts Back To Blog Page

MORE Panther Creek 2018 Read More »

Wrench Tip Wednesday: Cleaning an Air Filter

Wrench Tip Wednesday: Cleaning an Air Filter If you consider yourself a “dirt biker”, a good habit to have is, always check your air filter after every ride or race. If your race/ride was not dusty it MIGHT not be necessary to clean but when the filter does need to be cleaned, it can no longer do its job of stopping dirt. For starters, figure out where your air filter is located. It varies from bike to bike. On Beta’s you just remove the LH side cover and boom it’s there. Sherco’s have their air filters underneath the seat. Once you find the air filter, be sure to inspect it, if it looks ragged and falling apart safe to say it is time for a new one. Take a clean bowl or pan and pour some of your favorite cleaner in it, sometimes a small amount can go a long way. Lots of good options out there, such as Maxima, Bel Ray, and No Toil. Some brands recommend to use their air filter oil with their cleaners for best results. Soak the dirty air filter in the cleaner. Foam filter cleaners gets the oil and most of the dirt off. Next, use some warm soapy water to rinse the rest of the dirt out of the filter. Gently ring it out. Before it can be installed the filter needs to be completely dry, so go ahead and hang it up to let it air dry. While the air filter is out of the air box, it is a good idea to clean it up as well. Twin Air makes an air filter plug for almost all bikes out there. Install it and use a degreaser to get it cleaned. Now that you have a dry, clean air filter refer to last weeks blog post to install. More Posts Back To Blog Page

Wrench Tip Wednesday: Cleaning an Air Filter Read More »

Wrench Tip Wednesday: Air Filter Installation

Wrench Tip Wednesday: Air Filter Installation Did you know an air filter is one of the most important components on a dirt bike? The purpose of it is to capture dirt to prevent it getting in the carb and sucked into the engine. So, it is kind of a SUPER BIG DEAL! A leaky air filter can cause premature wear, such as, top end components (piston and rings) wearing out sooner than they should. Glove up and let’s install an air filter properly. First off, a clean air filter is a must. If you install a dirty clogged filter, it can reduce performance and make the bike sluggish. Take your clean filter and apply foam filter oil to it. Lots of good ones out there – PJ1, Motul, Bel Ray, etc. Most oils can be purchased in two different ways aerosol or pourable. It is personal preference but we prefer to use aerosol spray because it allows control of the amount of oil applied to the filter. It is important to insure coverage of the entire filter, sometimes kneading the oil in is necessary. The oil helps catch the dirt so having too much is always better than not enough. Now that the air filter is all oiled up, install your filter cage. The most vital step that is often forgot; apply a THICK BEAD OF GREASE around the rim. If this step is skipped you will guarantee yourself a leaky filter and premature engine failure. We recommend a good water resistant grease that has stability under high temperatures such as Lucas Red “N” Tacky Grease or Bel Ray Waterproof Grease. It is time to install the air filter. Make sure it lines up with the filter box, to insure its 100% sealed. Now you are ready to ride! We stock all products discussed and can be purchased on our online store! CHANCES ARE IF YOUR FACE LOOKS LIKE THIS SO DOES YOUR FILTER! More Posts Back To Blog Page

Wrench Tip Wednesday: Air Filter Installation Read More »

Muddobbers National Enduro 2018

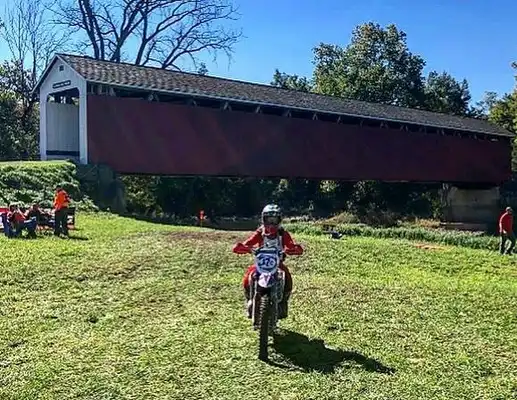
Muddobbers National Enduro 2018 Round 9 of NEPG took place in Matthews, IN. It was my first time to the covered bridge and the trail was very enjoyable. The conditions were borderline perfect; not a lot of dust, good moisture in the dirt, and not a ton of mud. The temperatures were in the lower 70’s and sunny skies, very ideal. In the first test, the sun was still low enough it was very blinding. The tight, winding trees were hard to maneuver with lack of vision. After test two, the sun was no an issue. I don’t remember a lot of details about every test expect having fun in all of them. There were lots of chances to open the bikes up and “let them eat” in the fast corn and soybean field sections. Test four had a lot of creek crossings and the dirt was on the muddier side. I chose my lines well and did not get stuck in any of the mud holes. I stayed off the ground majority of the day and overall rode really well. I had a blast and can’t wait to go back! Big thanks to Frank Leivan and Boyd for chasing us around all day. It took nine rounds before a pit mess up happened. Frank claims they were lost for 12 miles on the way to end of test 4 but got it figured out and was sitting there ready to pit at the end of test 5….waiting for the famous butt chewing! Steve Bonecutter claims, riding through the corn fields were wild! The corn was so tall and couldn’t see the next corner and he just thought that was the coolest thing ever! Bonecutter Off Road Results A open – Wyatt Bonecutter 20th A 30+ – Broc French 10th A 40+ – Steve Leivan 2nd A 40+ – Scott Boyer 5th A 50+ – Steve Bonecutter 6th Womens Elite – Tayler Bonecutter 4th Action Shot Photo Credit – Patrick Smith More Posts Back To Blog Page

Muddobbers National Enduro 2018 Read More »

Building a Race Bike According to Bonecutter’s

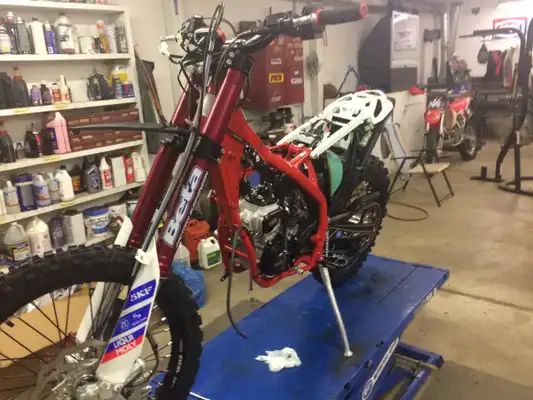
Building a Race Bike According to Bonecutter’s Okay, so you have taken the plunge and purchased a brand new dirt bike. Fantastic!! Now, is this new bike that you have just rolled off the show room floor “race ready”? Sure you can go straight out and race it, but you are fore warned there is serious risk of doing real damage to your new investment. I recently started riding a 2018 Beta 250 Race Edition. As you continue to read I will share all the things we have done to get my bike race ready and set up with all my personal preferences. Strip the bike down. Remove all the plastics, tank, and exhaust. This will allow you to get a good view of all the important stuff you are about to work on. GREASE. From the factory, bearings have a small amount of grease, but with what we ride you need a lot. We started with the linkage. Remove the linkage from the swing arm and grease the heck out of the bearings. This step will prolong the life of the linkage bearings by keeping the water and dirt from grinding away at them. Don’t get Loctite crazy. Some places it is best to use anti-seize. Chain adjusters and brake pins are a perfect place for anti-seize, keeping you from striping them the next time you are removing them. The bolts that hold your plastics on is another recommended place for anti-seize especially on the ones in the tank area. Loose lines can end a race in a hurry! The rear brake line coming from the brake caliper runs a good possibility of being knocked loose. The best way to help prevent this from happening is to have it tightened to the inside of the brake caliper and then tie it down with wire. A loose front brake line could end up in your spokes and then we all know what happens after that. Solution – always check your fork guard clamps for tightness and proper position. A cooler bike is always better. No, not referring to looks, Beta’s already have that going for them without extra help! This reference is to modifications to the cooling area. Consider installing oversized radiators as they allow the coolant more opportunity to keep your bike at a cooler temperature. Many bikes come equipped with a thermostat in the radiator lines. Totally unnecessary for our kind of racing, remove it. On my bike a Boano silicone hose kit was installed, deleting the thermostat. The header sits really close to the Water pump hose, we add an extra piece of hose around the outside of it for extra protection. Another optional item is the oversized water pump kit. It also helps the bike stay cooler so of course we installed it. Engine Ice is our choice for coolant. Up for a little dual sporting? Beta is your bike, as all are dual sportable, for this reason the Beta is equipped with a ton of extra wiring. If your plan is to hare scramble it is best to remove the OEM wiring. This can be accomplished by installing Beta’s race wiring harness. The picture shows the difference in size between the two, CRAZY! Think how much weight you just lost. My new harness was rerouted along the frame and removed the throttle cable from this route. Purpose is to free throttle cable so no kinking or binding occurs. In addition the CDI was moved behind the right side cover by the battery facing downward. This will provide more protection for the CDI and helps with water that may come in contact with it from causing issues. Jetting – to do or not to do. Check the jetting and needle in the carburetor, we base all of ours off JD Jetting’s chart. Beta’s stock jetting is actually perfect for Missouri, but on mine we did change the needle to blue. Also, the throttle position sensor was removed and a TPS plug was installed. Take a look at your carb vents. Do you see they vent out at the bottom of the bike where all the dirt and dust is billowing about? Solution – carb vent kit, this will relocate the vents to under the seat. Proper air filter installation is super important! Literally apply filter oil to the filter. Always use a THICK bead of grease around the rim. Doing both are a MUST every time an air filter is installed as dirt in the carburetor is NO good. Make sure your filter is seated snug against the filter box so there is not any leaks. Blue Loctite time! Super important on your new Beta, if nothing else is Loctited, at least take the time to Loctite the frame to subframe bolt and the seat bolt. We do recommend to Loctite all aftermarket protective items that you have purchased to add to your new bike. The line up on my new 2018 Beta 250 Race Edition is as follows: TM Designworks rear disc guard, BRP chain guide (thicker than OEM), IMS oversized tank – no pitting (OEM tank will not make last for a 2 hour race), TM Designworks skid plate (sides are high enough to protect water pump), Obie linkage guard, Bullet Proof Designs radiator guards, and Enduro Engineering full handguards make great tree deflectors. Feel the need for more power? Exhaust system might be on your list to change. It is suggested to zip tie around the seal that lies between the silencer and header. This will help prevent oil seepage. You may also want to consider installing a pipe guard to lessen the number of dents your pipe is sure to get. P3 makes a very durable guard. Do you prefer soft or stiff? Suspension, in my opinion, is the game breaker to the way your bike rides. Beta’s suspension varies between models. Beta RR models have open chamber forks, more suited for trailer riders to C class riders. Beta Race Edition models are equipped with closed cartridge forks that will work well for

Building a Race Bike According to Bonecutter’s Read More »

MORE Peninsula Run 2018

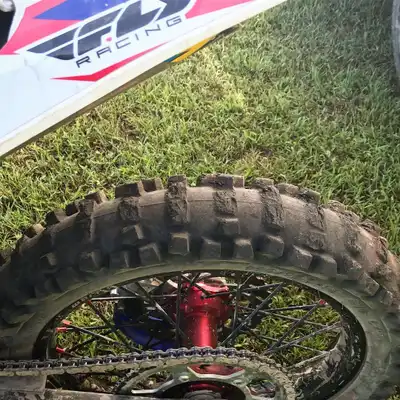
MORE Peninsula Run 2018 This past weekend round 6 of the MORE series took place on a peninsula at the Lake of the Ozarks. Camp Sabra is located in Rocky Mount, MO… Let’s just say there was some truth to the name of the town. MORE is a two day event and most races I will race three different classes. I remember enjoying this property the year before and was super excited for this race. During my practice lap, I just could not believe how many loose rocks this place had! It was insane. A lot of the trail is on the edge of the giving riders plenty of opportunity to see some up close views or as one rider did last year, plunge into the lake bike and all. Overall, the trail flowed well with a good mix of things but did not have many places that were not brutal. Saturday, I race in the Sportsman Intermediate class. For the first time all year, I had a decent start and was towards the front of the pack.. The first ¼ mile was zig zag trail through the cabin area. Suddenly, there was a sharp right corner behind one of the cabins. It was only wide enough for one bike to fit (single file line), to the left was a concrete retaining wall about 6 feet high and then to the right was the cabin wall. Literally, the entire class (20 riders) were piled up like a herd of cattle trying to get through. I lost 4 or 5 positions right there. At the end of the first lap, I was in 11 and by the end I found some good lines and passed into 9th. Overall, I felt really good on the bike but it sure was hot. Saturday afternoon, I race Ladies A. I was the only lady signed up in that class so I just tried to have fun! Sunday, I race in B on the long course. The trail was the exact same as Saturday’s race just more beat up and loose rock. I had another decent start putting me into 4th. I stayed in that position for the entire first lap and part of the second. I was feeling really good but started to notice I had no traction. I was not for sure what was up until I had a mishap on a hill falling back to 7th. I happened to look at my tire and noticed I had no knobs left! My first thought was, what the he!!, I guess this is my problem. I was not very thrilled about the situation but quitting over a bald tire was not going to be an option. I sucked it up and continued on. I made one pass and another guy quit so I ended up finishing 5th. Bonecutter Off Road Results: Pro – Broc French 4th (Beta)A – Chris Cassil 1st (Sherco) A – Colton Pratt 2nd (Sherco) A +35 – Steve Bonecutter 1st (Beta) B – Tayler Bonecutter 5th (Beta) +50 – Roger MacKay 4th (Beta) C+30 – Wade Mislevich 1st (Beta) C+40 – Travis Opie 7th (Sherco) C+40 – Mike Rothganger 11th (Beta) C+40 – Steve Summers 17th (Beta) C+40 – Rob Steele 19th (Beta) C – Chase Rothganger 8th (Beta) Sportsman Expert – Colton Pratt 5th (Sherco) Sportsman Expert – Chris Cassil 6th (Sherco) Sportsman Expert – Steve Bonecutter 9th (Sherco) Sportsman Intermediate – Tayler Bonecutter 9th (Beta) Sportsman Intermediate – Jamie Kost 13th (Beta) Sportsman Amateur – Wade Mislevich 1st (Beta) Sportsman Amateur +40 – Philip Burger 8th (Beta) Sportsman Amateur +40 – Steve Summers 9th (Beta) Sportsman Amateur +40 – Mike Rothganger 10th (Beta) Sportsman Amateur +40 – Rob Steele 15th (Beta) Ladies A – Tayler Bonecutter 1st (Beta) Ladies +30 – Missy Bonecutter 2nd (Beta) Thanks to Puremoto Photography for the awesome shots!! More Posts Back To Blog Page

MORE Peninsula Run 2018 Read More »

Loose Moose National Enduro 2018

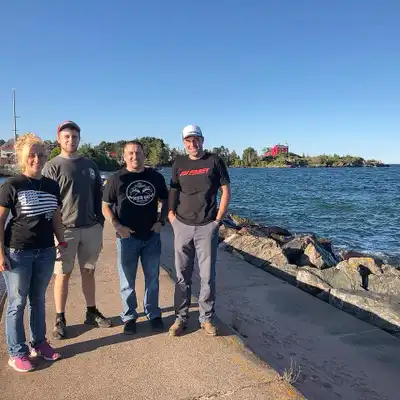
Loose Moose National Enduro 2018 How many people get to say they did a weekend race trip to the upper peninsula of Michigan? Round 7 of NEPG took place in Marquette, MI. The Bonecutter crew left Friday morning so we would have a chance to do some sight seeing of the Great Lakes Michigan and Superior. The views were incredible. The weather is a lot chillier than it is here in Missouri. Sunday morning the temperatures were in the upper 40’s. Luckily no rain and sunny skies were in the forecast for the day. Test 1 had a lots of sand whoops but also a fair share of single track woods. The single track was very tight with lots of sharp corners. The sun was still low enough it was blinding through the trees. Overall, it had a good flow. All I can really remember from Test 2 was lot of sand whoops. It was an extremely fast section but it was fun. Test 3 was very hard for me to get a flow. It was nonstop, between greasy tree roots, tight corners, and mud holes. It was only 7 miles long but it felt WAY longer than that. Two out of 3 of the mud holes, I had to drag my bike out of the main rut to prevent from getting further stuck. Other than that, I had no issues and just tried to stay off the ground. Needless to say, I was glad to see that test end. Test 4 was the longest one of the day, 9.5 miles. It was my favorite section! It had miles of sand whoops and an occasional moon rock climb. The moon rocks were big but not really hard or a struggle. The rocks were a nice break from the constant beating in the sand. I pushed really hard in this test and ended up getting tired towards the end of it, resulting in three wrecks. Test 5 was the shortest one of the day, 5 miles. I was excited knowing how short it was because it was my last test of the day (Women’s Elite don’t do test 6). I knew I was getting tired but thought with it being short it would be painless, little did I know. Right after takeoff, we had to cross a mound of rocks. A quarter of a mile in, there was a tough, rutted, rocky hill with two people already stuck on. No other lines or even a way around it so I just sat there waiting on them. Meanwhile, the row behind us catches up. I made it up the hill without any trouble but I had let the other people who caught up go ahead. The other 4 ¾ miles left were even more BRUTAL!! Nonstop moon rock climbs, downhills with drop offs, uphill climbs with boulders. It was absolutely INSANE! It went from fast sand to hard enduro style. Going into this test already exhausted resulted in, more views of the ground, not making good decisions, and pushing my bike a ton! Such an epic change of terrain! From what I heard, test 6 was way harder than 5. It had bigger rocks (I didn’t know that was possible), bigger hills, sketchy off camber slopes, and mud holes! Everyone I talked to after this test looked worn out and had at least one struggle! Shoutout to our pit guy during the race, Kevin Boyle “Boyd”. He walked way longer than half a mile to make sure our crew had water. After the day was done he claims he was “done, spent, wore out”. Steve Bonecutter’s description of test 6 – “The moon rocks were so huge it was like rolling up to the house and trying to figure out how to climb it. By the end of the first mile, I was tired, had leg cramps, and was barely able to ride my bike. RUTHLESS! Hardest 8 miles I have ever rode.” Overall, it was a super cool location and now that we know what to expect, I hope we get to go back next year! Completely worth the haul up there. Bonecutter Off Road Results: Wyatt Bonecutter (Sherco) – A Open 9th Broc French (Beta) – A 30+ 8th Steve Leivan (Sherco) – A 40+ 3rd Scott Boyer (Beta) – A 40+ 5th Steve Bonecutter (Beta) – A 50+ 3rd Tayler Bonecutter (Beta) – Women’s Elite 3rd Tayler Bonecutter Why Sag is a Priority for… WARNING, I am not a suspension expert but understanding how it works is something… Why do I use Flexx Bars? For starters, use what works!! Beta 200 vs Beta 250 – What… So, stoked to finally test out a Beta 200! More Posts Back To Blog Page

Loose Moose National Enduro 2018 Read More »

Girls Flock to Hardwood Hills Ranch

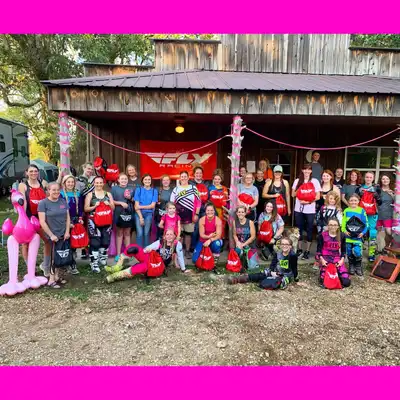
Girls Flock to Hardwood Hills Ranch The only girls allowed riding weekend started three years ago at Hardwood Hills Ranch and has created many lifelong friendships. The first year four girls participated, the second year it grew to nine girls, and this year exploded! The weekend was quickly arriving, with an expected attendance of nearly 30, including 9 girls under 11, a teenage group, and women. Meg and I worked hard to promote the weekend, inviting all the women we have met traveling and racing. A Facebook event page was created so we could keep track of the ladies planning to attend. With so many young girls riding with us this year, we spoiled them with candy, necklaces, cute bags, and bright pink sunglasses. We had dirt bike related giveaways for everyone who came. MTA Distributing donated pink Torc 1 Racing Grips, Bonecutter Off Road donated a set of women’s gear, Bridgestone M59 front tire, and Fly T-shirts. Marionville Power Sports donated a super cool Shot helmet. Meg got the weekend started early to decorate the lodge in pink and flamingos. Saturday was the official start day of the girls riding weekend. Day one we had 21 ladies show up. The day was laid out by splitting the ladies into three groups determined by skill level. I worked with the advanced level group. I set right out to challenge their abilities by riding a tough 15 mile portion of the yellow loop. Everyone seemed to enjoy the trail. After all groups were done with their first ride, we decided to let everyone choose who they rode with. A group of four teenagers instantly clicked and it was one of the coolest things to witness. It reminded me of the first year when my group of ladies and I became so close. Saturday night, Meg took a group of younger girls on a night ride using her Task Racing helmet lights. They absolutely loved it. A few of the girls left Saturday and a few more showed up for Sunday. Sunday was started with the giveaways. We had four big prizes; gear, helmet, front tire, and a kid goodie bag. Everyone put their name in a bucket of their choice for a chance to win one big item. There was so much excitement with the girls, teenagers, and women during the drawing. No one left empty handed smaller items were given to all who attended. Thanks again to MTA Distributing, Bonecutter Off Road, and Marionville Power Sports. The Sunday morning riding was very laid back, everyone doing their own thing and riding with who they wanted. Meg decided to do a slow race and limbo with the kids. Sunday afternoon, Meg and I had the pleasure to “break in” the teenagers by letting them ride the hard sh*t of HHR! Most riders would start with the easier obstacles and making it harder each time, we went straight into “Something Special”, an element used in the final moto of The Ozark 100 Miler. Pictures and videos of this hill does not capture how gnarly the hill is. With assistance all girls made it up without breaking anything! That alone is bragging rights! Next stop was “VW”, off cambered slope with big boulders everywhere. This obstacle is night and day easier than “Something Special” but choosing the right line can be tricky. All of the teenagers made it through without assistance. They wanted more, so we headed to “Bastard Hill”, a long steep uphill washed out and covered in loose rock. Being a really tough hill, there were only a few issues; but everyone made it to the top. After doing so, EVERYONE was ready to call it a day! Sunday night was filled with the kids playing and the adults telling stories. Over the entire weekend there was 24 girls! It is amazing to see so many ladies get into this male dominated sport, excel at it, and make friendships that will last a lifetime! More Posts Back To Blog Page

Girls Flock to Hardwood Hills Ranch Read More »

Scroll to Top